3D Hybrid optical inspection system (AOI) YSi-V Overview
Includes 2 dimensional inspections, 3 dimensional inspections and 4-way oblique imaging inspections all in one unit! TypeHS2 realizes highest level inspection speed by further accelerating TypeHS.


- 2D High-speed, high-resolution 2-dimensional inspections
- 3D Height, and sloped surface 3-dimensional inspections (option)
- 4D∠ 4-direction angular camera (option)
- Software suite supporting high quality production

Function and Feature
Sturdy framework designed from mounter

2D High-speed, high-resolution 2-dimensional inspections

3D Height, and sloped surface 3-dimensional inspections (option)

4D∠ 4-direction angular camera (option)

Recommend for Such Production Site
For customers who want to do all types of high-accuracy inspections on a single machine.
In addition to 2D and 3D inspections, it also has a 4-way angular image inspections making this one unit an all-around inspection device
2D inspection functions
- Has a high resolution camera with 120 million pixels and high-rigidity frame equivalent to that of mounters, and provides high repeatability.
- Equipped with telecentric lens for capturing highly detailed external images at high resolution of7μm(0201mm to ...) and high speed(0402mm to ...)
- Makes automatic inspection settings with an imaging optical inspection algorithm for the 3 values of brightness, color and form inherited from YSi series technology.
- Makes feature inspections combining multiple types from 10 images, white color 3-stage LED: Upper stage (H) Mid-stage (M) Lower stage (L) Red (R) (G) Green (B) Blue (IR) Infrared
- CI (Cut In) lighting allows RGB display of solder fillets, FOV method can perform large component inspections by seamless joining of visual field to visual field via a high-rigidity frame
3D inspection functions
- By using special features from 2D+3D functions, and IR (infrared) lighting it can make high-accuracy 3D inspections by recognizing the correct PCB height standards for each PCB.
- In case of irradiation from 2-way moire fringes, the componential moire fringes in the shadows of large components render no effect so a 4-way angle camera is needed to restore the 3D shape which causes poor performance.
- For the TypeHS2 hybrid AOI system, Yamaha developed a dedicated 3D irradiation unit with 7 μm resolution. Using it in combination with high-accuracy mode provides stable measurements ideal for fine-detail component inspections that have now evolved to higher levels than conventional models.
4D inspection functions
- Using the 4-directions angled camera to simultaneously capture oblique images during 2D and 3D imaging minimizes tact loss and allows visually verifying NG points without actually having to grip the PCB by hand.
- Supports use of auto inspection data and visual inspection of crucial points such as in (solder) bridge inspections to find if any solder is present.
M2M functions
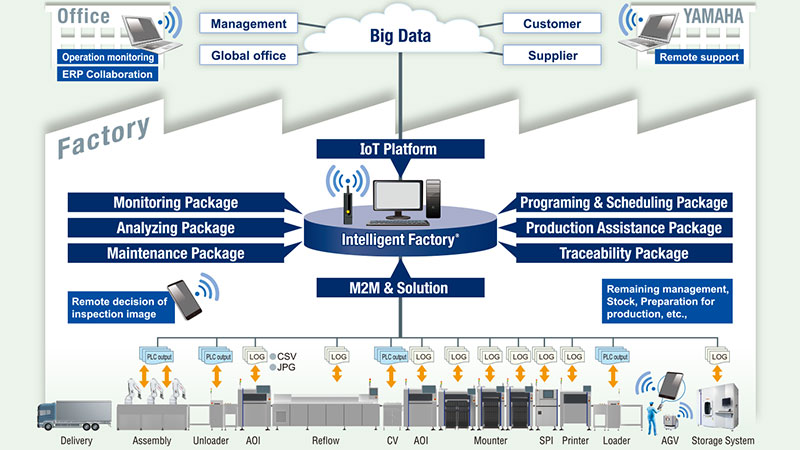
- Offline software: P-tool AOI Limited (YSi-OS iPRODB) Repair station (visual decision) Remote station (image decision)
- N-point collation software: In addition to before-and-after reflow, SPI, mounter recognition image, and history information are displayed simultaneously on one screen and the problem and timing that caused the problem are analyzed.
- As a QA option, after component mounting, the mobile decision software instantaneously sends defect information from the inspection machine as feedback and feed-forward to the mounter and stops the mounter.
For customers who place high importance on linking between machines after start-up
A full range of software types and support systems are available for shortening the product startup time
Creating data M2M functions DIP inspections
- Yamaha standard library: Yamaha’s in-house developed standard inspection library linking to approximately 80,000 types of SMT components Just choose a component shape and paste it to complete the inspection data.
- Offline view edit utilizes the FOV method. Namely, by linking to an image for one PCB, the user can change the field of view (FOV) as needed when creating inspection data while offline
- Auto registry of inspection character strings: Just indicating the character string for OCR inspection automatically inputs the information needed for inspection and shortens the data creation time to make everything simple.
- Inspection machine operates based on IPC standards. Land information is obtained from the actual PCB and it can automatically switchover to an inspection based on IPC standards.
- AI-Auto library matching: This eliminates the task of manually selecting a library for creating inspection data and simplifies the process by making error-free settings and then pasting in the results in a mere 1/10th the time of a human operator.
- Offline software: P-tool AOI Limited (YSi-OS iPRODB) Repair station (visual decision) Remote station (image decision)
- N-point collation software: In addition to before-and-after reflow, SPI, mounter recognition image and history information are displayed simultaneously on one screen and the problem and timing that caused the problem are analyzed.
- As a QA option, after component mounting, the mobile decision software instantaneously sends defect information from the inspection machine as feedback and feed-forward to the mounter and stops the mounter.
- Web support is provided via a cloud server as Yamaha direct support relating to inspection programs and system data.
Promotion Movie
Related contents

- Product
- Introduce our product lineup, including surface mounters, solder printers, and visual inspection machines.

- Showroom
- Find and explore SMT Smart Showroom or Virtual Showroom

- Intelligent Factory
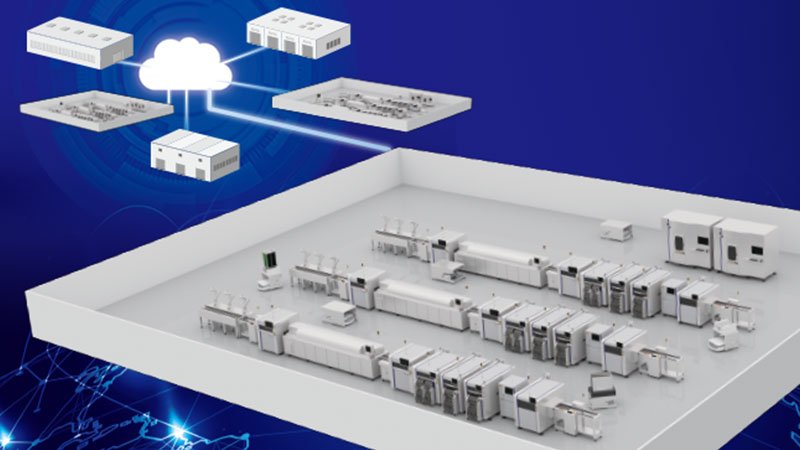
- IoT/M2M Integration system - System allows linking our SMT machines to equipment made by other companies and give all-around high productivity in the mounting process.