3D Hybrid Optical Inspection System YRi-V Overview
Multi-purpose optical inspection systems for all markets that realize super high-speed and high-accuracy 3D inspections. The mounted coaxial lighting and 5μm lenses added to the lineup support high-accuracy inspections in the device sector.。


- Super high-speed 3D inspections
56.8cm²/sec (under optimum conditions) - Super high-accuracy 3D inspections
8-way projector - 4-way oblique imaging inspections
20Megapixels 4-angle camera - Device inspections
Super high-resolution 5μm/coaxial lighting
Function and Feature
Super high-speed 3D inspection 56.8cm²/sec (under optimum conditions)

Super high-accuracy 3D inspection 8-way projectors

4-ways oblique imaging inspection 20-megapixel 4-angle projectors

Device inspection Super high-resolution 5μm/coaxial lighting

Recommend for Such Production Site
For customers who are seeking a super high-speed, high-accuracy and high-spec 3D inspection
It supports high-accuracy inspection in the device sector by the 5μm lens with the coaxial lighting.
2D inspection function
- The ultra-high-rigidity frame, whose capacity is equal to or even higher than that of the mounter, which supports a new high-speed 12 megapixel camera and 5-μm coaxial optical system, would realize a high repeatability.
- It offers a various of resolution, ultra high-resolution of 5 μm (densely-mounted device components and larger), high resolution of 7 μm (0201 mm and higher), and high speed at 12 μm (0402 mm and higher) which all are equipped with the telecentric lense for a high-definition appearance of inspection imaging.
- The automatic inspection could be configured by the image extraction of three more advanced optical inspection algorithms, luminance, chromaticity, and shape.
- 13 images made up by the separated elemets R, G, B of a new added coaxial light, R, G, B of each 3-level of white LED (high, middle, low) and the IR, which it could be combined to characterize the inspection.
- The coaxial lighting and 5μm lenses added to the lineup for supporting a high-accuracy inspection such as a crack inspection of WLCSP.
- By the CI lighting, It could display the fillets shape in RGB. Even it is an FOV method, it capables to inspect large parts by seamless appearance of FOV combination with a high-rigidity frame.
3D inspection function
- The super high-speed 3D inspection could measure 1.6 times faster than previous 12μm , which is double speed of 7μm.
- Increase the inspection capability on a narrow adjacent area with 8 projections (4-way + 4-way) to achieves an ultra-high-precision measurement and shape inspection without blind spots.
- The measurement range has been expanded to support 3D shape inspection up to 25 mm of height.
- The delineation of segmentalized wire frames onto solder makes it possible to inspect solder shapes.
- Even for the reproduction of the shape of WCSPs for devices, the use of a combination of 3D and 2D inspections allows users to identify the shape easily.
4-angle cameras
- The camera performance has been improved from 5M to 20M. The newly developed Scheimpflug lens realizes the acquisition of delicate oblique-view images.
- An oblique-view image is acquired simultaneously by 2D and 3D imaging, minimizing tact loss and allowing the user to perform a visual check for defects without fail.
- Automatic inspection data also supports important visual check points such as the presence or absence of solder and bridge inspections.
Flexible dual lanes
- Lanes 2, 3 and 4 are moveable , which is convenient for matching the machine's line up.
Automation/manpower reduction software solution
- The newly designed GUI realizes highly visible operation screens with an advanced design. The introduction of the newly developed YSUP-PG supports GERBER conversion, CAM conversion (ODB++), and CAD conversion (ASCII conversion). Simple conversion from mounter component data is also possible. It is now easy to create inspection data from the data each customer is actually using.
- Determinations of data tuning time, including inspection frame automatic determination, lighting automatic setting, automatic position correction, and the reduction of excessive determination, have been automated, resulting in a reduction in operation time by 50%.
- Data creation/inspection support features using AI for high-end users, such as an automatic component library matching function, a function for creating component libraries very easily, and a secondary determination AI support function (under development), have been enhanced further.
- DIP data automatic creation function: YAMAHA has developed a function that automatically assigns coordinates of through hole data on the reverse side of PCBs not only for SMT but for general use, allowing users to inspect both sides of PCBs in subsequent processes.
- Mounter link function QA option & mobile decisions: Pass or fail of inferior images is determined by operators using mobile terminals, contributing to labor savings.
For customers need high-speed inspection for semiconductor products.
Realize high-speed, high-Accuracy inspections
Many fanctionarities to Inspect semiconductor products
- The new 25 megapixel camera realizes wide field of view on 7μm and 5μm machines.
- Coaxial lighting and 3D laser enables to get correct surface information of mirror-surface parts and transparent body parts. These functions realize high 3D inspection performance for semiconductor PCBs.
Promotion Movie
Related contents

- Product
- Introduce our product lineup, including surface mounters, solder printers, and visual inspection machines.

- Showroom
- Find and explore SMT Smart Showroom or Virtual Showroom

- Intelligent Factory
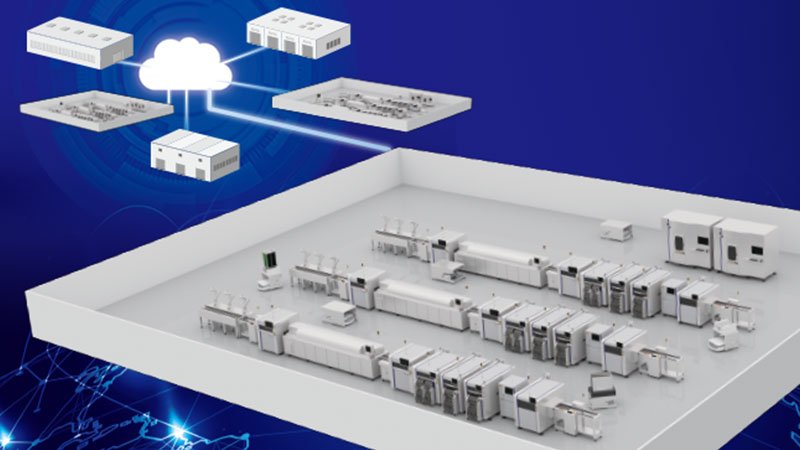
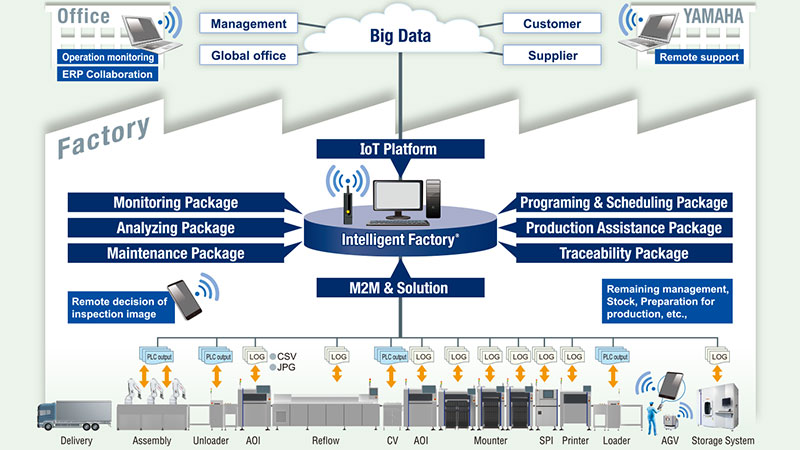
- IoT/M2M Integration system - System allows linking our SMT machines to equipment made by other companies and give all-around high productivity in the mounting process.