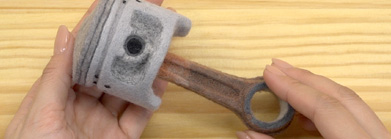
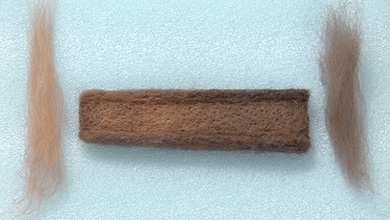
SR Piston how-to guide
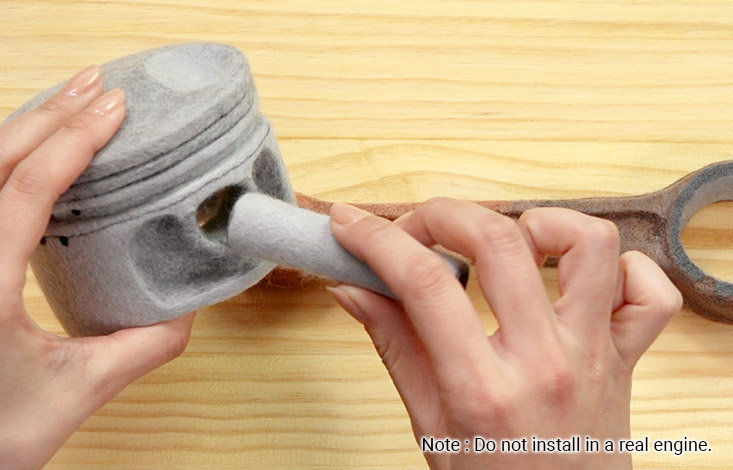
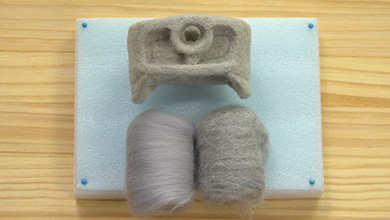
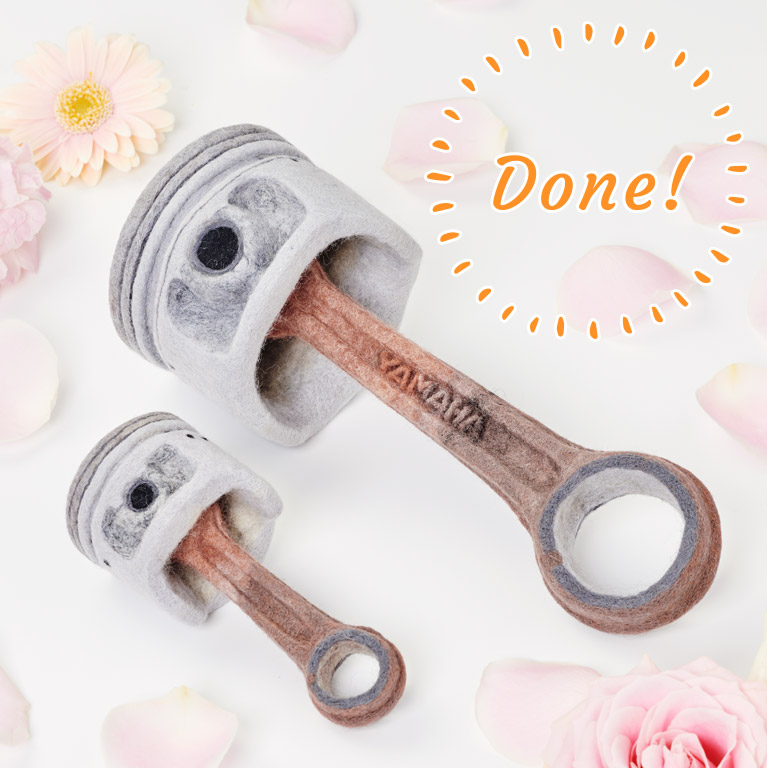
SR piston reproduced by felt. We have videos for how to make both the life-size and mini versions.


Make a piston from felt
The piston is the heart of a bike. It creates power by strenuously moving a hollow cylinder in the engine up and down using gasoline combustion.
We have reproduced life-size and mini versions of the metal piston in felt.
See the patterns and videos and challenge yourself to make a piston.

You will need the following colours of wool
Prepare the sheet felt for the base and the following colours of felt. Mix these colours to create the piston and poke. See the how-to guide videos.
- Light grey
- Slightly darker grey
- Dark grey
- Charcoal grey
- Brick red
- Cream
- Black
Required tools
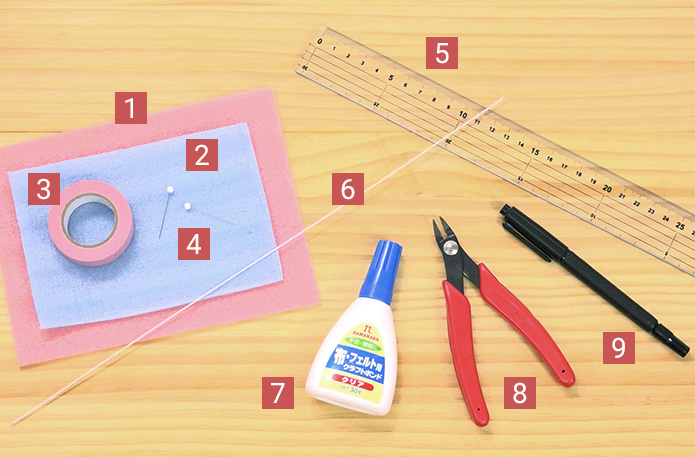
In addition to the tools introduced in the guide to successful felting even for beginners, you will need to following tools to make the piston.
[1]Mat cover (a colour that makes it easy to see the felt) [2] Cushioning (made into a cylinder to use for the core) [3]Masking tape [4]Pins [5]30cm ruler [6]Wire [7]Glue [8]Pliers [9]Permanent marker
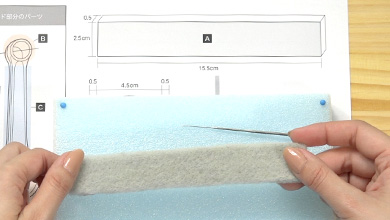
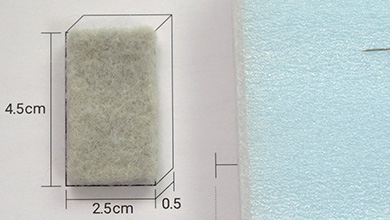
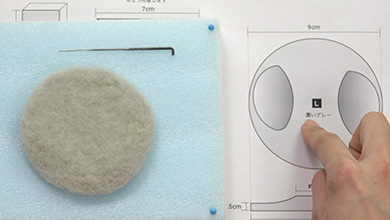
Pattern

It is important to check the size of each part against the pattern. We have provided the pattern in PDF format. Please download and print out to use.
When printing, make sure to check scale and edge guide so that you get the actual size for the pattern.

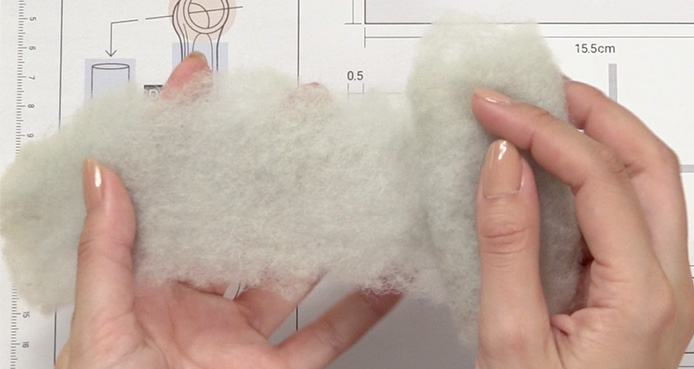
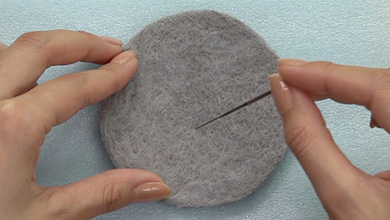
Check the finished firmness
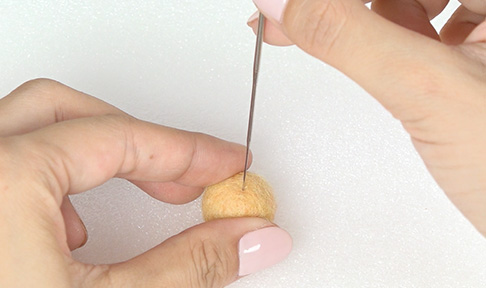
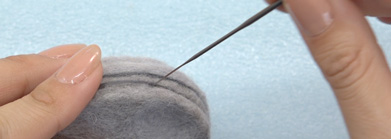
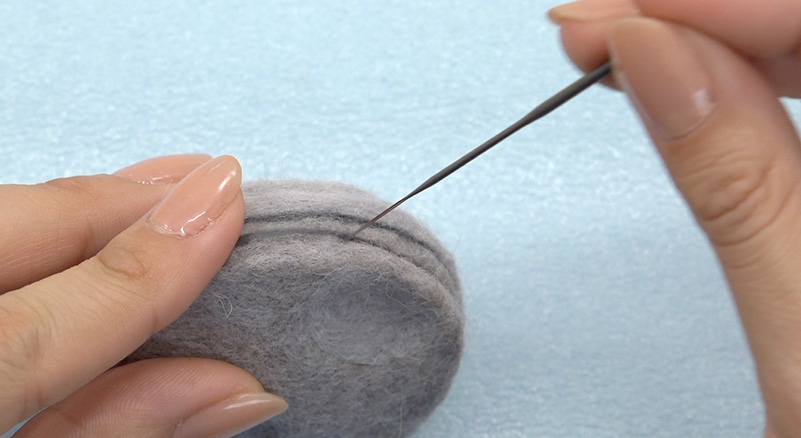
As you poke the needle into the wool, it becomes more and more firm. You may wonder how firm you need to make the wool.
The firmness of the 1.8cm ball made from 1g of wool as shown in the felt ball how-to guide in the Basic Needle Felting Lesson is the standard firmness for making the piston.
If the felt is not firm enough, it will be off-kilter when assembling or the finished item will fall apart so it is important to work the felt to make it firm.

Once you have prepared everything, you are ready to start making your piston!
The how-to guide differs for the life-size and mini piston versions.


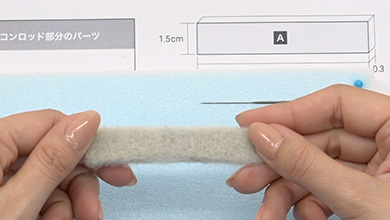
1 Connecting rod

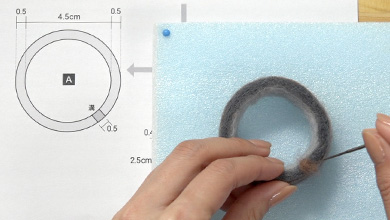
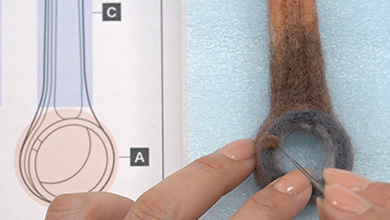
Big end (large circle)
-
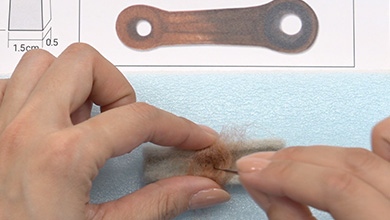
Poke to obtain the size and shape of pattern A
-
Poke dark grey felt round the edges
-
Poke light grey felt into one side
-

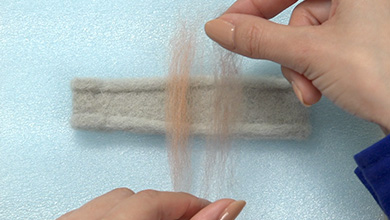
Mix brick red with light brown felt 1:1 with a little charcoal grey
-
Poke the mixed felt into the opposite side from the light grey felt until the base colour cannot be seen
Don't poke it too deeply or the mixed felt will go through to the grey side -
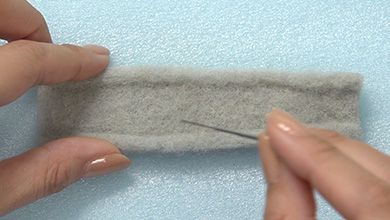
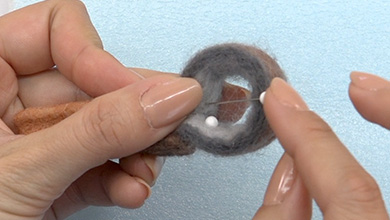
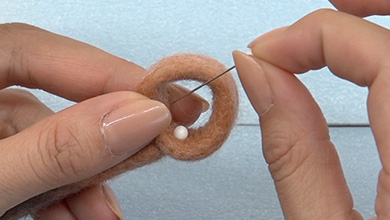
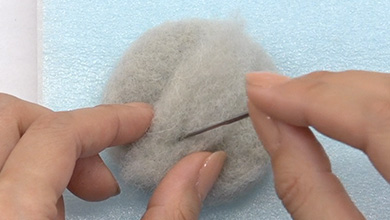
Join the two ends of part A and insert a needle diagonally to hold them together
-
Place the same colour of felt over the temporary join and poke carefully
-
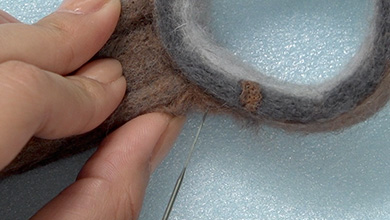
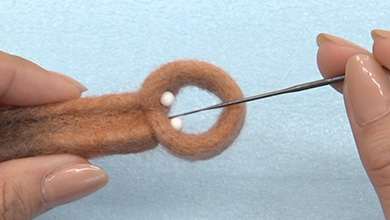
Poke the mixed brown felt into the groove shown on the pattern
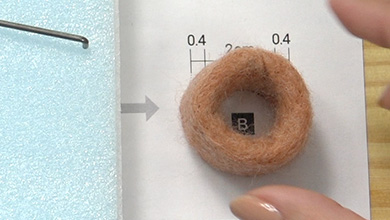
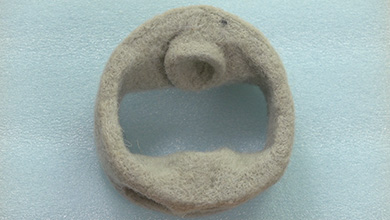
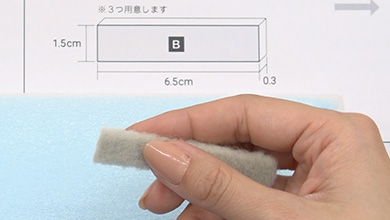
Small end (small circle)
-
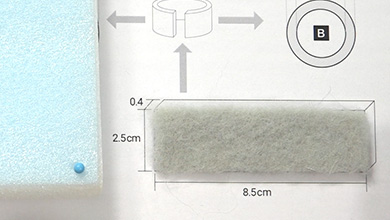
Poke to obtain the size and shape of pattern B
-
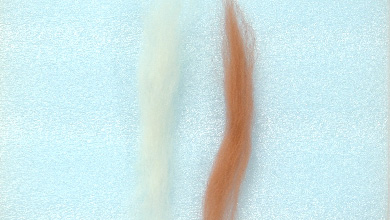
Mix brick red with cream felt 1:1 to create the desired colour
-
Lightly poke the mixed felt over the whole shape
-

Join the two ends of part B and insert a needle diagonally to hold them together
Place the same colour of felt over the temporary join and poke carefully -
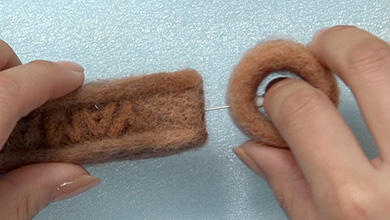
The small end is complete
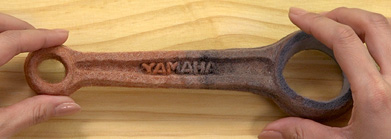
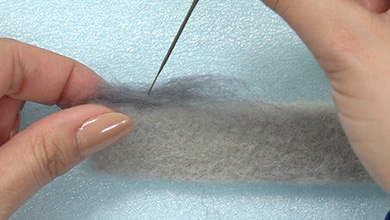
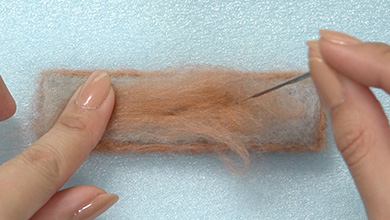
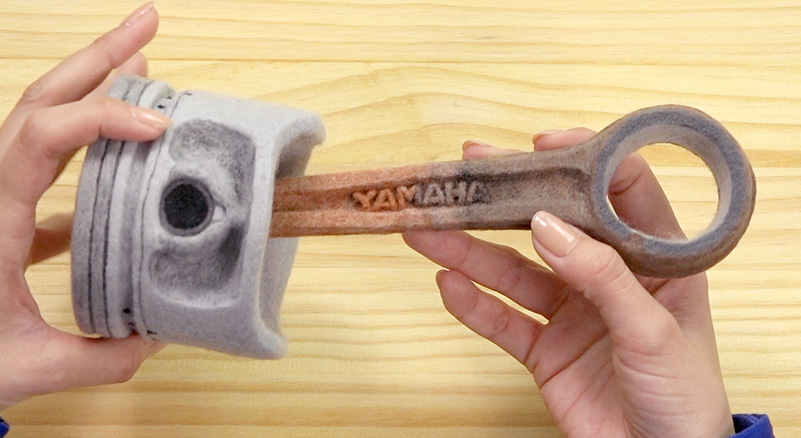
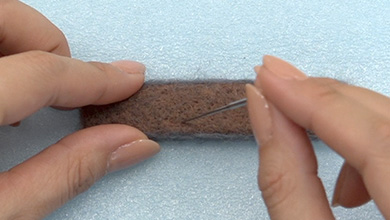
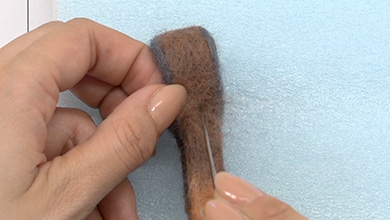
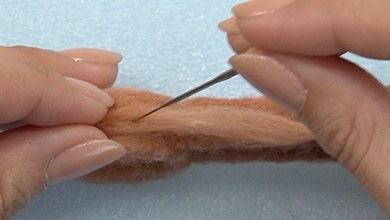
Make the rod
-
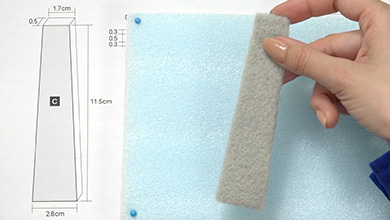
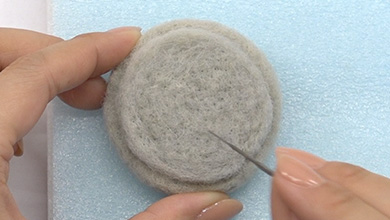
Poke to obtain the size and shape of pattern C
-
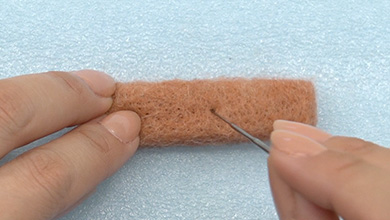
Pinch and poke the felt to create an 0.3cm edge
-
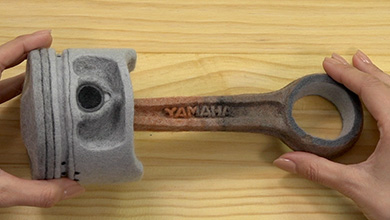
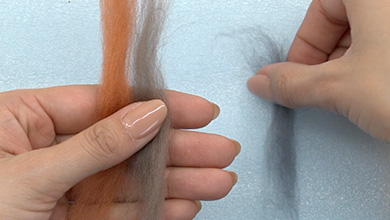
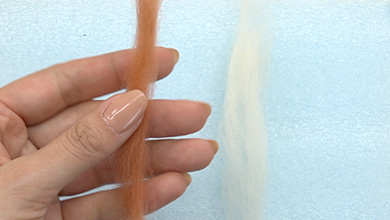
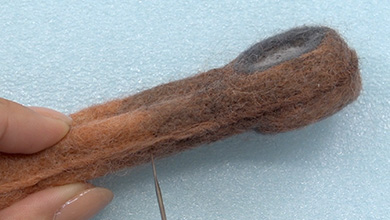
Add colour according to the pattern photo
Mix both colours in the centre and poke to create gradation -
Gradation is complete
-

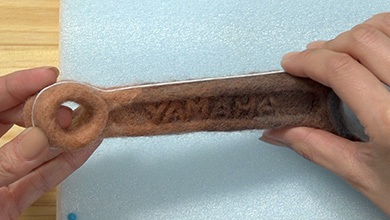
Carefully poke the YAMAHA letters using felt the same colour as the base
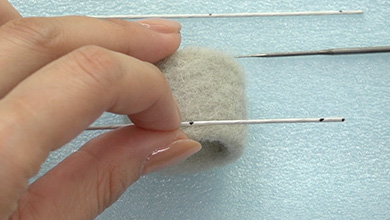
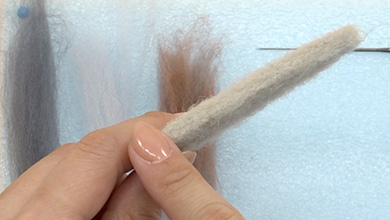
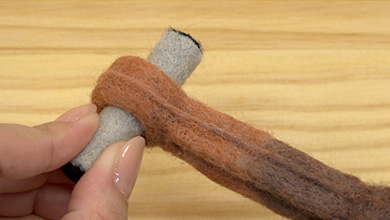
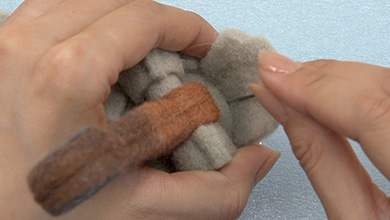
Make the piston pin
-
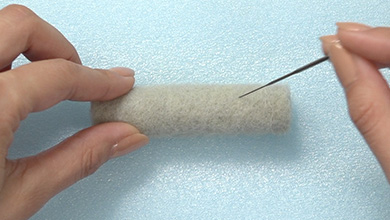
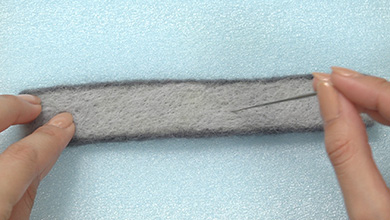
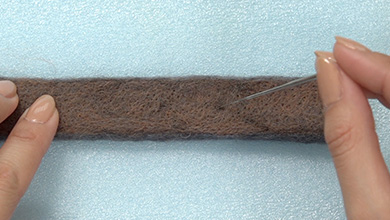
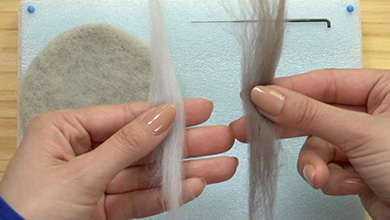
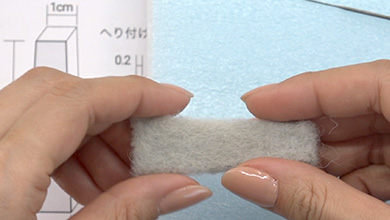
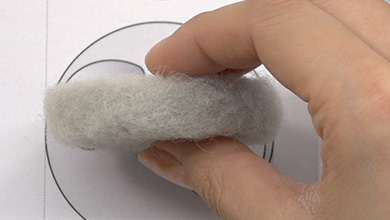
Tear off a piece of felt 8cm × 12cm, roll it and poke it until it is as hard as you can get it
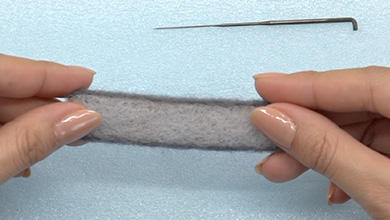
-
Wrap light grey felt around the cylinder and poke
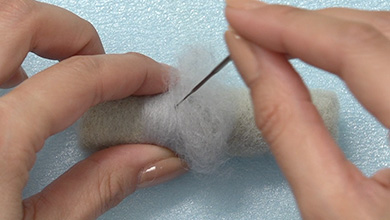
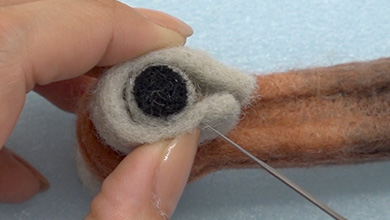
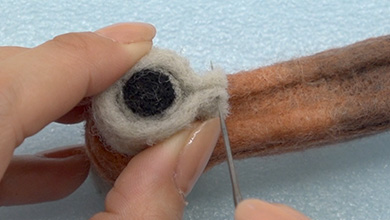
-
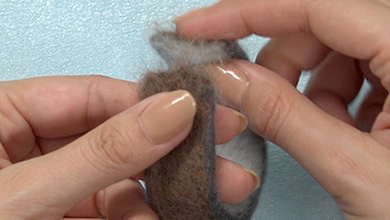
Poke black felt to create an 0.9cm diameter circle on the end
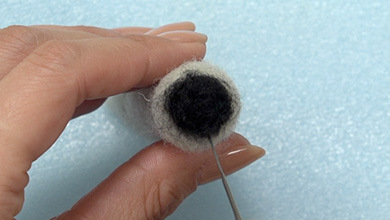
-
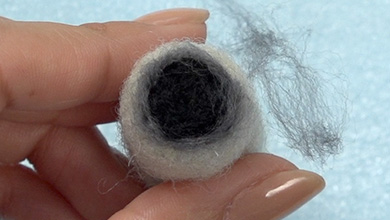
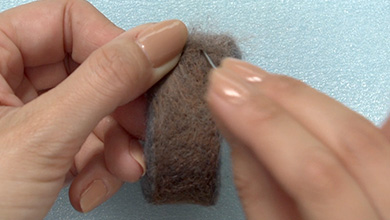
Poke dark grey felt round the black circle on the end
-
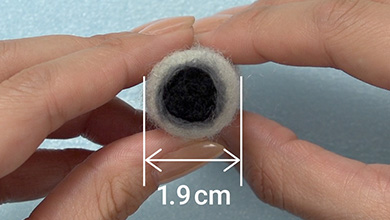
Check that it measures 1.9cm in diameter
Assembly
-
Fix the big end to the wide end of the rod with a pin
-
Poke from the inside of the circle to fix
-
Add the same colour of felt to the join and poke to finish the shape
-
Fix the small end with a pin in the same way and poke with the needle
-
Add the same colour of felt to the join and poke to finish the shape
-
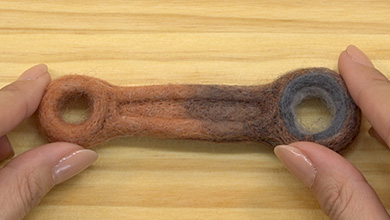
Bend some wire and wrap around the centre of the outer edge
-
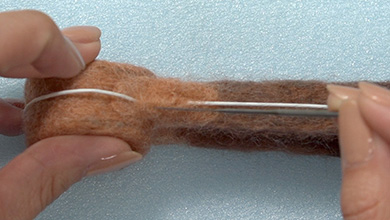
Hold the wire with your fingers and poke felt the same colour as the base around it
-

The connecting rod is complete
2 Piston
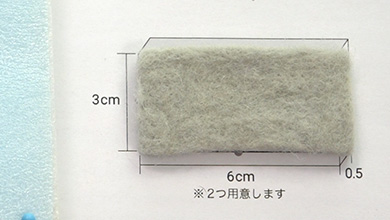
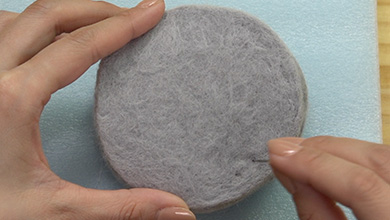
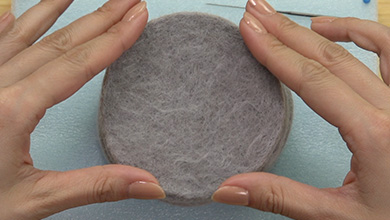
Make the piston base
-
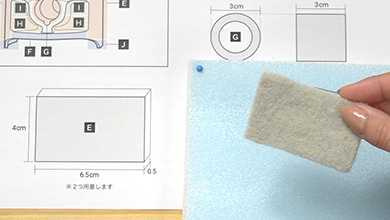
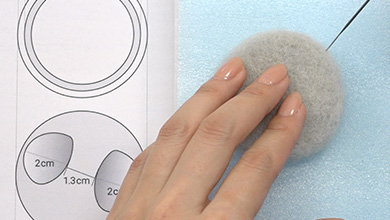
Poke to obtain the size and shape of pattern E
Make one more in the same way -
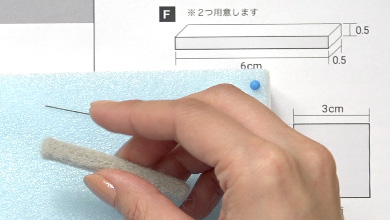
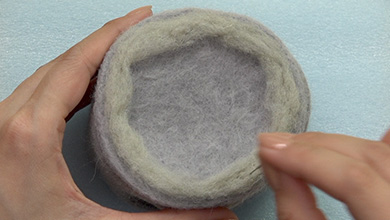
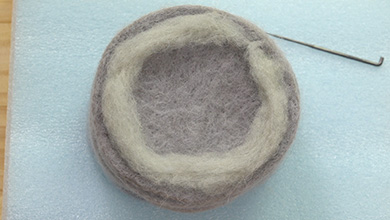
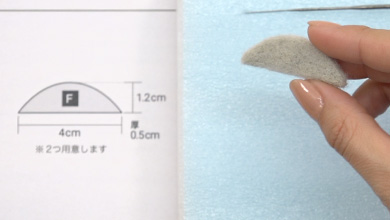
Poke to obtain the size and shape of pattern F
Make one more in the same way -
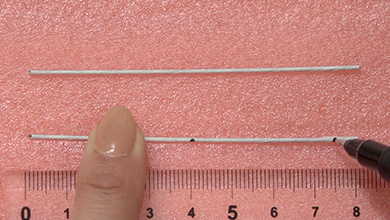
Prepare two pieces of wire 8cm long
Mark with a pen in the middle and 0.5cm from each end
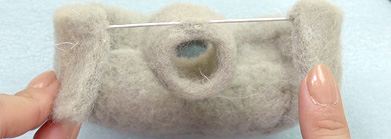
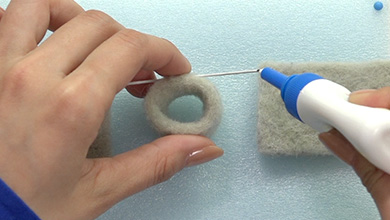
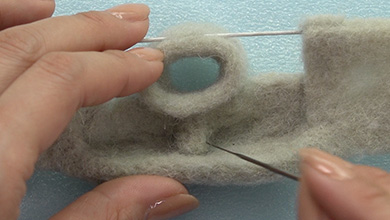
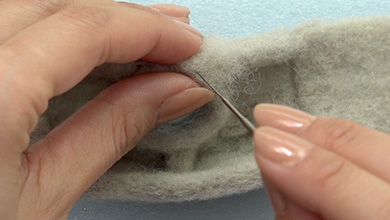
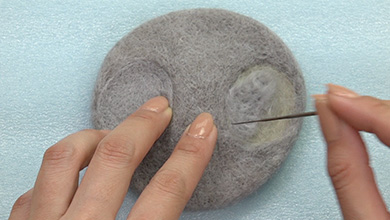
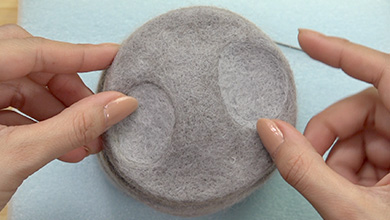
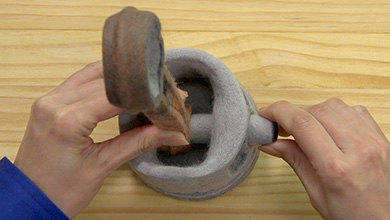
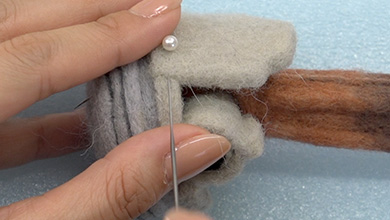
Make the hole for the piston
-
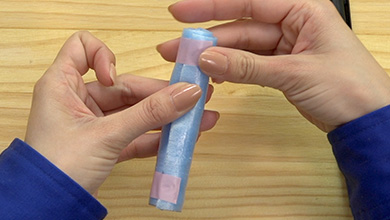
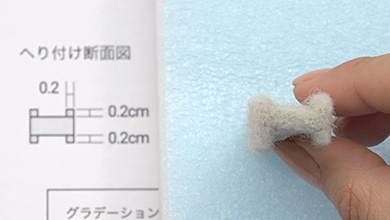
Prepare a piece of cushioning: 0.2cm thick, 15cm long, 10cm wide
and fix with masking tape to make the core -
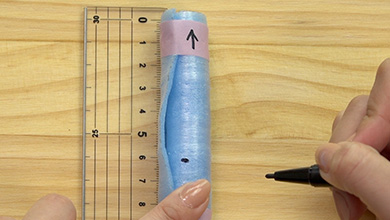
Make marks so that you can tell the top from the bottom
and draw a line 6cm from the top -
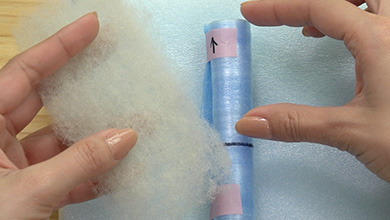
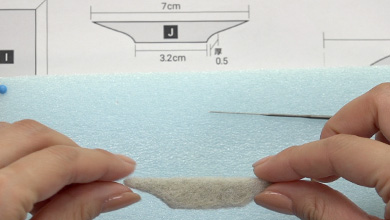
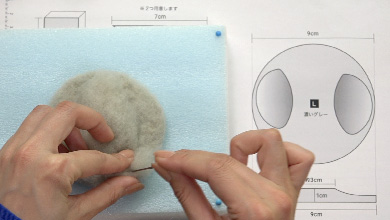
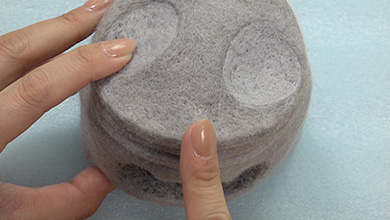
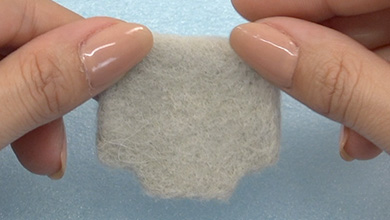
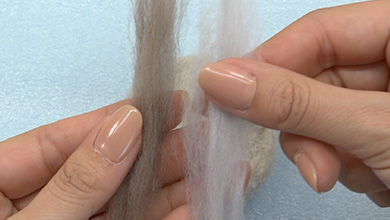
Tear off a piece of sheet felt 6cm wide
and pull to wrap around the 6cm portion -
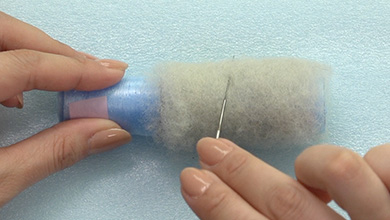
Turn and poke - make sure only to poke the felt, not the core.
Turn and poke the felt until it gets to a thickness of 1cm, keeping it within the 6cm line. -
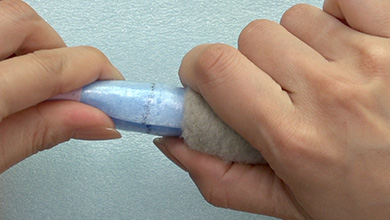
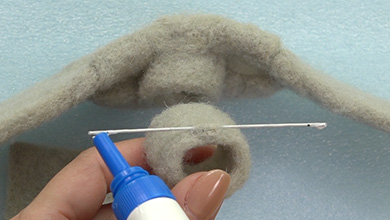
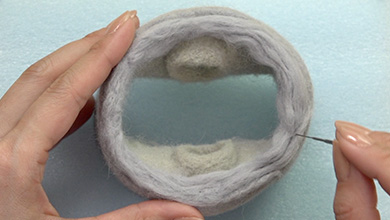
When it gets to a thickness of 1cm, remove the core
-
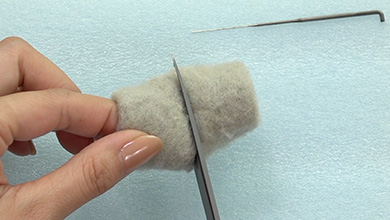
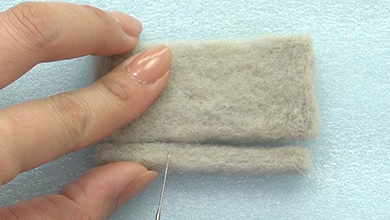
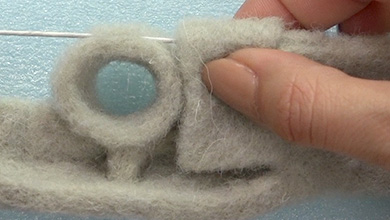
Cut the middle with scissors
-
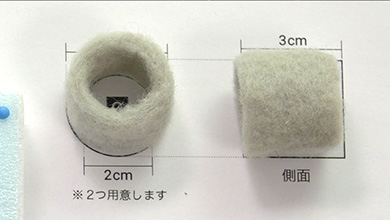
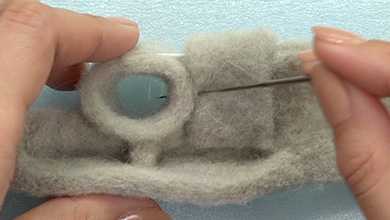
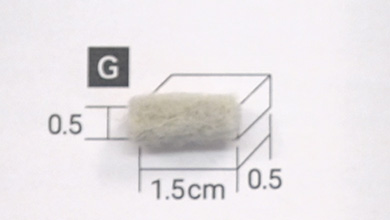
Match to pattern G and poke the cut ends to tidy up
-
Poke the centre mark on the wire with felt to attach to the edge of part G
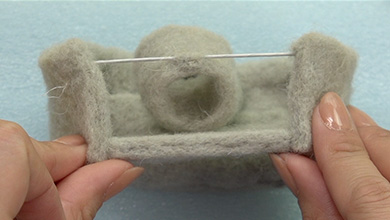
Assemble the piston
-
Put glue on the 0.5cm marks on both sides of the wire and attach part E
-

Press firmly with your fingers to fix
Poke the join with felt to fix -
Poke to obtain the size and shape of pattern H
Make one more in the same way -
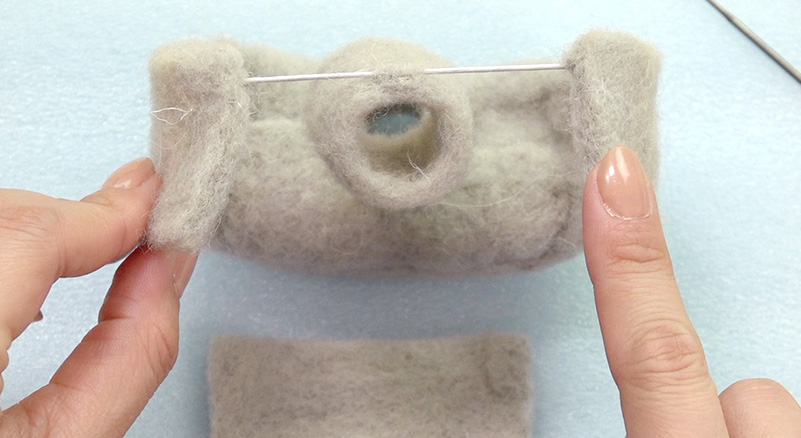
Attach parts H and F
-
Place part F between the two E parts and poke the joins to fix
-
Fold part H forward
-
Attach both H parts according to the assembly diagram
-
Poke both sides of part H to part E to fix
-
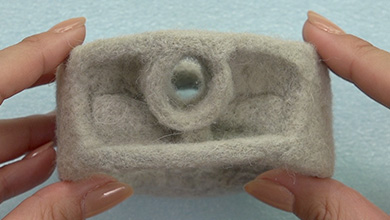
Take a little felt, fill in the gaps and poke to create a rectangle
-
Poke to obtain the size and shape of pattern I
Make four parts the same -
Place part I over the wire and poke just under the wire
-
Poke the bottom, left and right of part I to fix and join
-
Add felt to any places where you can still see the wire and poke to cover
Make the other side of the piston
-
Put glue on the 0.5cm marks on both sides of the wire and attach part E
-

-
Place part F between the two E parts and poke the joins to fix
-
Poke part H and I in the same way as for the front
-
Use the same procedure to make the other side of the piston
3 Piston - Assembly
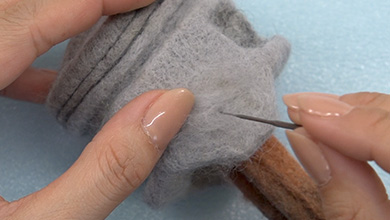
Make the piston side
-
Poke to obtain the size and shape of pattern J
Make one more in the same way -
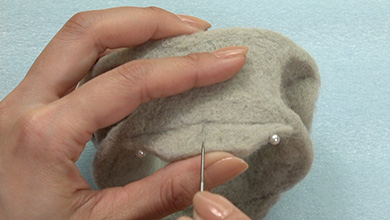
Poke the bottom of the piston side to fix,
pin the attachment position and poke the join -
Poke the indented part with dark grey felt then poke the whole of the piston with light grey felt
-
Make the piston head
-
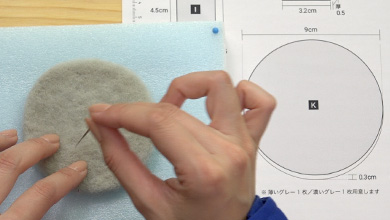
Poke to obtain the same size and shape as pattern K and a thickness of 0.3cm
Make one more in the same way -
Mix light grey with charcoal grey felt 1:1 to make dark grey felt
-
Poke one of the K parts with dark grey felt
-

Poke the other K part with the single light grey colour
-
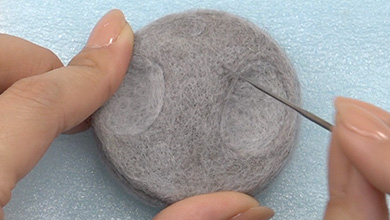
Tear off a piece of sheet felt one size bigger than pattern L and form the shape by poking with a needle
-
Add felt and poke to make the protrusions in the middle
-
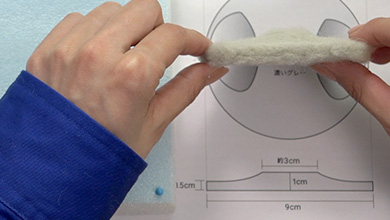
Check that the side view is the same as the pattern
-
Poke the whole shape with dark grey felt and the indents with light grey felt
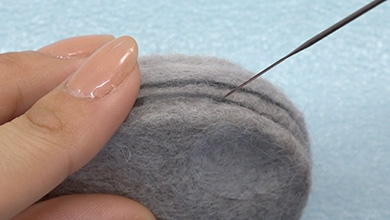
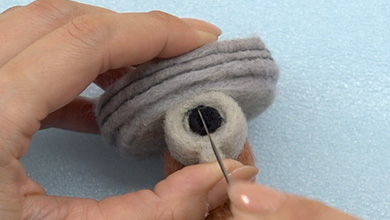
Ring groove and finishing
-
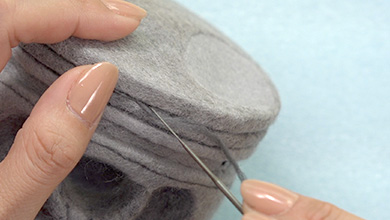
Poke grey felt to a height of 0.5cm round the ring 0.2cm from the edge
-
Place the light grey part K on top and poke to fix
-
Poke light grey felt to a height of 0.3cm round the ring 0.2cm from the edge
-
Place the dark grey part K on top and poke to fix
-
Poke light grey felt to a height of 0.3cm round the ring 0.2cm from the edge
-
Place part L on top of everything and poke to fix
Check the positioning of the front and the indents -
-
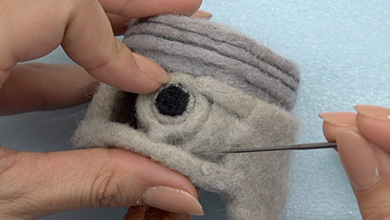
Poke a groove with dark grey thread to a height of 0.3cm and make it stand out
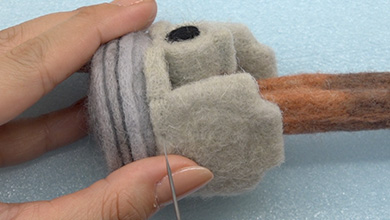
-
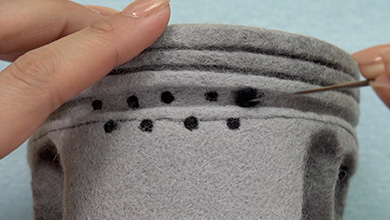
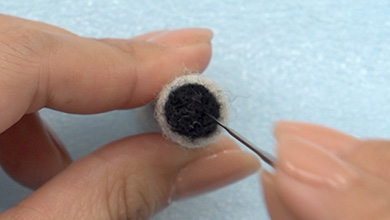
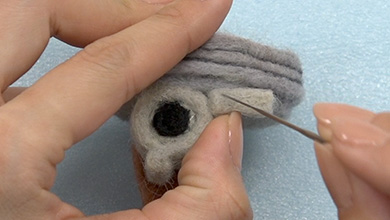
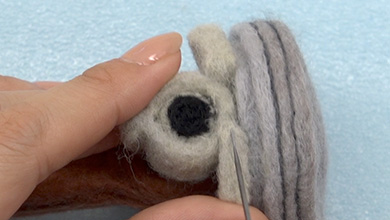
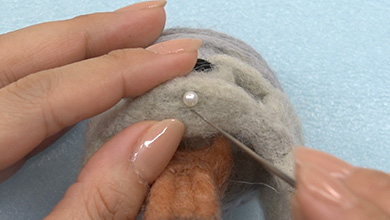
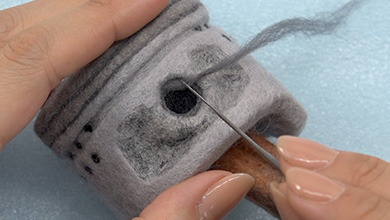
Make balls of black felt and poke so that the holes can be seen from the side
-
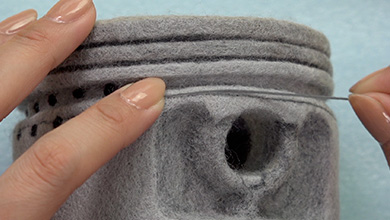
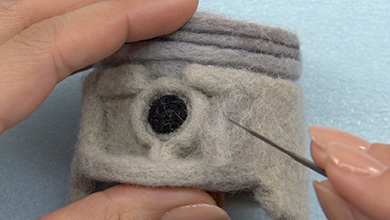
Poke charcoal grey felt around the piston 0.2cm from the top
-
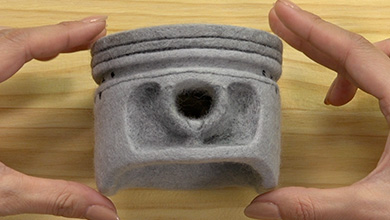
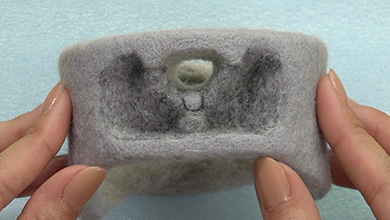
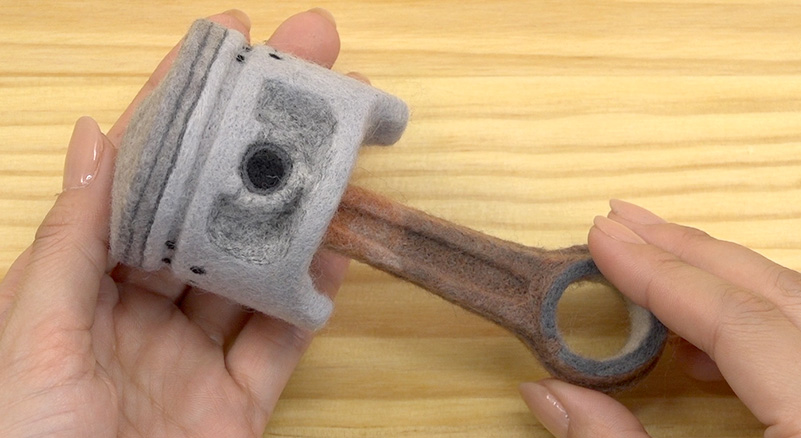
This piston is complete
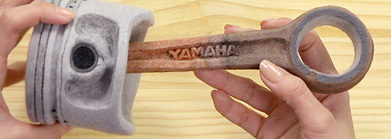
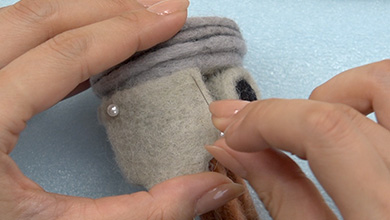
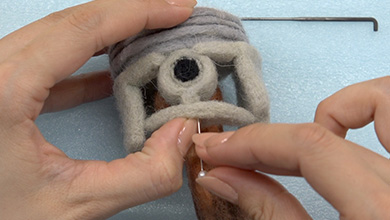
Assembly
-
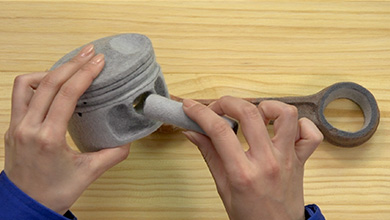
Insert the pin into the piston
-
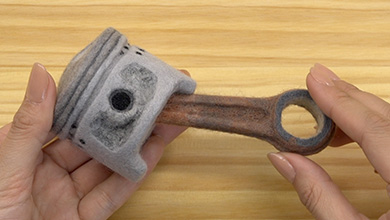
Thread the cylinder through the small hole of the connecting rod to complete
-
Complete!
1 Connecting rod

Make the circles
-
Make the big end
Poke to obtain the same size and shape as pattern A -
Make the small end
Poke to obtain the same size and shape as pattern B -
Colours for big end:
Mix brick red with light brown felt 1:1 with a little charcoal grey -
Colours for small end:
Mix brick red with cream felt 1:1 to create the desired colour -
Colour the big end
Poke dark grey felt round the edges -
Poke light grey felt into one side
-
Poke the mixed felt into the opposite side
From the light grey felt until the base colour cannot be seen
Don't poke it too deeply or the mixed felt will go through to the grey side -
Colour the small end
Lightly poke the mixed felt over the whole shape
Make the rod
-
Poke to obtain the same size and shape as pattern C
-
Make an 0.2cm edge according to the the diagram
-
Add colour according to the pattern photo
Mix both colours in the centre and poke to create gradation -
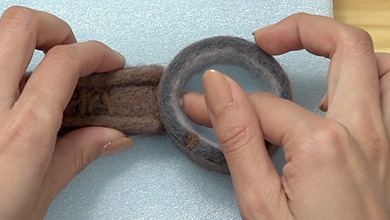
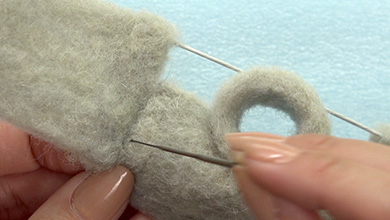
Fix the edge of part A to the wide end of the rod with a pin and make a circle with part A
-

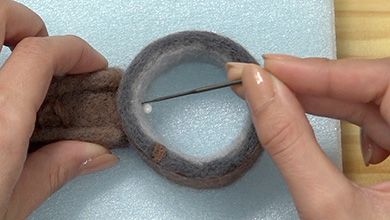
Poke from the inside of the circle to fix
-
Add the same colour of felt to the join and poke to finish the shape
-
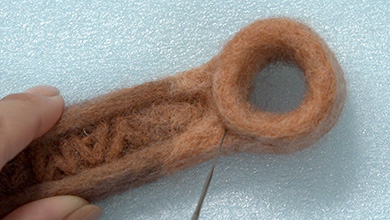
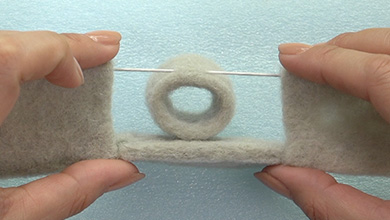
Fix the edge of part B to the narrow end of the rod with a pin and make a circle with part B
-
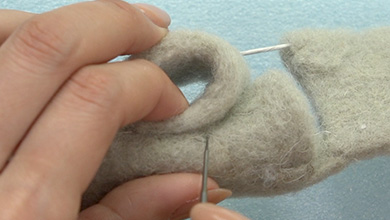
Poke from the inside of the circle to fix
-
Add the same colour of felt to the join and poke to finish the shape
-
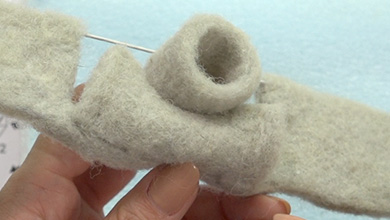
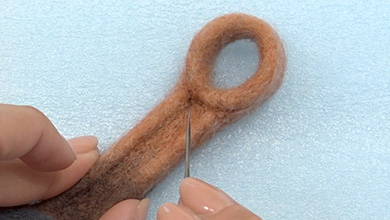
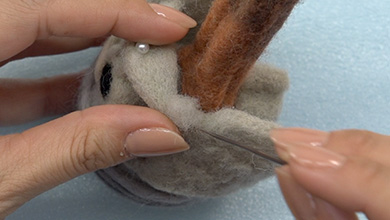
Poke the mixed brown felt into the groove shown on the pattern
-
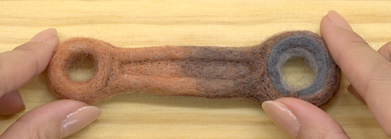
Twist felt the same colour as the base and poke to fix in the centre of the side
-
-
The connecting rod is complete
2 Piston
Make the piston pin
-
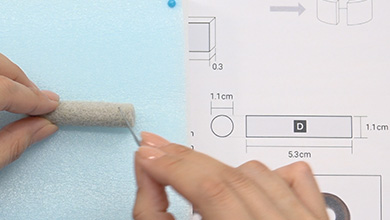
Roll the torn off felt and poke to make it as hard as possible. Form the shape while comparing with pattern D
-
Poke both ends with black felt to finish
Make the piston
-
Poke to obtain the size and shape of pattern E
Make one more in the same way -
Poke to obtain the size and shape of pattern F
Make one more in the same way -
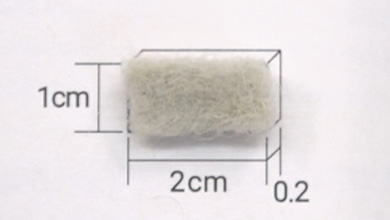
Poke to obtain the size and shape of pattern G
Make four parts the same -
Poke to obtain the size and shape of pattern H
Make four parts the same
Make the piston head
-
Tear off a piece of sheet felt one size bigger than pattern J and form the shape by poking with a needle
-
Check that it is the same size as the pattern and 1cm thick
-
Add felt and poke to make the protrusions in the middle
-
Add an 0.3cm thick, 5.1cm diameter circle to the back
-
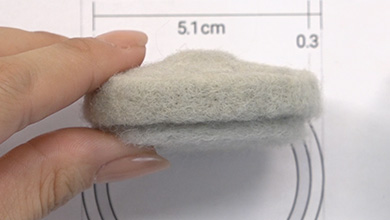
Check that side view is the same as the pattern
-
Mix light grey with charcoal grey felt 1:1 to make dark grey
-
Poke the whole shape with dark grey felt and the indents with light grey felt
-
Insert a line with charcoal grey felt
3 Piston - Assembly
Piston assembly
-
Insert the piston pin into the small end and check that it moves
-

Wrap part B round the edge of the piston pin so that 0.2cm can be seen
-
Poke to attach the join to the piston pin and then poke the two flaps to join
-
-
Check the centre position of the piston head and attach the back of the piston head to the top of part I
-
Attach part G to the left and right of part I and poke G on the back of the piston head to fix
-
Poke parts G and I to fix properly
-
Make part E round and fix with a pin
-
Poke firmly from the inside to fix
-
-
Poke to fix part E on the opposite side in the same way
-
Pin part F under the flap of part I
-

Add felt to the edges of parts E and F and poke to fix
-
Add felt to the join and shape and poke to fix
-
Firmly poke the bottom of parts F and I to fix
-
Fix parts H to the open areas in the order shown on the assembly diagram
-

Attach parts H to the remaining open areas
Colouring
-
Poke a little dark grey felt on the protrusions
-
Poke grey felt over the rest of the shape
-

Poke and fix black felt in the holes on both sides of the piston
-
Poke dark grey felt in a line around the piston pin
-
The mini piston is complete

Official social media gallery -
Send in pictures of your work!
Let us post the work you have created using the how-to guide on this site on the official Yamaha Motor amigurumi / needle felting account on Instagram.
Just fill in the required fields on the posting page and upload photos of your work. We are looking forward to seeing them.
Terms of use
These contents are operated by Yahama Motor Co., Ltd. and are provided free of charge with the premise that they will be used in the pursuit of hobbies by individuals.
Please read the terms of use of the website before use. We hope you enjoy these contents.>Terms of use