FUJISAN HEAD How-to Guide
We have prepared some videos of how to make a FUJISAN HEAD by wet felting. It would be great if you could take up the challenge.


Let’s try making a FUJISAN HEAD by wet felting.
We are going to made a wet felting sauna hat of FUJISAN HEAD(*1), a supporter merchandise product for the Shizuoka Blue Revs who are in Japan Rugby League One.
If you wear a FUJISAN HEAD hat that expresses the drive to be No.1 in Japan and go into a sauna, both your mind and body should REV UP!(*2)
Take up the challenge of making this according to the pattern and the how-to videos.
*1 Mt. Fuji is called as "FUJISAN" in Japanese.
*2 can differ from person to person

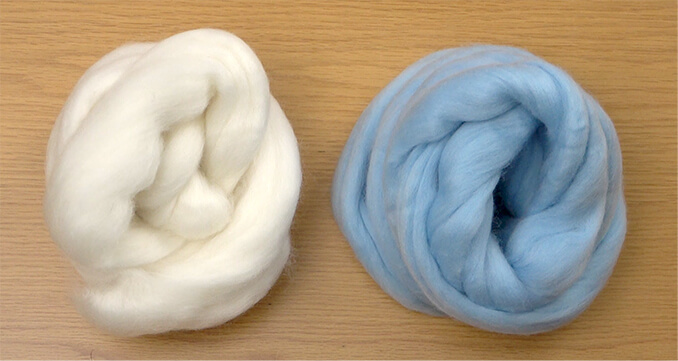
Felt
You will need the following colors of felt to make your FUJISAN HEAD.
-
White 60g
-
Pale blue 70g
-
Dark blue 5g
Tools you will need
Please prepare the following tools for doing your wet felting.
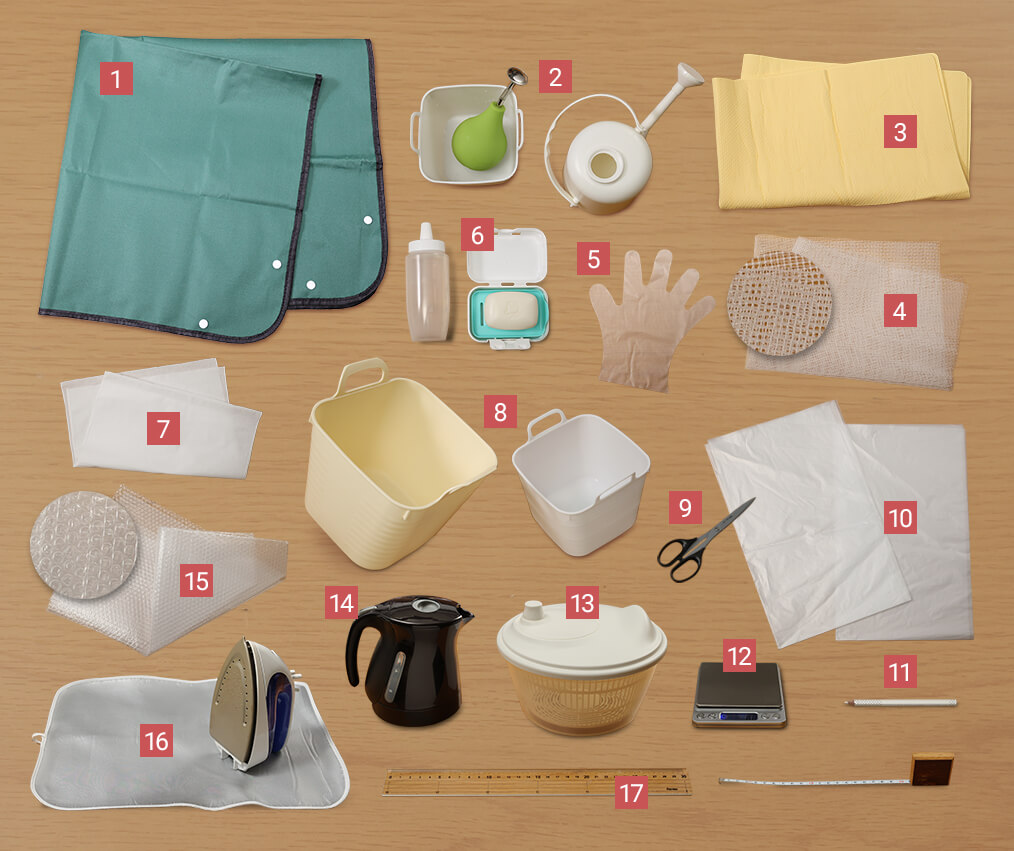
- 1.Garden groundsheet (waterproof; fits an object of W80cm × H50cm)
- 2.Watering can or shower ball
- 3.Large absorbent sheet (The one you use for washing your car is OK. Laid underneath your felting to stop it from moving.)
- 4.Non-slip items(such as those use to keep rugs in place, or two absorbent sheets are OK)
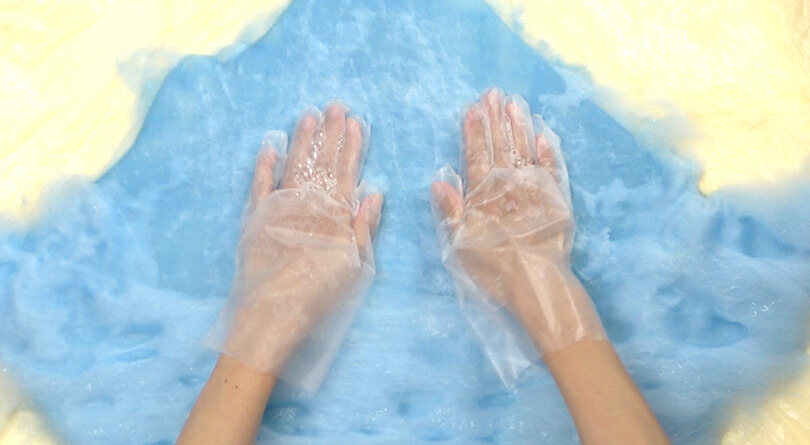
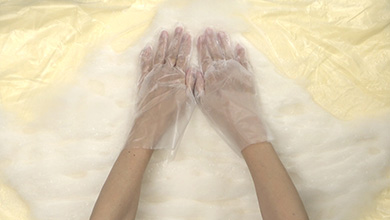
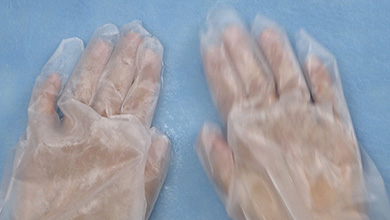
- 5.Two plastic gloves
- 6.Cake of soap or liquid soap (weak alkaline; laundry or hand soap are fine)
- 7.Japanese tenugui cloth or non-fibrous cotton cloth (pile fabric is not suitable)
- 8.Tabletop bucket
- 9.Scissors
- 10.Two 45-liter garbage sacks
- 11.Chalk Pen
- 12.Scales
- 13.Salad spinner (at least 23cm diameter) or washing machine drain
- 14.Water that is hot to the touch
- 15.Bubble wrap
- 16.Iron
- 17.Ruler or measuring tape
You will need the following tools for the embroidery.
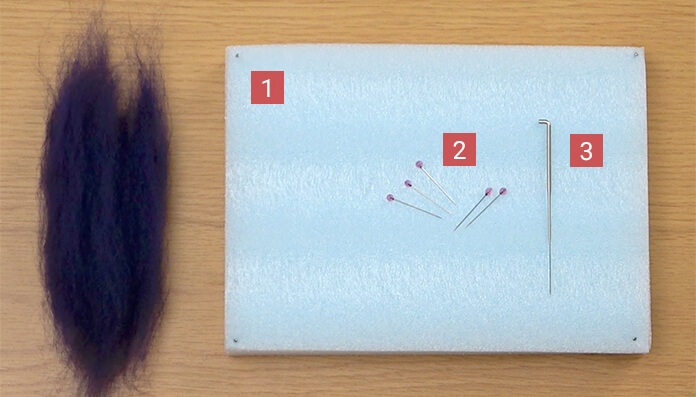
- 1.Needle mat
- 2.Short pins or sewing pins
- 3.Needle(extra-fine)
- 4.Precision cutter, cutter mat
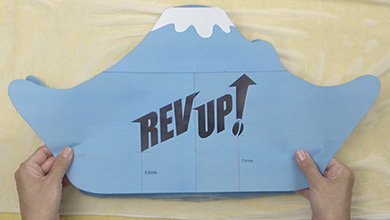
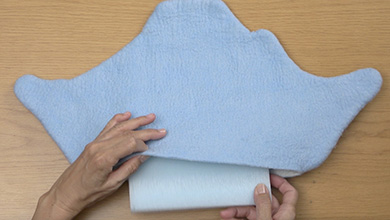
Pattern
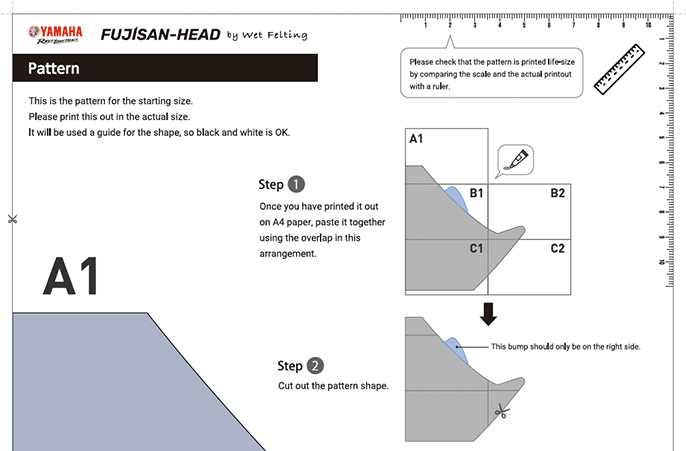
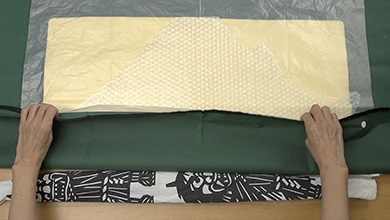
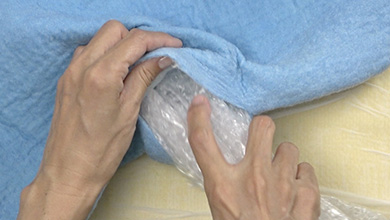
The starting size and shape are in the pattern. Paste the A4 sheets you have printed with the actual measurements together and cut around the shape. Place the cut pattern on the bubble wrap and trace the shape with a ballpoint pen. Since the pattern is only the right half, flip it and trace the left half with the pen. Then cut around the shape on the bubble wrap.
In addition to the pattern, we have prepared a life-size sheet that can be used as a guide for the finished size. Please use it after pasting the printed actual size A4 sheets together and cutting round the shape.
Actual size printing : Please specify ‘Actual Size’ when printing. Please check that it is the actual size by comparing the sheet scale with a ruler.

Once everything is ready, you can start making your FUJISAN HEAD!
1 Preparation
Preparation
-
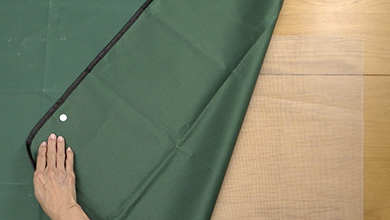
Lay the garden ground sheet on the non-slip sheet
-
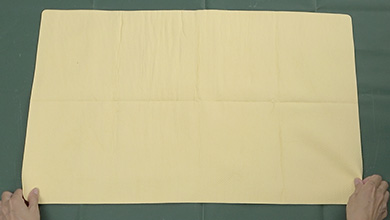
Put the absorbent sheet on top of the garden ground sheet
-
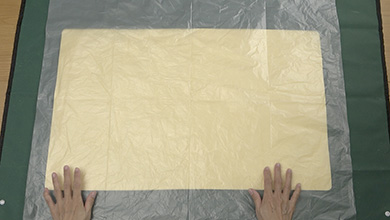
Set the 45 litre garbage sack
-
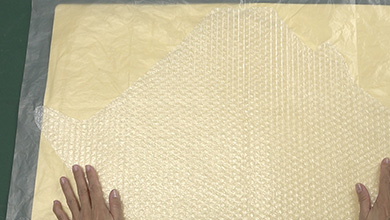
Then, put the bubble wrap cut to the pattern on top
-
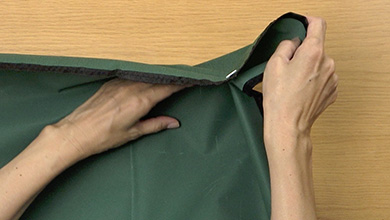
Button the top corners of the garden ground sheet. If you are using a plastic sheet, hold the corners together with clothes pegs
-
Place a rolled up towel at the front of the garden ground sheet. This creates a barrier and makes it easy to work
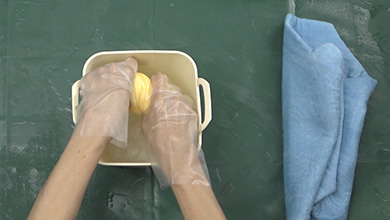
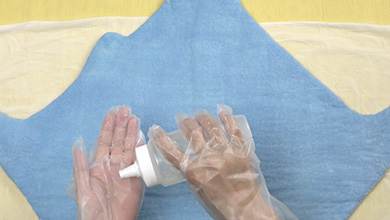
Prepare the soapy water
-
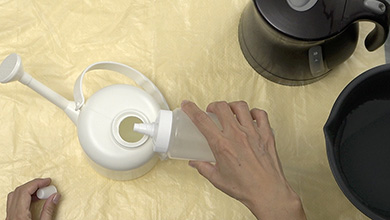
Using a watering can
Put a total of 500ml of hot water and cold water in the watering can to make it possible to touch. Put three drops of liquid soap into the water and mix -
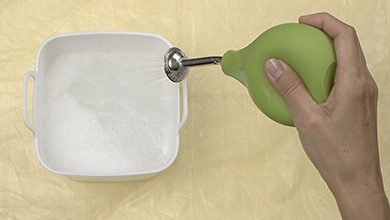
Using a shower ball
Put a total of 500ml of hot water and cold water in the watering can to make it possible to touch. Put three drops of liquid soap into the water and mix -
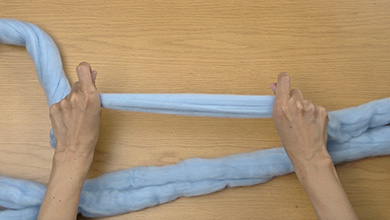
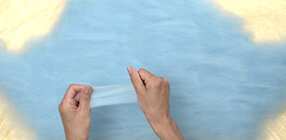
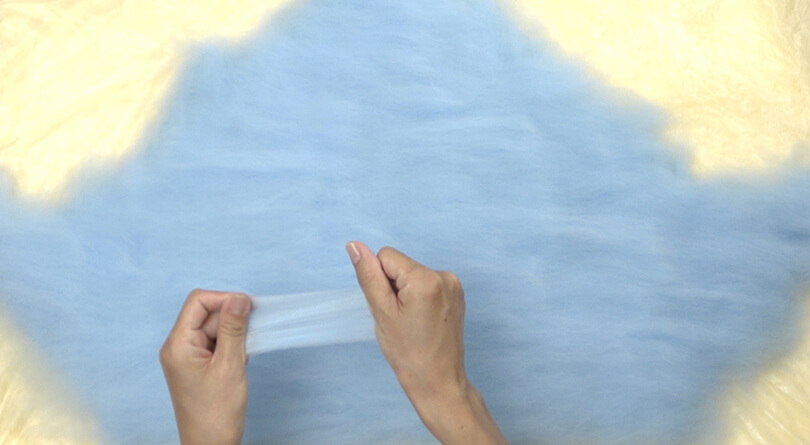
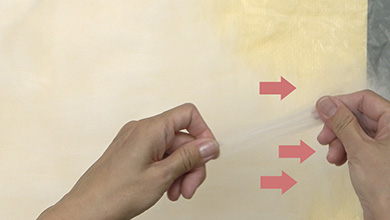
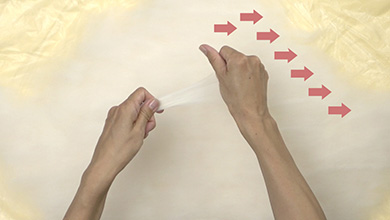
Fold the felt in half, pull the felt apart from the middle and then pull apart
-
Split both the blue and white felt into four
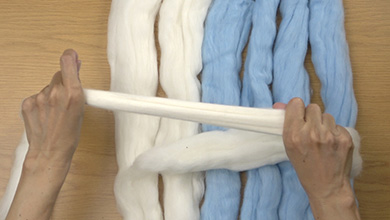
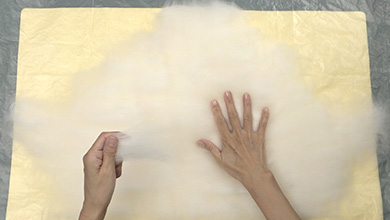
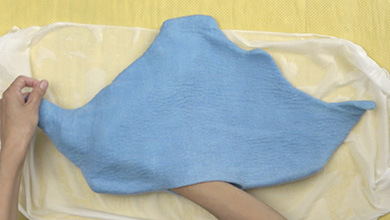
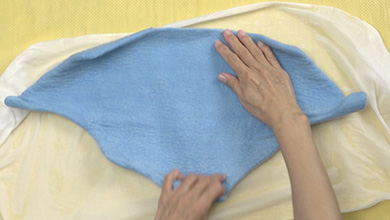
Line up the felt on the pattern
-
Using one piece of the white felt, hold it with the fleshy part of your thumb and place the fibers vertically from the top left. Make sure they hang over the pattern by around 1cm
-
Make the felt thinner on the bump and the edges, pulling it apart and making it shorter
-
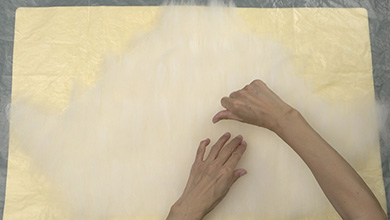
Put the rest of the felt in places where it looks thin, or in the middle
-
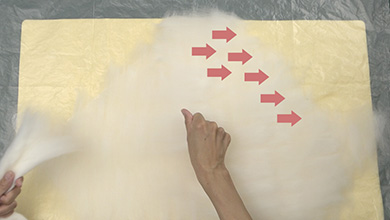
Using another piece of white felt, place the felt fibers from the top right of the pattern horizontally
-
Make the felt thinner on the bump and the edges, pulling it apart and making it shorter
-
Put the rest of the felt in places where it looks thin, or in the middle
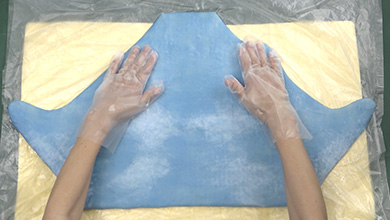
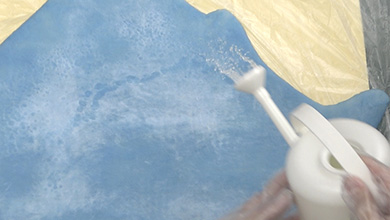
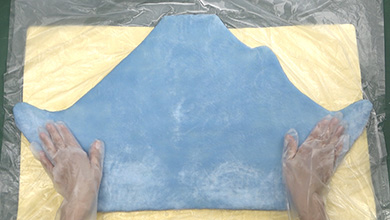
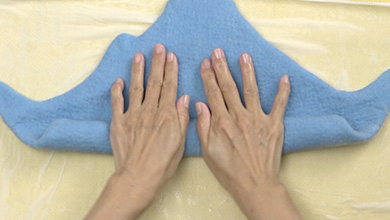
2 Shape the felt to the pattern in soapy water.
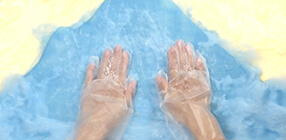
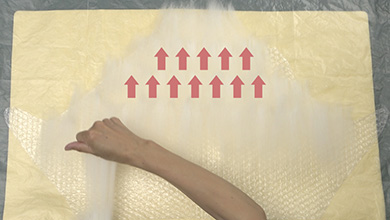
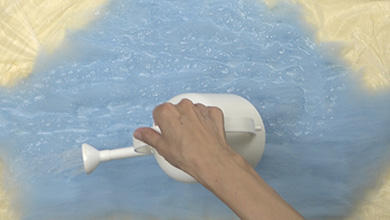
Pour on the soapy water
-

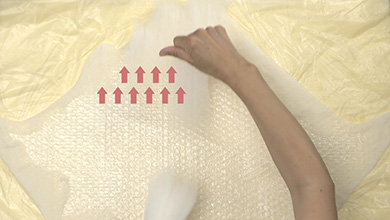
Pour the soapy water on in the direction of the fibers (horizontal)
-
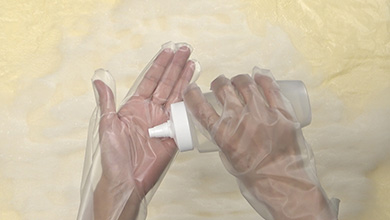
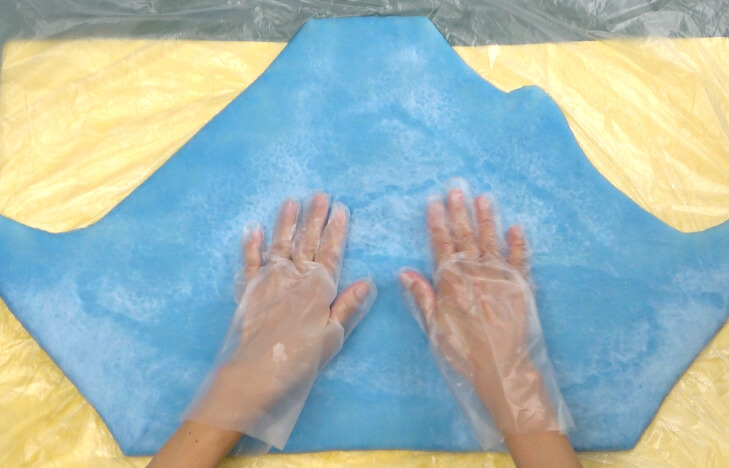
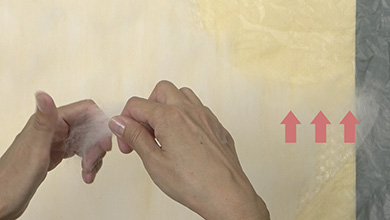
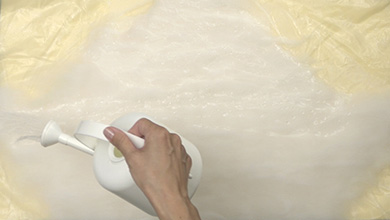
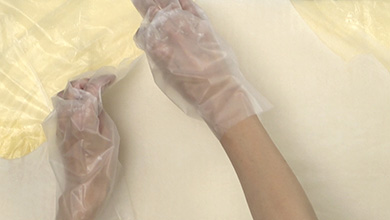
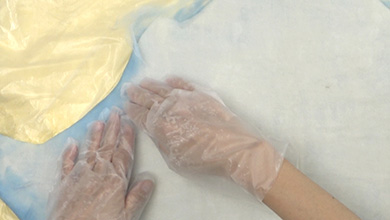
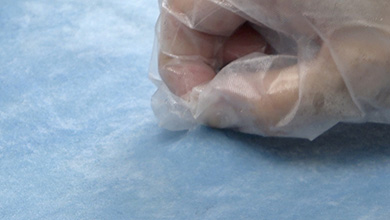
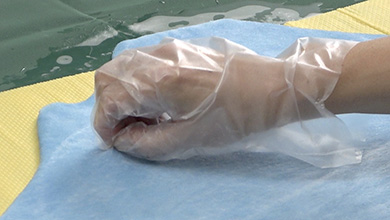
Put on plastic gloves and pour some soap into your hands
-
Spread the soap onto both palms
-
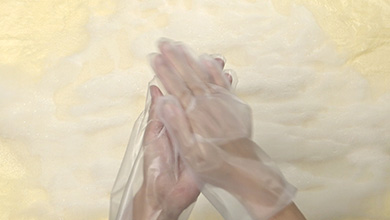
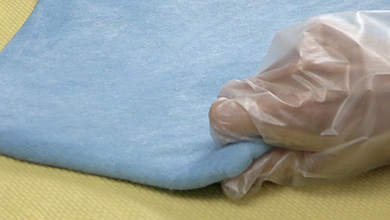
Pat to get the air out
-
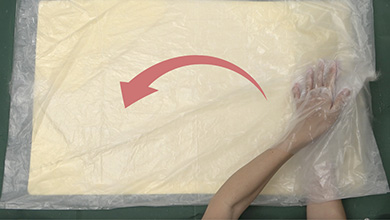
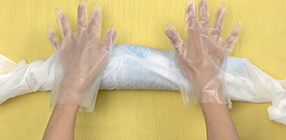
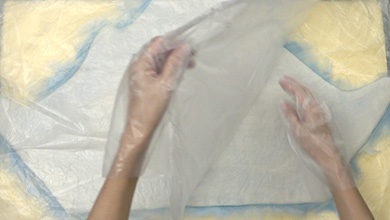
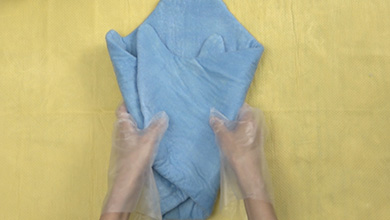
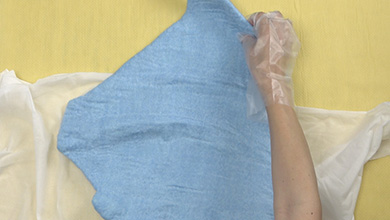
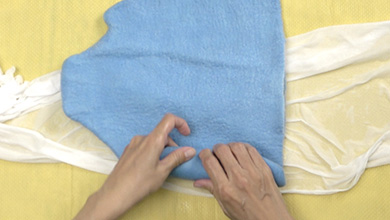
Place a garbage sack on top and then turn over with the garbage sack on the bottom
-
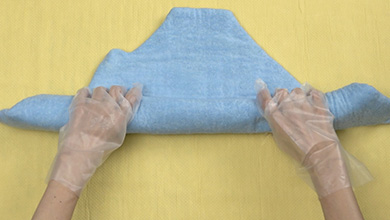
Make the back
-
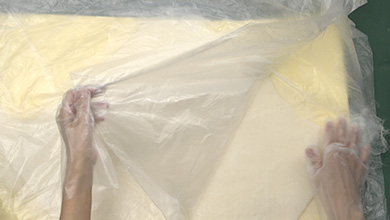
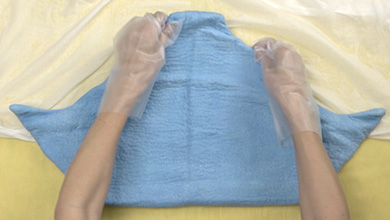
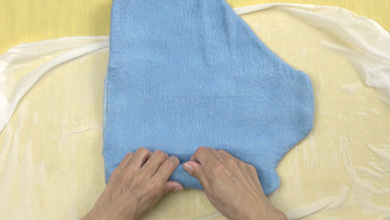
Fold the felt that is sticking out from the pattern towards the middle.
-
Tear or cut the felt with scissors at the bump and the edges to keep the shape
-
Place the white felt in the same way as the front, vertically at first
-
Next, place the felt horizontally
-
Pour the soapy water on in the direction of the fibers (horizontal)
-
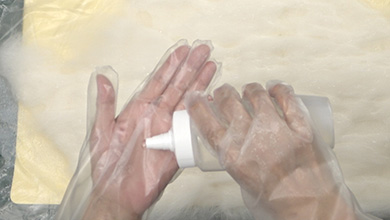
Put on plastic gloves and pour some soap into your hands. Spread the soap onto both palms
-
Pat to get the air out
Put blue felt on the front
-
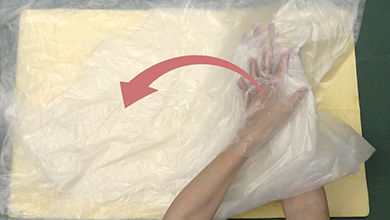
Place a garbage sack on top and then turn over with the garbage sack on the bottom
-
-
Fold the felt that is sticking out from the pattern towards the middle.
-
Place the blue felt in the same way as the white felt vertically
-
Make the felt thinner on the bump and the edges, pulling it apart and making it shorter
-
Place the felt horizontally
-
Make the felt thinner on the bump and the edges, pulling it apart and making it shorter
-
Pour the soapy water on in the direction of the fibers (horizontal)
-
Put on plastic gloves and pour some soap into your hands. Spread the soap onto both palms.
Pat to get the air out -
Fill in the thinner parts with extra felt
-
Place a garbage sack on top and the turn over with the garbage sack on the bottom
Put blue felt on the back
-
-
Fold the felt that is sticking out from the pattern to the inside
-
Place the blue felt on the back in the same way, vertically
-
Next, place the felt horizontally
-
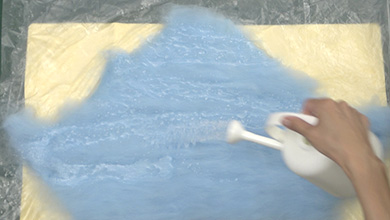
Pour the soapy water on in the direction of the fibers (horizontal)
-
Put on plastic gloves and pour some soap into your hands. Spread the soap onto both palms.
Pat to get the air out
Turn over to the front
-
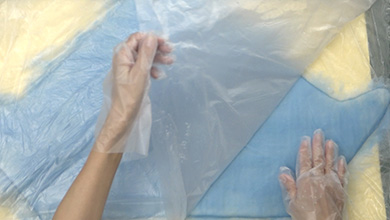
Place a garbage sack on top and then turn over with the garbage sack on the bottom
-
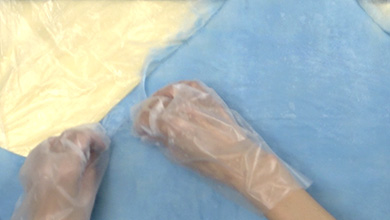
Fold the felt that is sticking out from the pattern to the inside
-

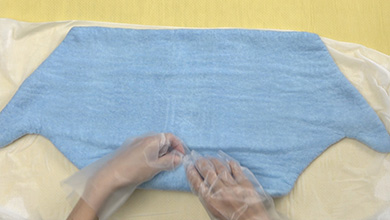
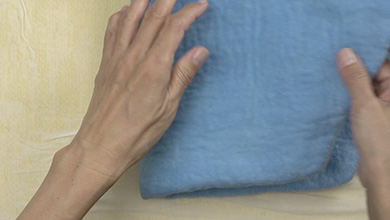
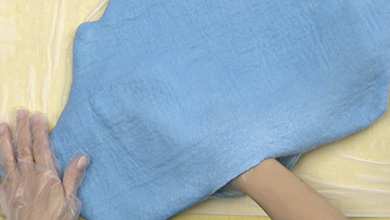
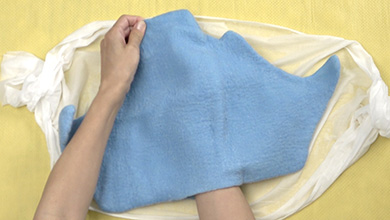
The felt positioning stage is complete
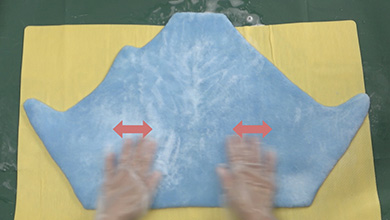
3 Smooth out to make the shape perfect.

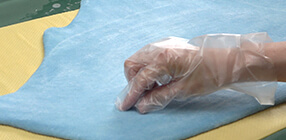
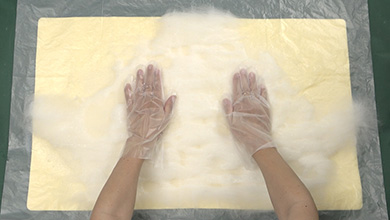
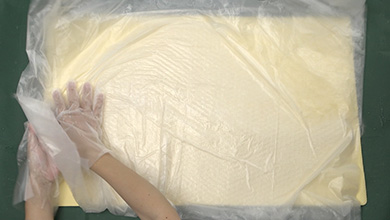
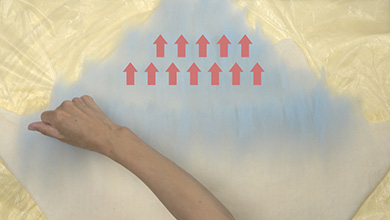
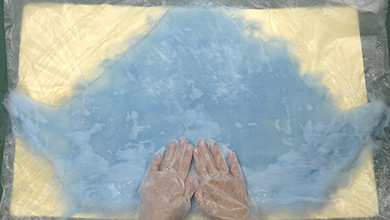
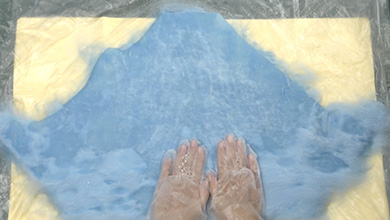
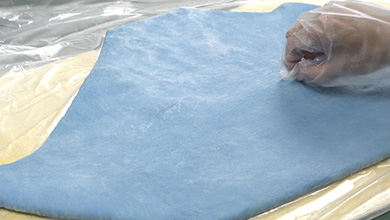
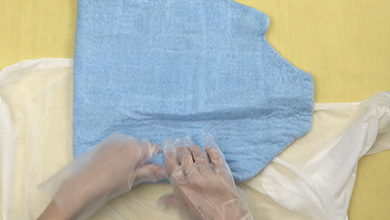
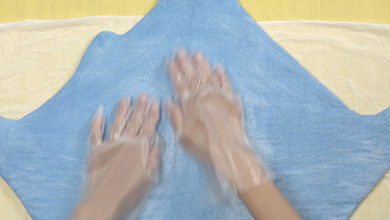
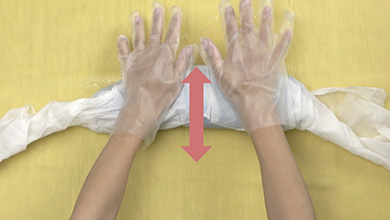
Smooth the felt
-
Gently smooth over the whole shape with your hands, making sure the felt doesn't move
-
If it cools down, pour on more soapy water and always keep it warm.
-
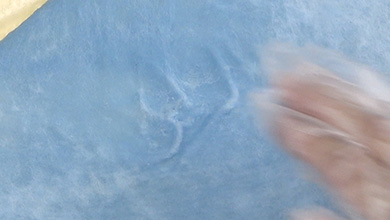
Caution: If you press hard, the felt will bunch up or peel away.
-
Smooth the whole shape for around 10 minutes
-
Check whether the felt bunches up or peels away by pressing it harder. If it bunches up, smooth gently for 5 minutes. If it is OK, rub your hands firmly across the felt in a circular motion
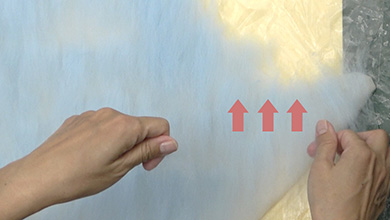
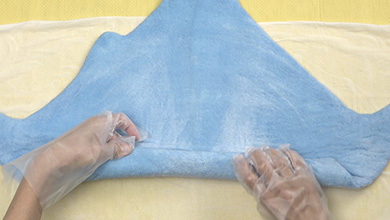
Pinch test
-

Pinch and lift to test the felt's progress. If the fibers loosen and make a hole, smooth for another 10 minutes
-
If the whole thing lifts up when you pinch it, then it's OK
-
Do the pinch test in the middle, at the top and the bottom, and the left and right
-
Turn the whole thing over
Smooth the felt on the back
-
Do the same to the back as the front, smoothing with gentle pressure
-
Do the same pinch test as you did with the front
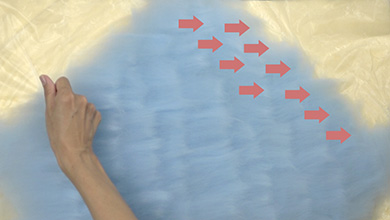
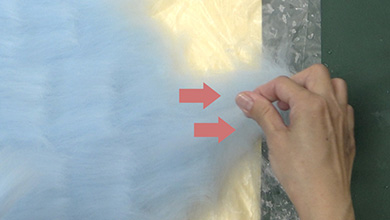
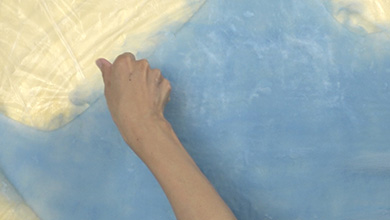
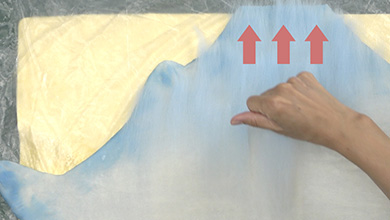
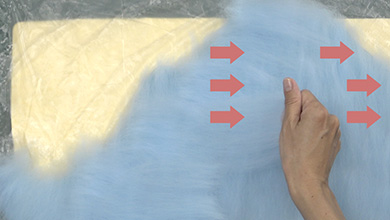
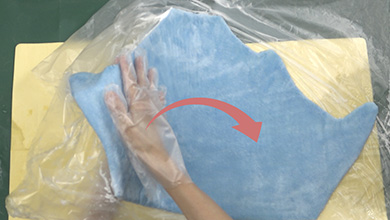
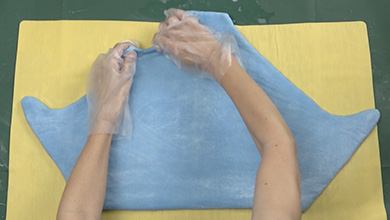
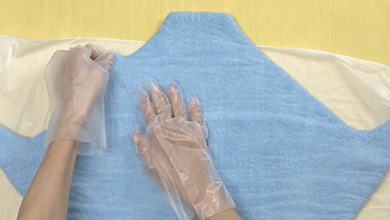
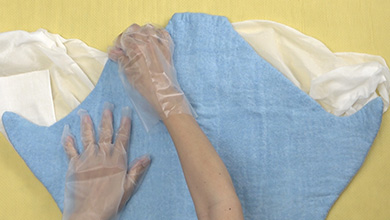
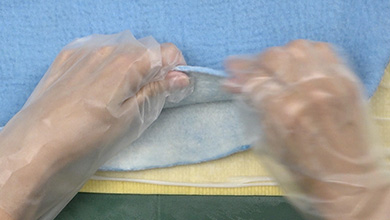
Smooth the edges
-
Smooth the edges five times, holding it between your fingers and your palm
-
-
If water collects on the sheet or the absorbent sheet stops absorbing, fold the felt gently and get rid of the water
-
-
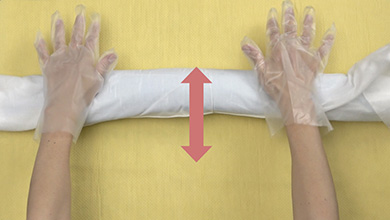
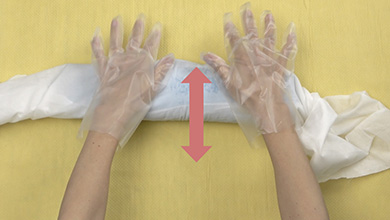
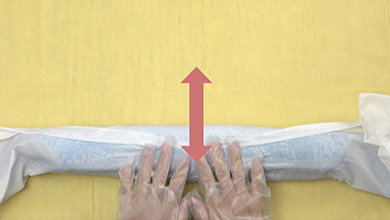
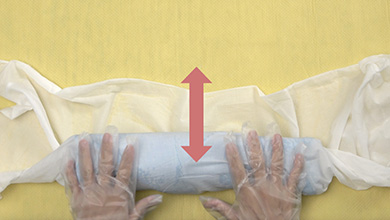
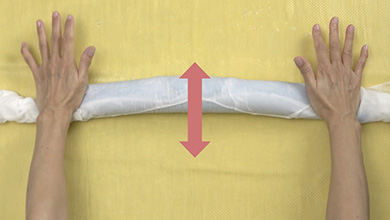
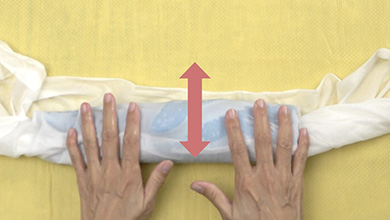
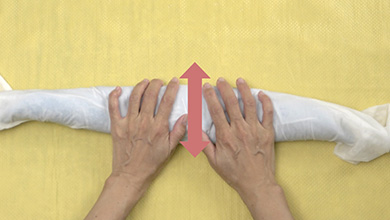
4 Roll up and roll back and forth
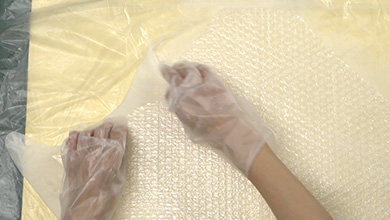
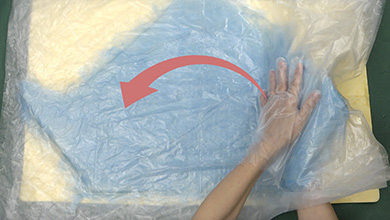
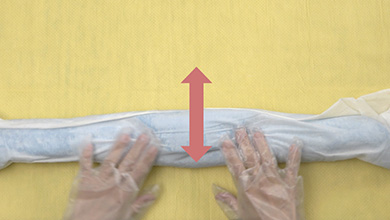
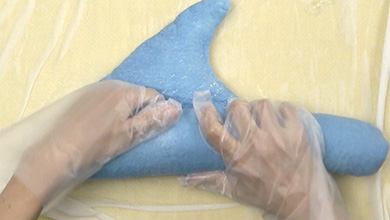
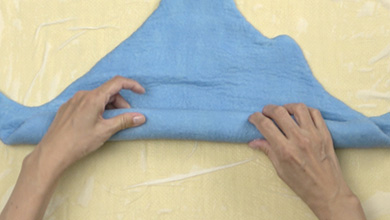
Rolling up - Stage 1
-
Roll the whole shape up loosely from the bottom
-
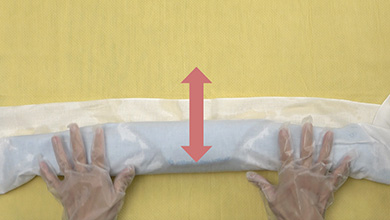
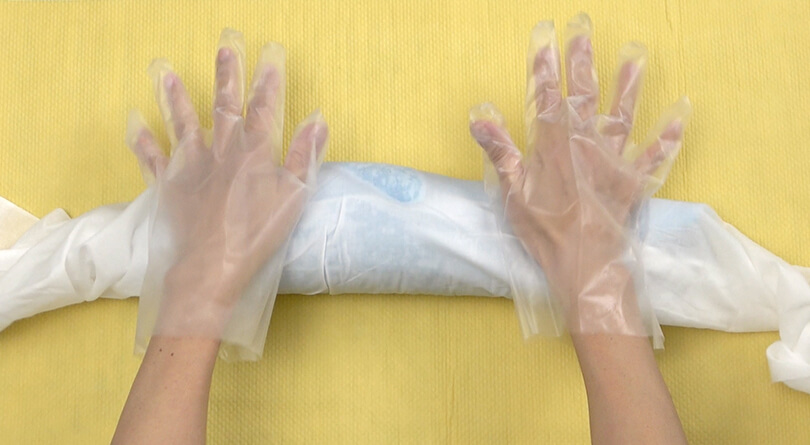
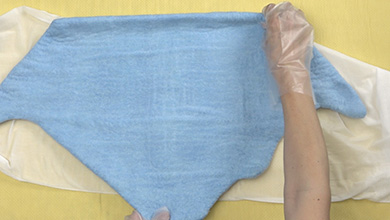
Wrap in a towel and roll back and forth 10 times
-
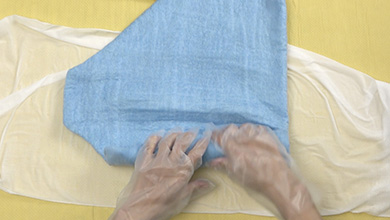
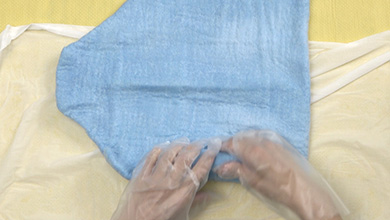
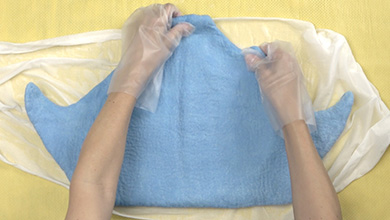
Once you have finished rolling, pull on the bump and tidy up the shape as a whole. If the felt starts to come apart, smooth it over to fix it
-
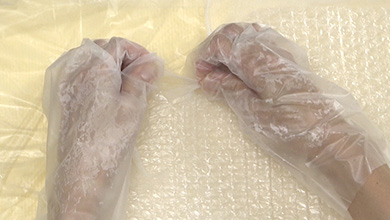
Turn it round 180˚, loosely roll up then roll back and forth 10 times
-
-
-
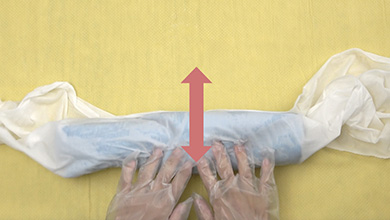
Turn it round 90˚, loosely roll up then roll back and forth 10 times
-
-
-
Turn it round 180˚, loosely roll up then roll back and forth 10 times
-

-
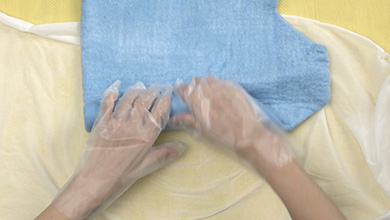
Roll the back loosely, too
-
Turn it over, add some liquid soap and rub in
-
-
Roll gently in the same order as for the front: vertical/horizontal/up/down 10 times
-
-
-
-
-
-
-
-
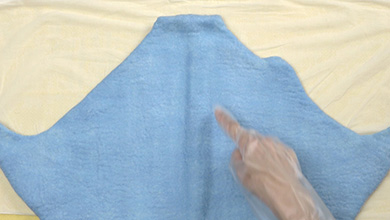
When the first stage of rolling up is finished, you will see the pattern rolled up in the middle as the felt forms
Rolling up - Stage 2
-
Roll a little tighter
-
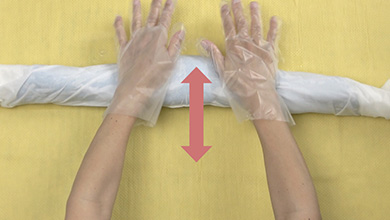
Wrap in a towel and roll back and forth more firmly 20 times
-
-
-
As in stage 1, roll firmly 20 times in all four directions, back and front
-
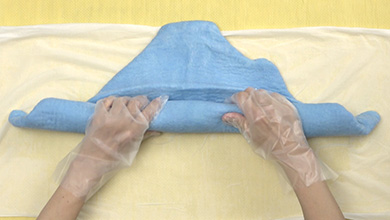
Tidy up the shape and the 2nd stage of rolling is complete
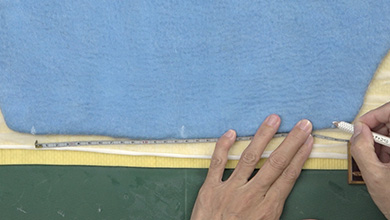
5 Felting – to the finished size
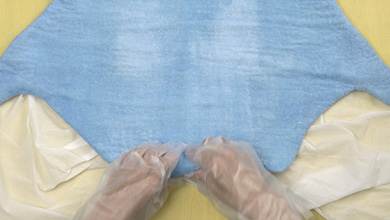
Remove the pattern from the middle
-
Fold the shape in two and check the position in the middle
-
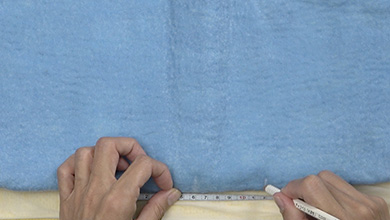
Make marks 6 cm on either side of the middle at the bottom (total 12cm)
-
Insert scissors into the middle and cut to the left and right
-
Remove the pattern from inside
-
-
Put some soapy water inside and smooth quite firmly all over
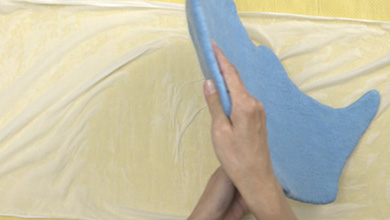
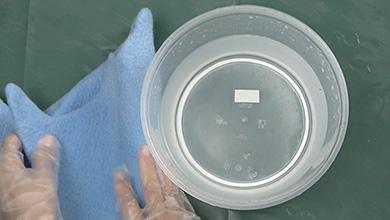
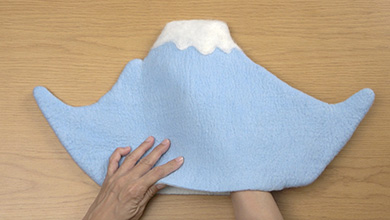
Check the felt formation
-

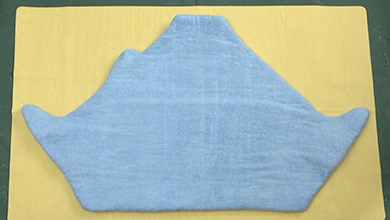
Lay the finished size on top to see the felting progress. It is complete when it is exactly the same size as the finished size template
-
Roll up tightly and roll more strongly than before 30 times
-
-
After rolling, make sure to put your hand inside to check that it has not stuck together
-
In the same order as last time (4 directions), roll very firmly 30 times
-
-
-
-
-
Turn it over and roll very firmly in all 4 directions 30 times
-
-
Check the size against the finished size template
-
Make any slight adjustments by rolling up and rolling back and forth.
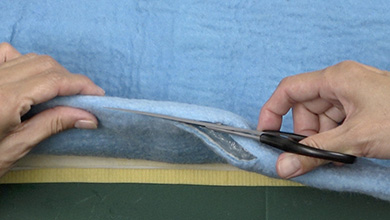
Cut the hole for the head
-

Mark the hole at around 27.5cm
-
Cut the hole with scissors
*Adjust the hole to the size of your head as necessary -

Smooth out the edges of the hole to felt
Wash out the soap
-
Wash out the soap with water
*Washing in the kitchen sink is OK -
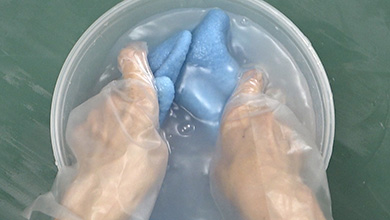
Wash until the water runs clear
-
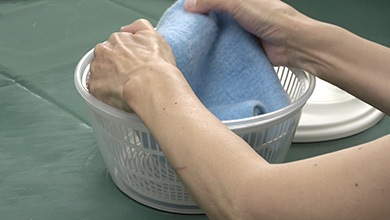
Remove the water
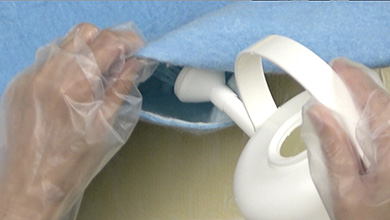
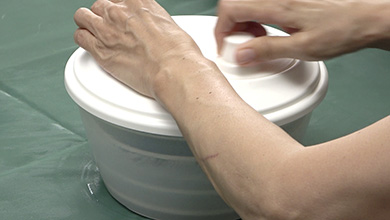
*Use a 23cm (min) diameter salad spinner or the spin function in your washing machine -
-
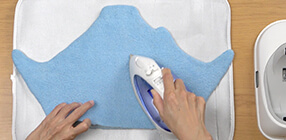
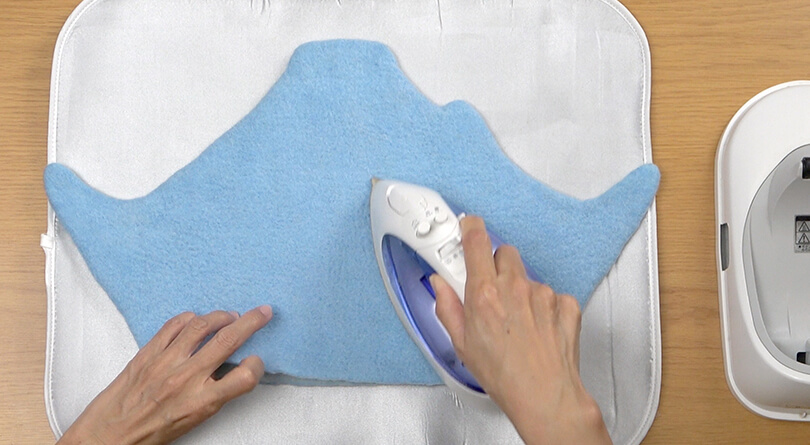
Iron
-
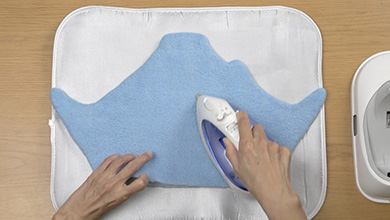
Iron
-
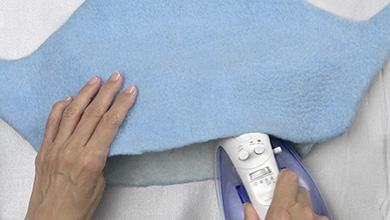
Iron the inside, too
Hang in the shade
-
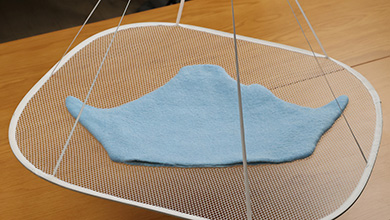
Hang in the shade until completely dry
*Can also be left on the table to dry
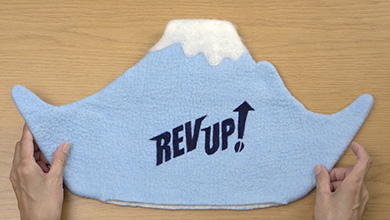
6 Finish with embroidery
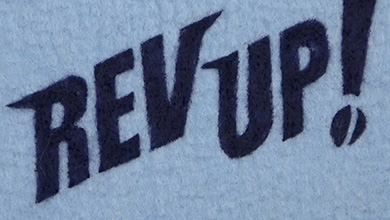
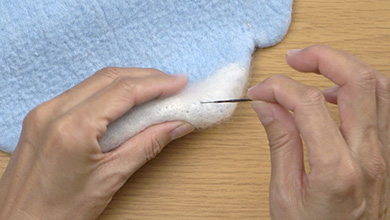
Needle felt the logo
-

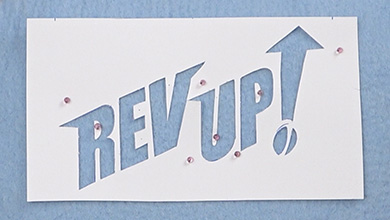
Use a cutter to cut out the REV UP! Logo in pattern C2
*Cut out the holes in the R and the P -
Turn the shape to the front (bump on the right) and put a needle mat inside
-
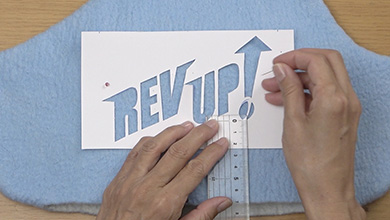
Pin the logo pattern to the shape, measuring from the bottom
-
Pin the middles of R and P as well
-
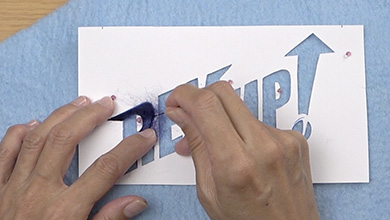
Insert dark blue felt into the pattern little by little and poke
-
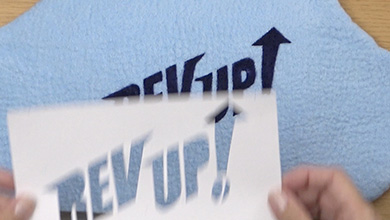
Once you have finished, remove the pattern and tidy up
-
-
Change the direction of the needle mat and put it back in
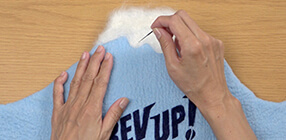
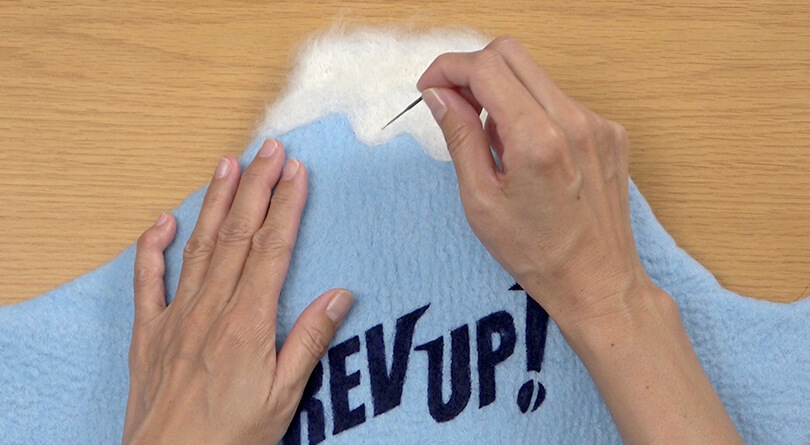
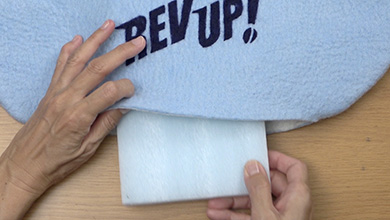
Needle felt the snow
-

Referring to the finished size template, use white felt to create the snow on top of Mt. Fuji
-
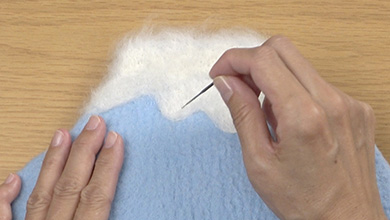
Poke round the edges first then fill the shape in
-
Thoroughly poke top as well
-
Check that the two sides are not sticking together with your hand
You are finished!


Official social media gallery -
Send in pictures of your work!
Let us post the work you have created using the how-to guide on this site on the official Yamaha Motor amigurumi / needle felting account on Instagram.
Just fill in the required fields on the posting page and upload photos of your work. We are looking forward to seeing them.
Terms of use
These contents are operated by Yahama Motor Co., Ltd. and are provided free of charge with the premise that they will be used in the pursuit of hobbies by individuals.
Please read the terms of use of the website before use. We hope you enjoy these contents.>Terms of use