Basic amigurumi lesson
This video introduces the basics of knitting that you will need to make amigurumi.


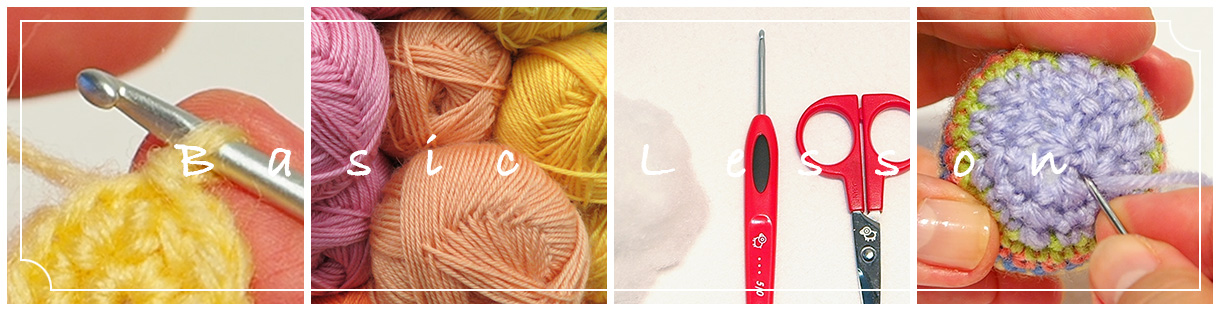

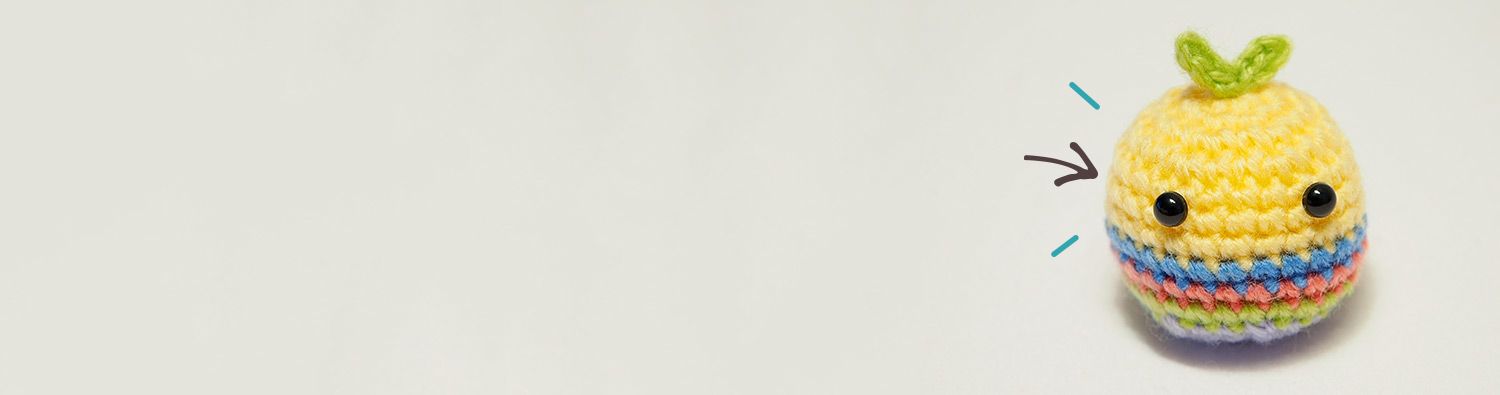
Amigurumi is a craft in which you knit shapes with wool and stuff them to make three-dimensional objects. It can be said that its most characteristic feature is that you knit with one crochet hook.
There are more and more amigurumi enthusiasts throughout the world and the potential to express yourself is expanding from mostly cute little mascots to bikes such as NIKEN provided by this content.
Have a look at this lesson on the basics and maybe you will try your hand at amigurumi.

1Required tools
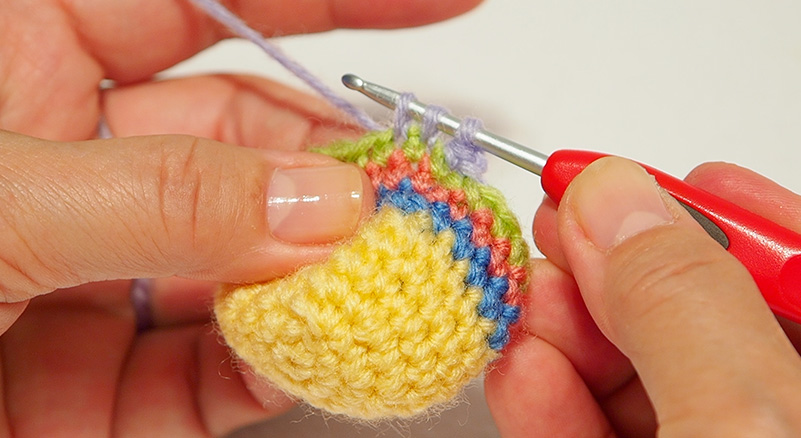
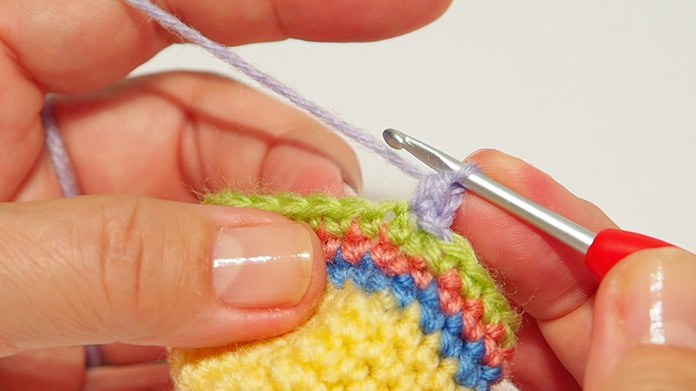
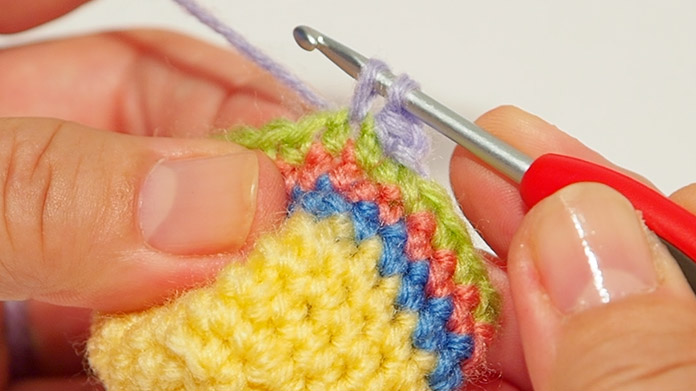
2Casting on a double circle - knitting 1 row
3Tightening the circle - knitting slip stitches - how to add stitches
4How to knit the 2nd and 3rd rows

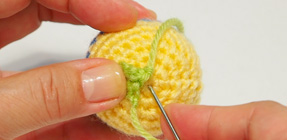
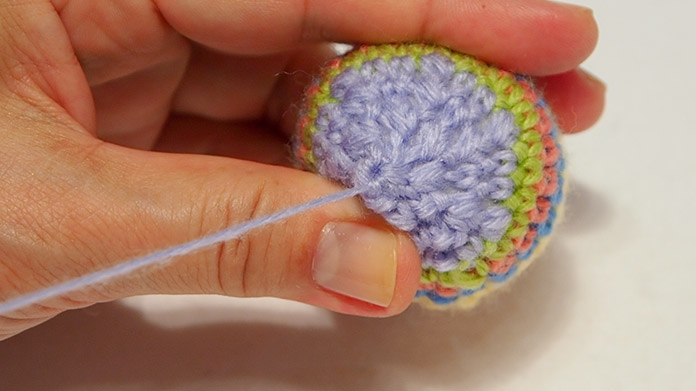
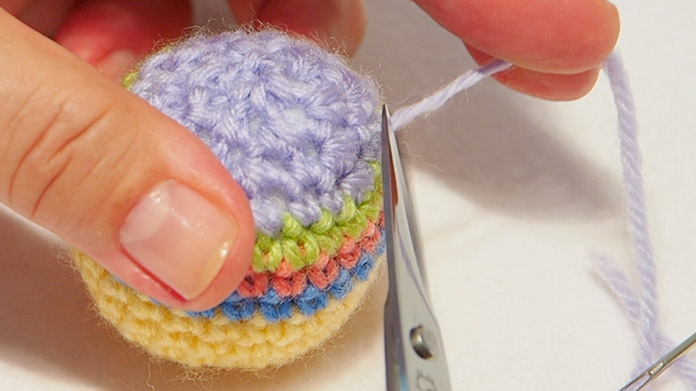
5Changing colours – how to weave in the wool end after changing colours
6How to decrease stitches
7Casting off - stuffing - tightening and closing - managing wool
8How to knit the string parts from a chain
9How to sew the parts on
10How to stick the parts on

11About the pattern
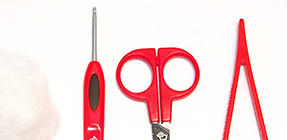
1 Required tools
Here are the necessary tools in addition to wool.
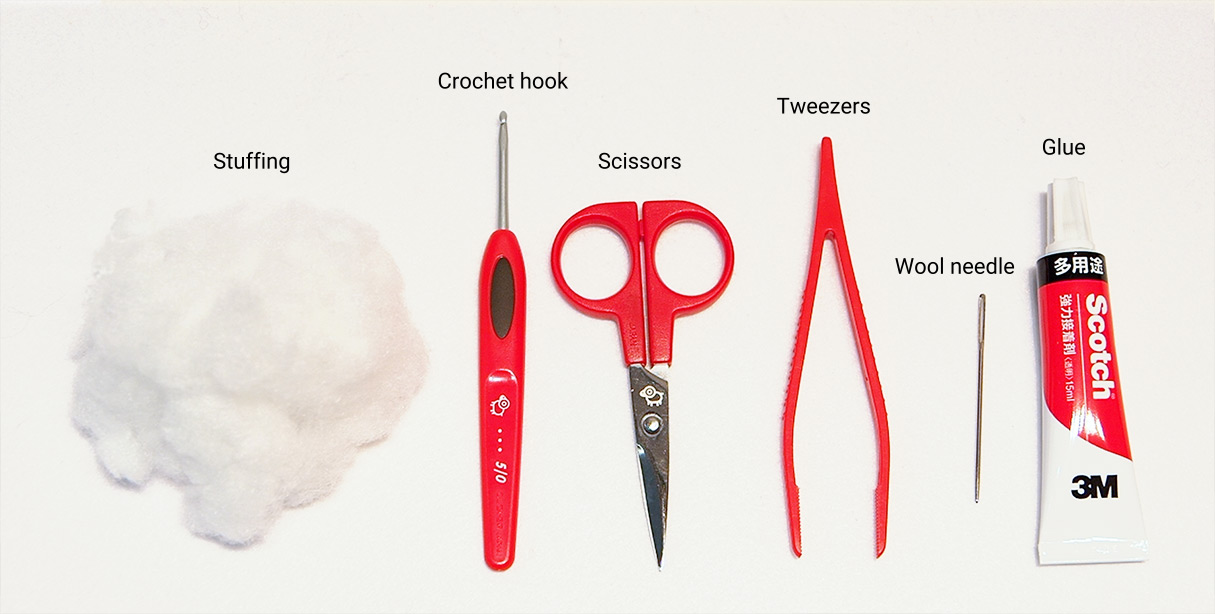
[1] stuffing [2] crochet hook [3] scissors [4] tweezers [5] wool needle [6] glue
These tools can be purchased at craft shops or online.
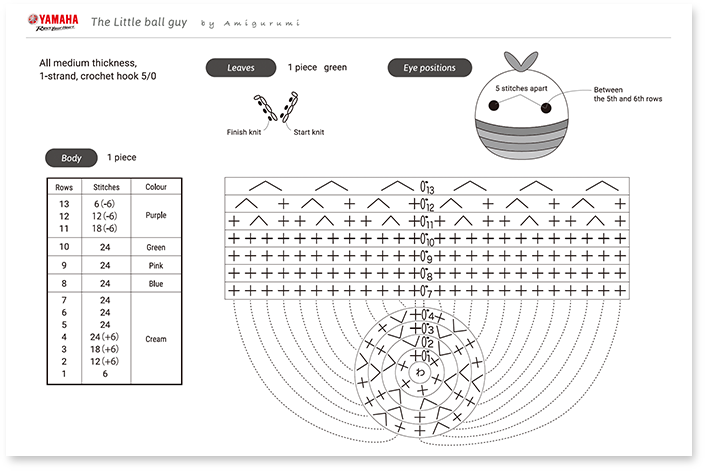
The little ball guy pattern
You can download the PDF pattern designs to make this cute little ball guy. The pattern includes knitting instructions as well as instructions for yarn thicknesses and colours.
 Download the pattern PDF
Learn the basics of amigurumi
while making this little ball guy.
Learn the whole basic amigurumi process from starting to knit, to adding rows, changing colours, stuffing, tightening and closing by making this cute little ball guy.
Watch the video and try it out!
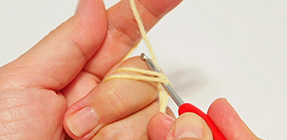
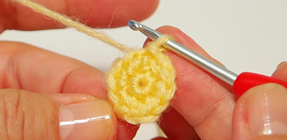
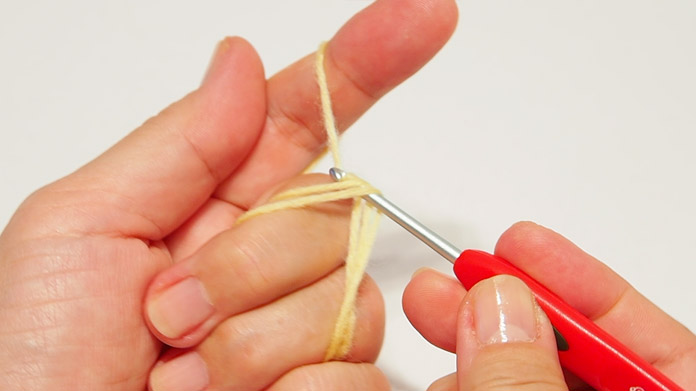
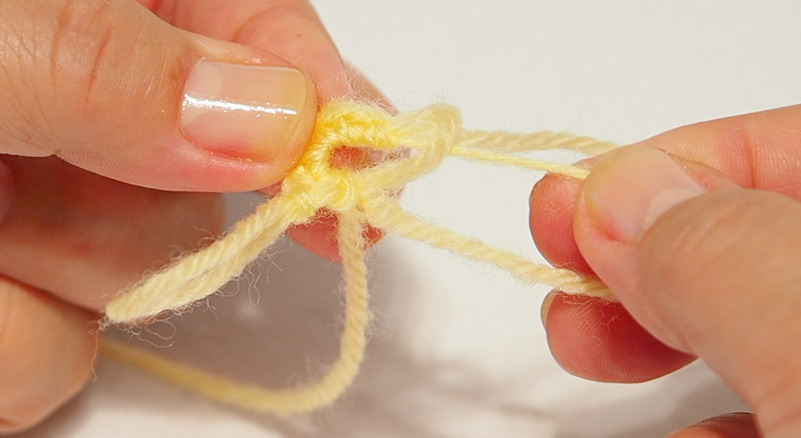
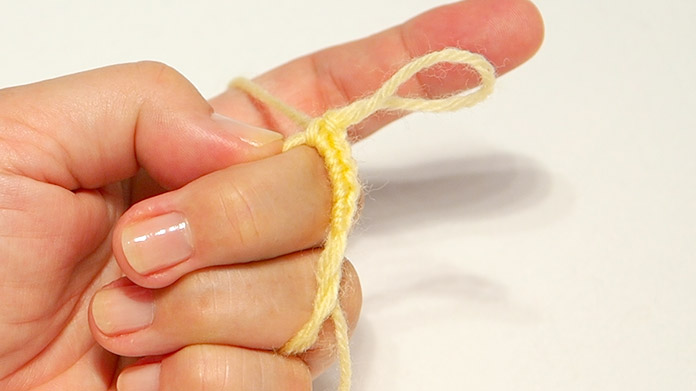
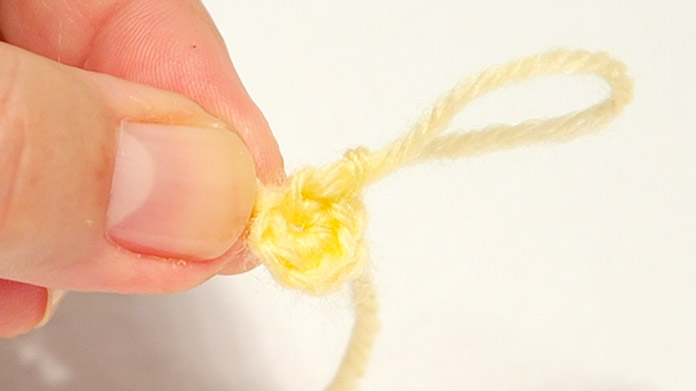
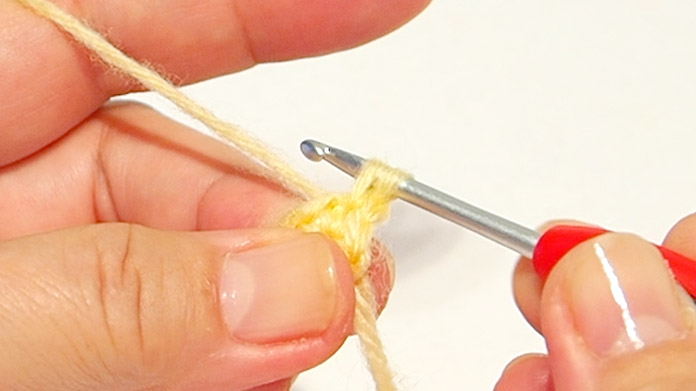
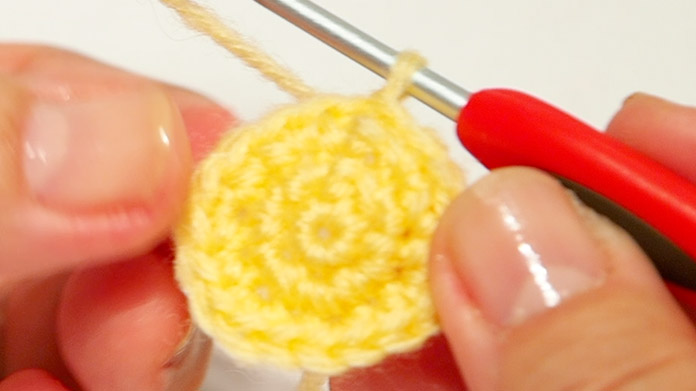
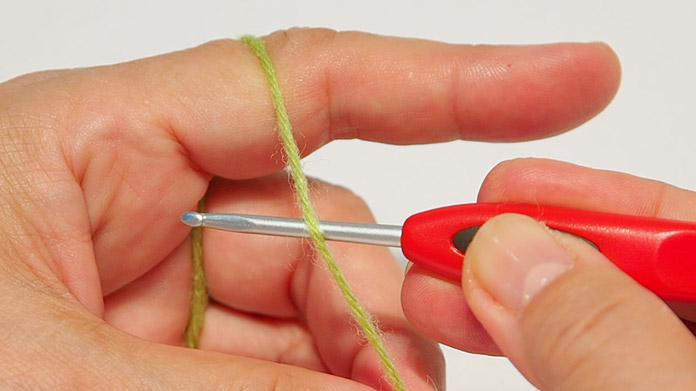
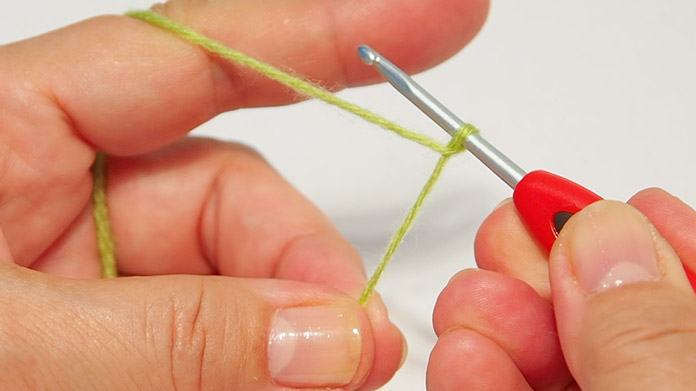
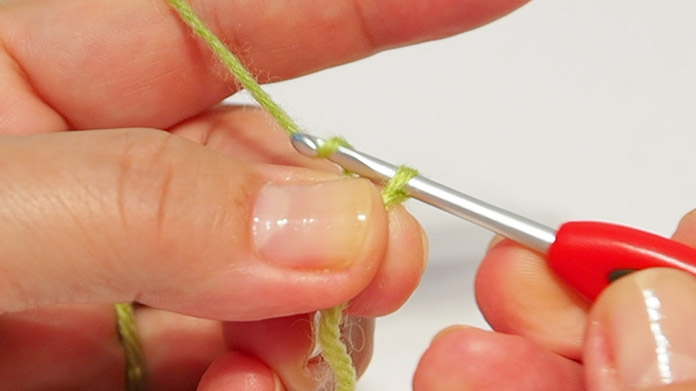
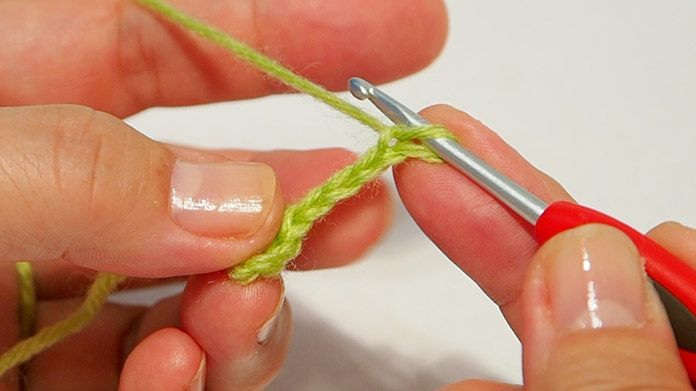
2 Casting on a double circle - knitting 1 row
We start with the important amigurumi casting on process up to how to knit the first row.
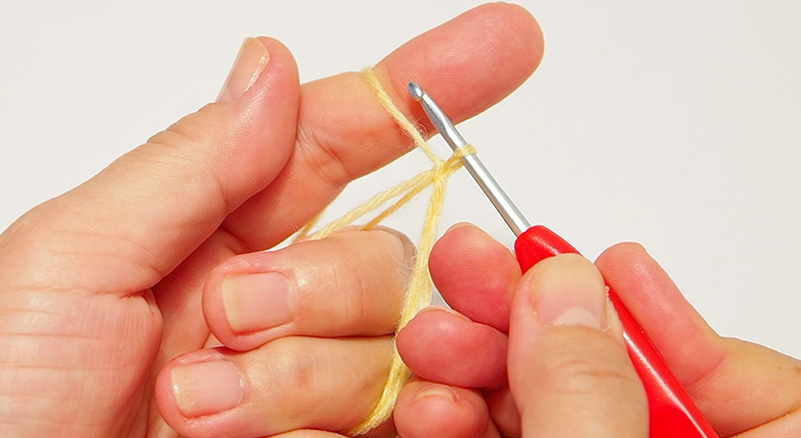
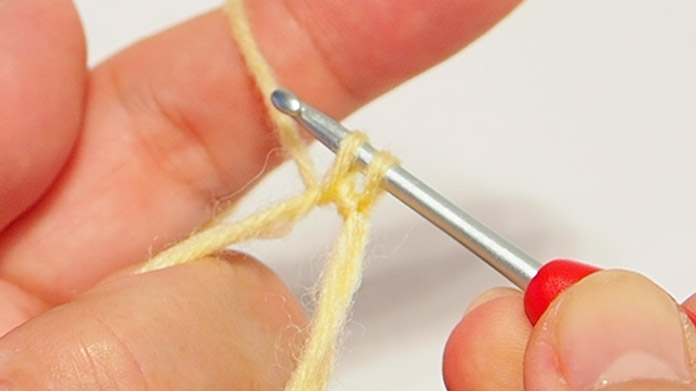
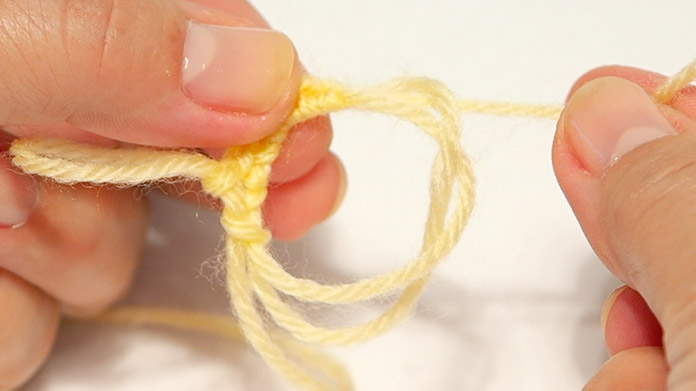
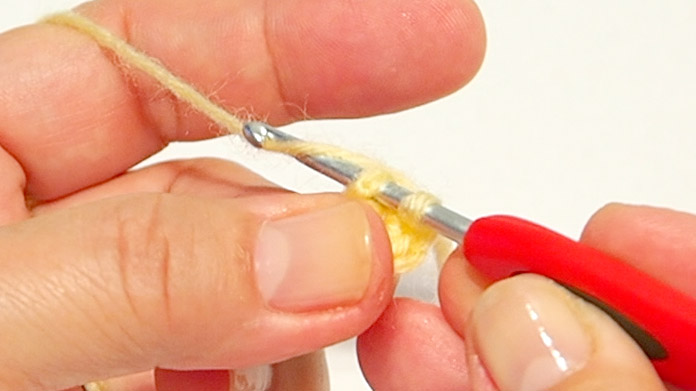
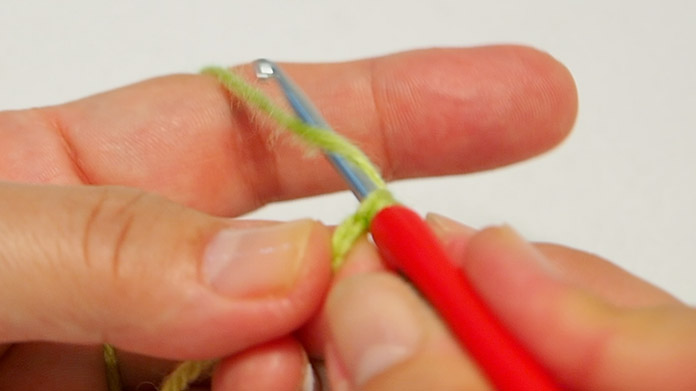
Casting on with a double circle.
-
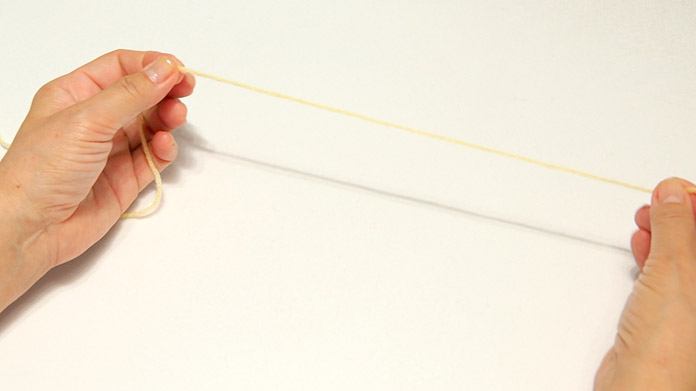
Pull out around 30cm of wool.
-

Thread the wool from behind your little finger.
-
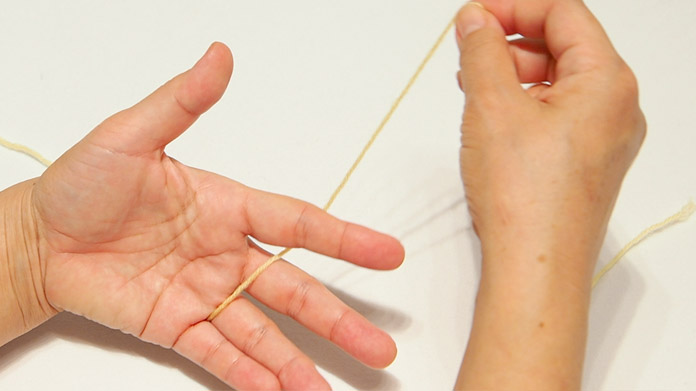
Thread over your ring and middle fingers and behind your index finger.
-
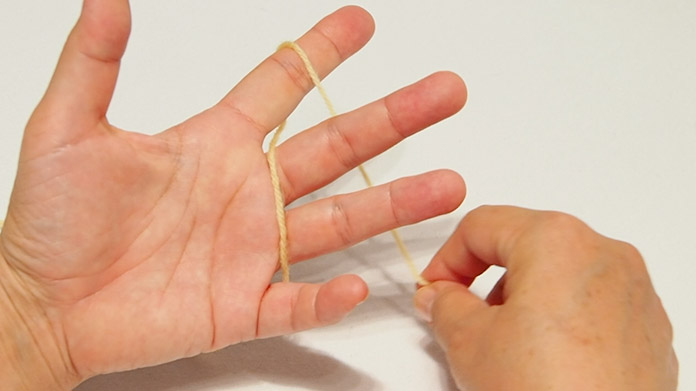
Thread behind the ring and middle fingers and wrap twice.
-
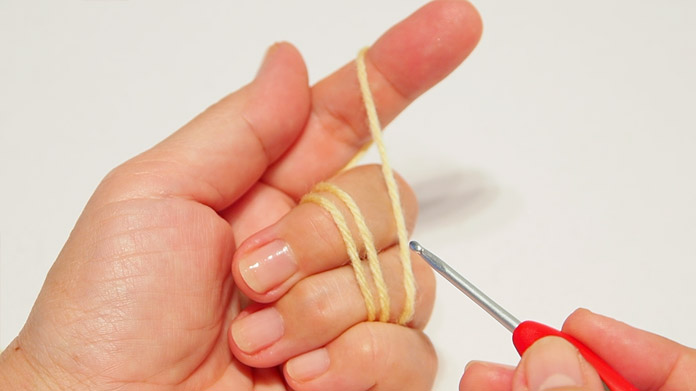
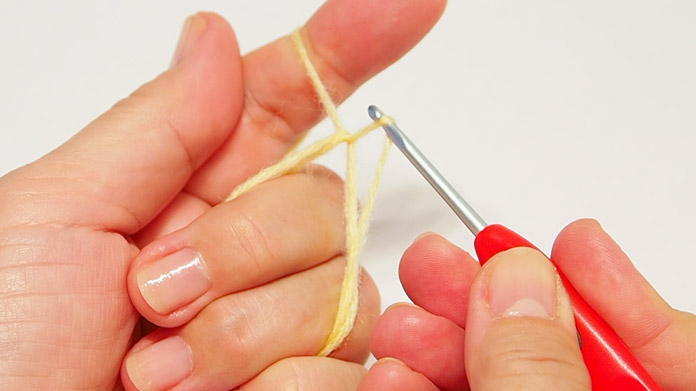
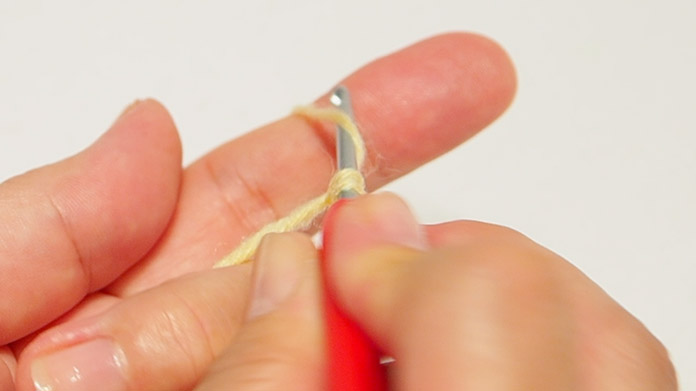
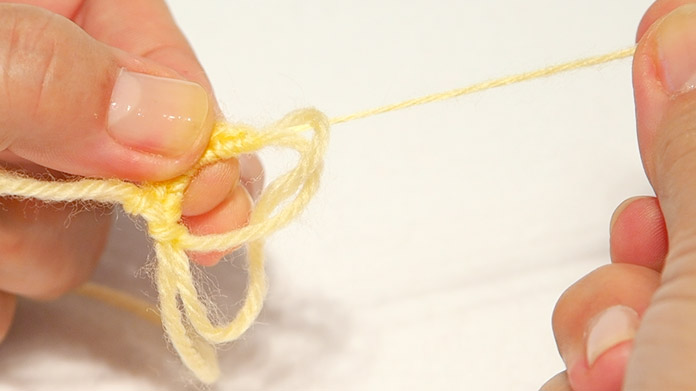
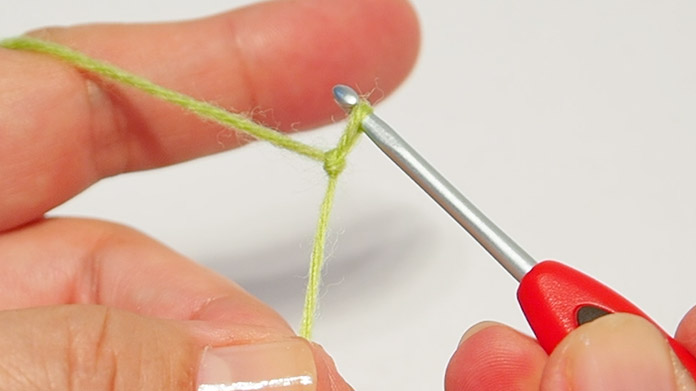
Knit the 1st row.
Make a loose fist. -
Insert the hook at the top of the fingers and loop under the 3 threads.
-
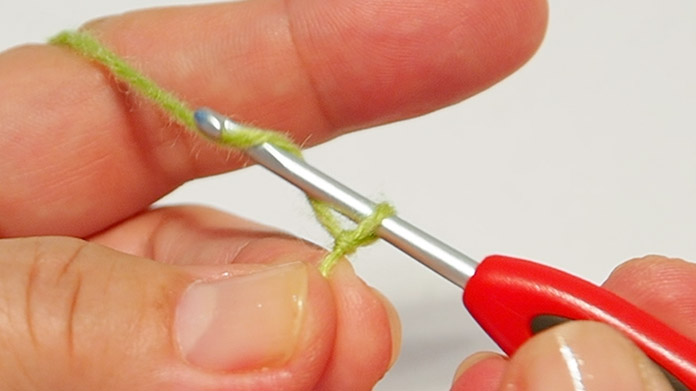
Loop the wool.
-
Pull the wool through.
You have cast on a double circle.
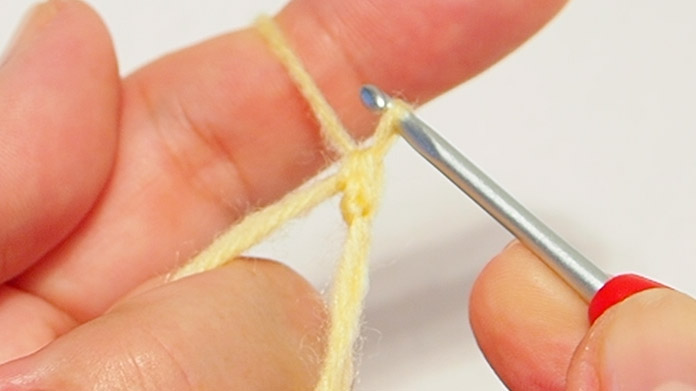
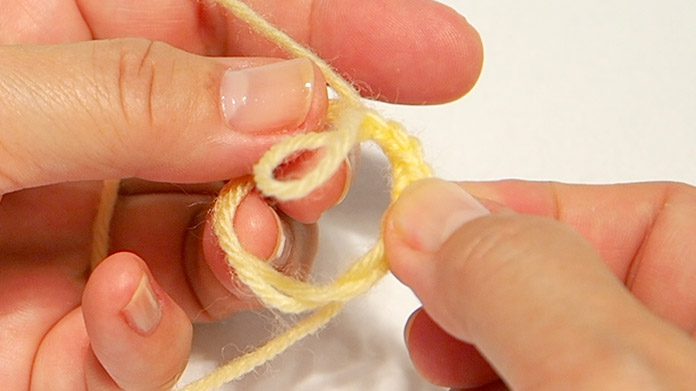
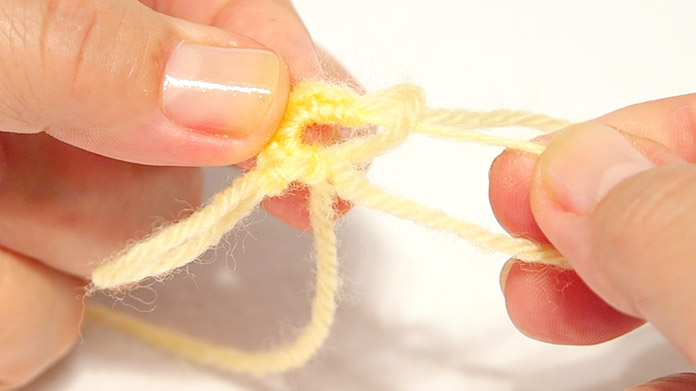
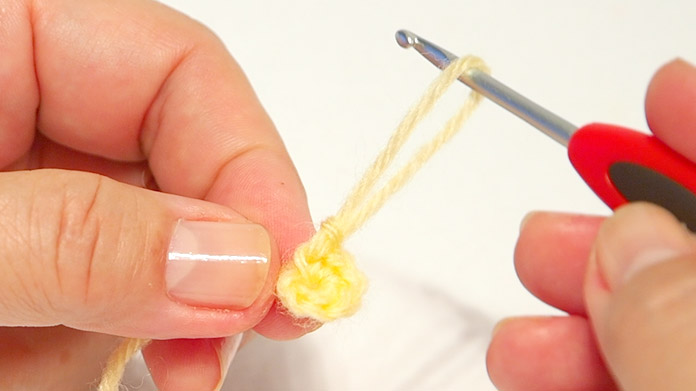
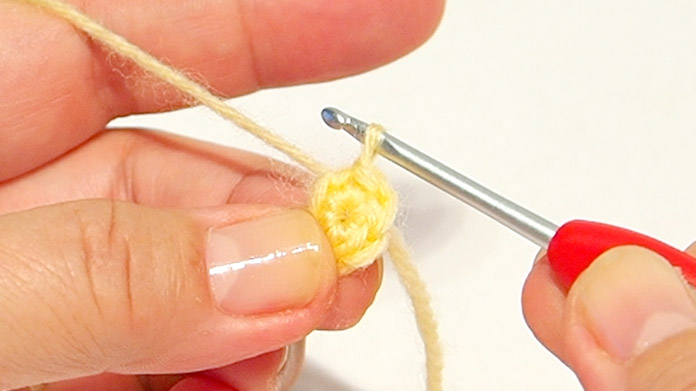
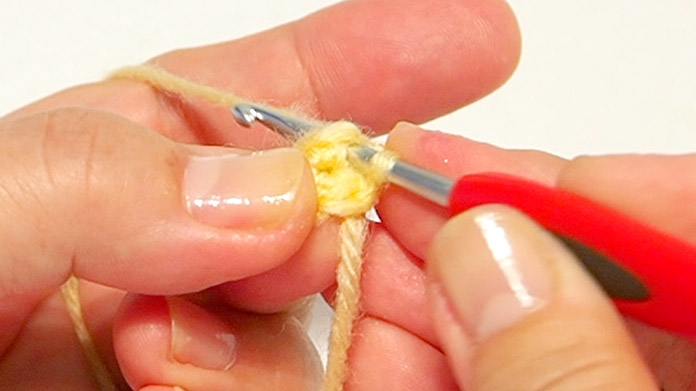
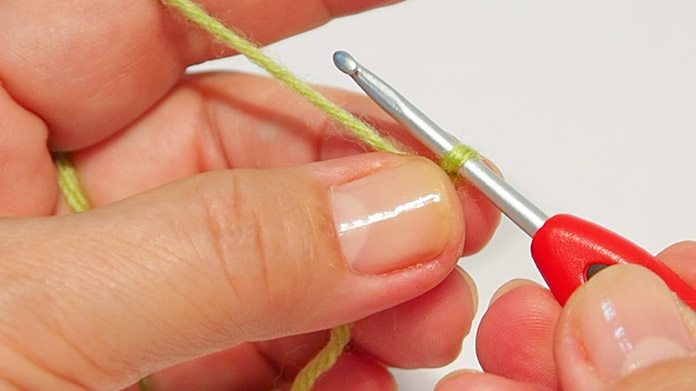
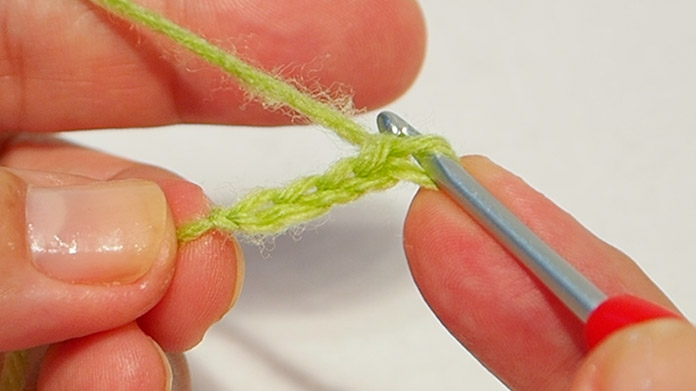
1st row
-
-
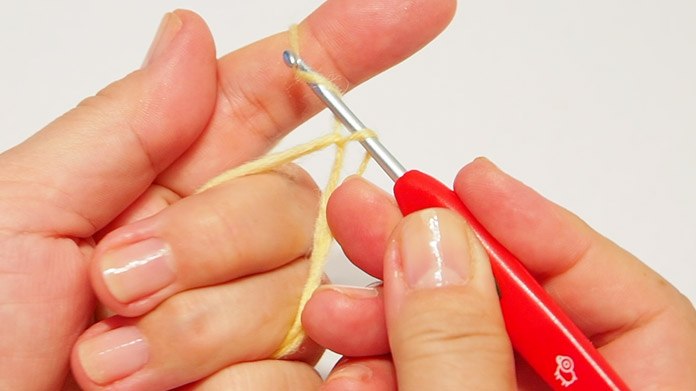
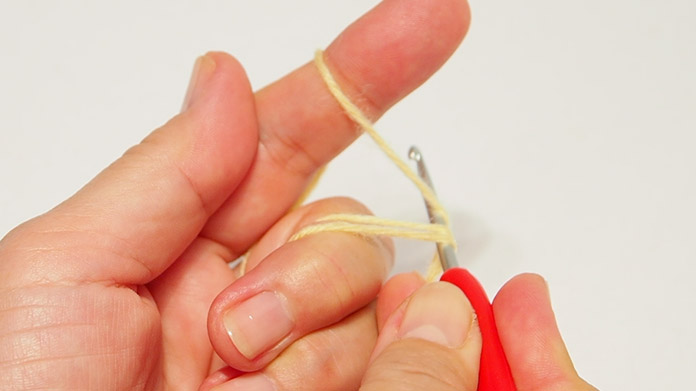
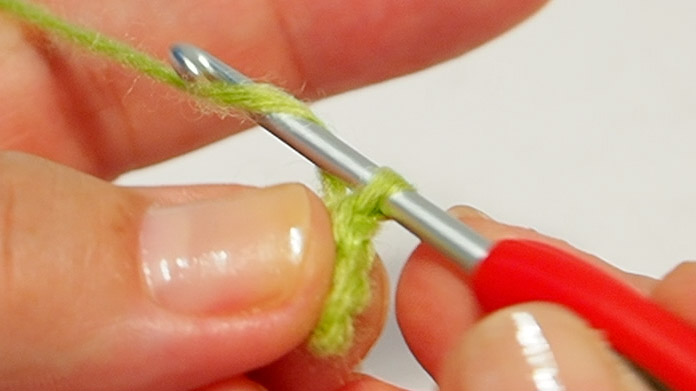
Knit 1 row round the circle in single crochet.
-
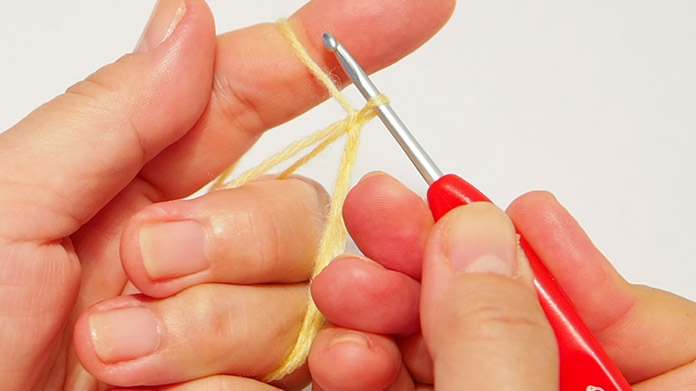
Insert the hook into the circle and pull the wool towards you.
-
There are now 2 loops on the hook.
-
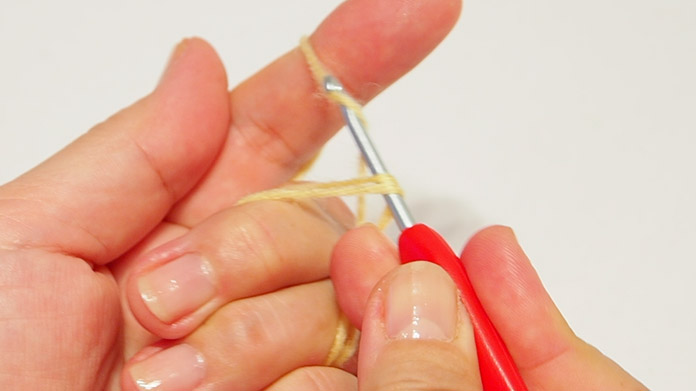
Put the wool on the hook and pull through the 2 loops.
-
You have knitted a single crochet stitch.
-
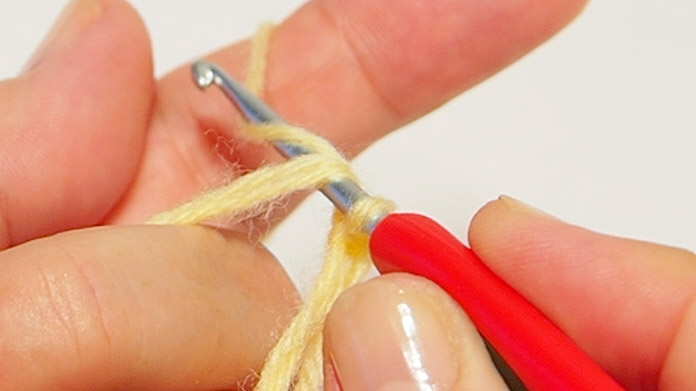
Knit round the circle in the same way.
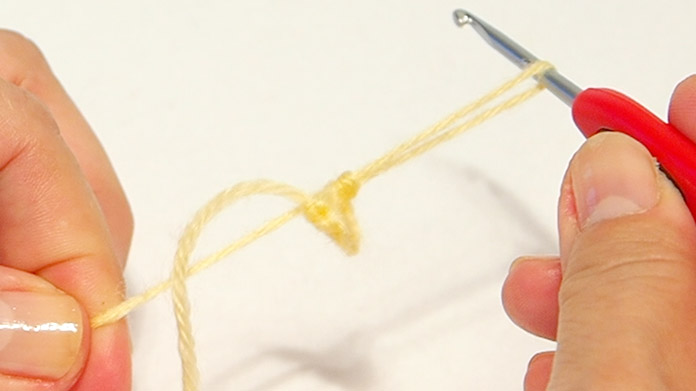
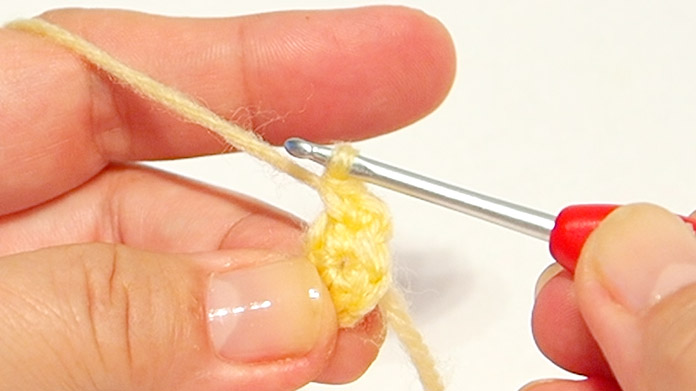
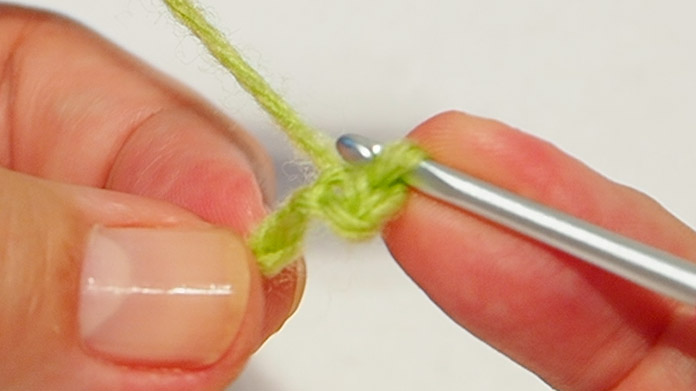
3 Tightening the circle - knitting slip stitches - how to add stitches
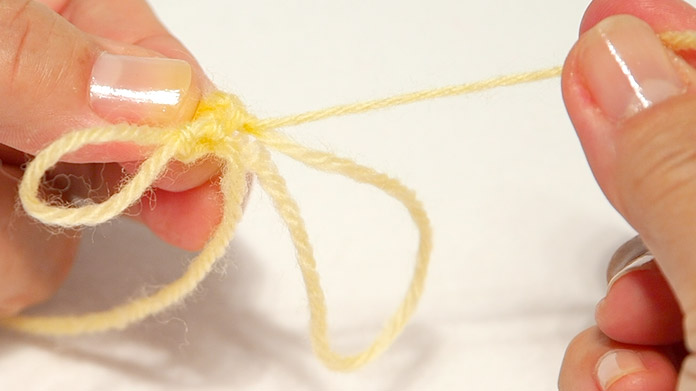
Tightening the circle
-
-
Remove your fingers from the knitted fabric.
-
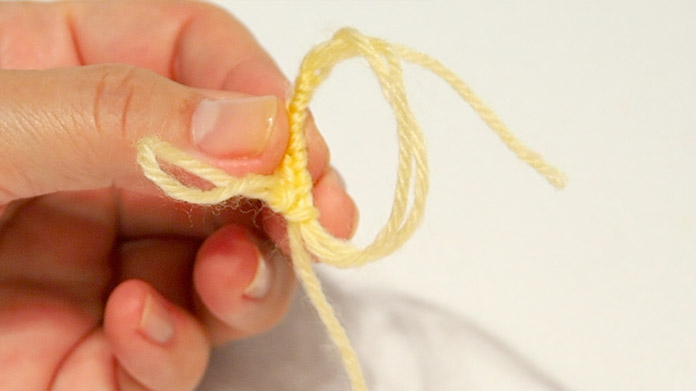
Change to your left hand.
-
Pull the end of the wool a little.
-
Tighten one of the circles.
-

Pull the smaller circle clockwise.
Pull it until the other circle is no longer visible. -
The other circle is no longer visible.
-
Pull the wool of the remaining circle until it is no longer visible.
-
The double circle is no longer visible.
-
Return the loop to the crochet hook.
-
Tighten the loop by pulling the wool towards the knitted fabric.
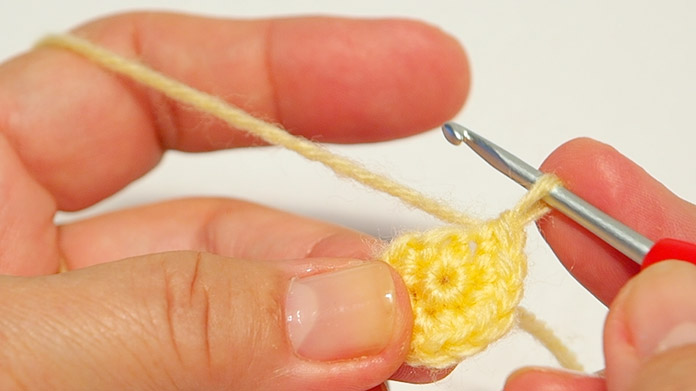
Knit a slip stitch
-
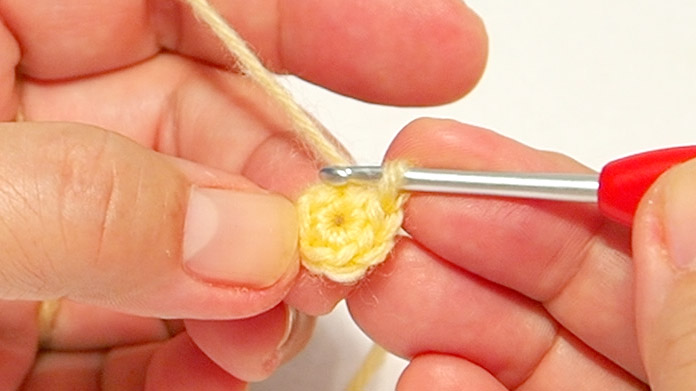
Insert the hook into the first stitch of the single crochet.
-
Wind the wool round the hook and pull through all the loops.
-
This completes the 1st row.
-
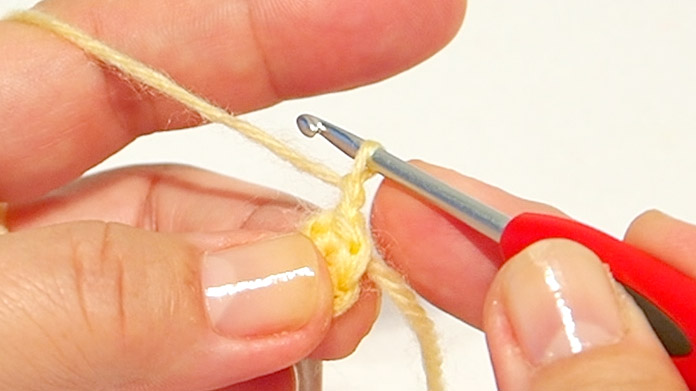
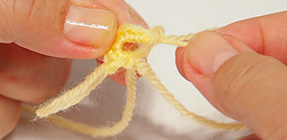
Knit the first stitch in the starter chain for the 2nd row.
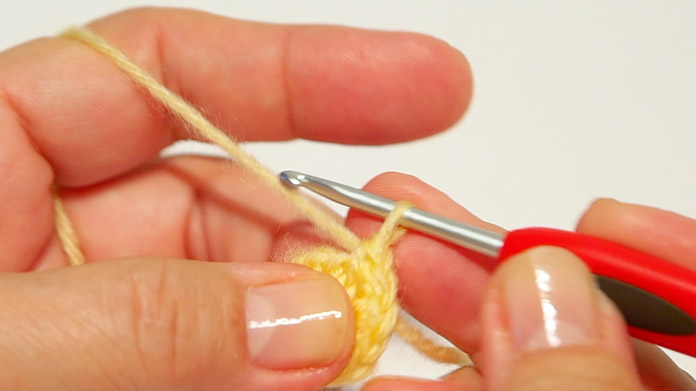
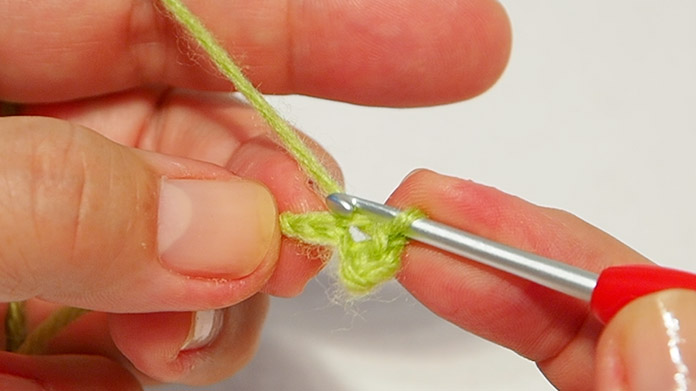
Adding stitches
-
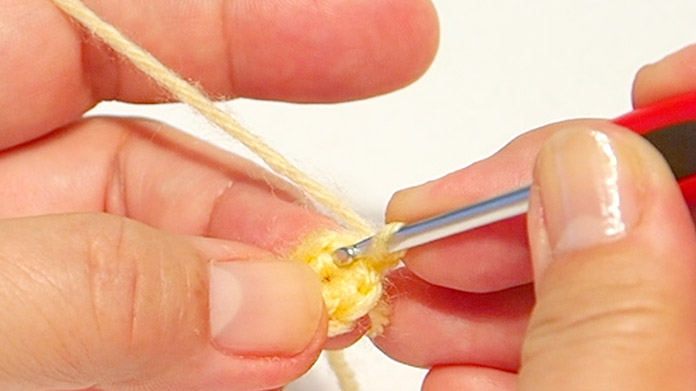
Insert the crochet hook into the 1st stitch of the 1st row.
-
Knit in single crochet.
-
Insert the crochet hook into the 1st stitch again and knit in single crochet.
-
You have added a stitch.
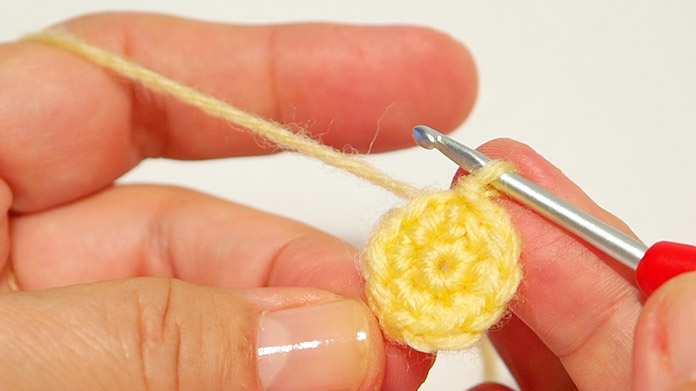
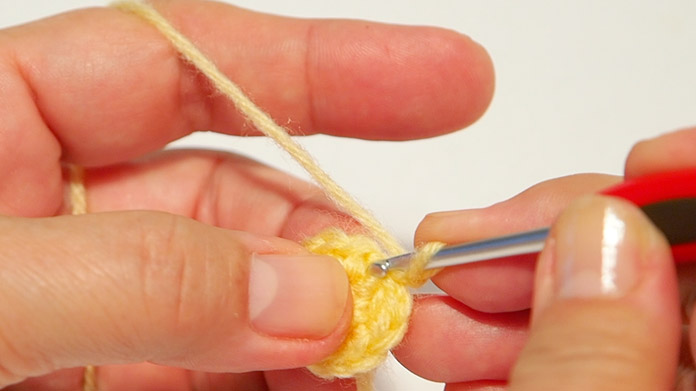
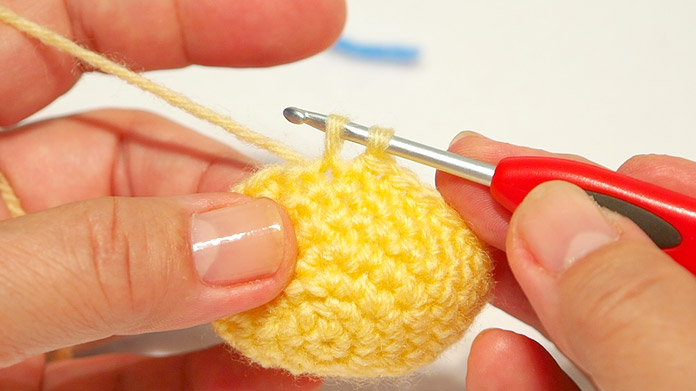
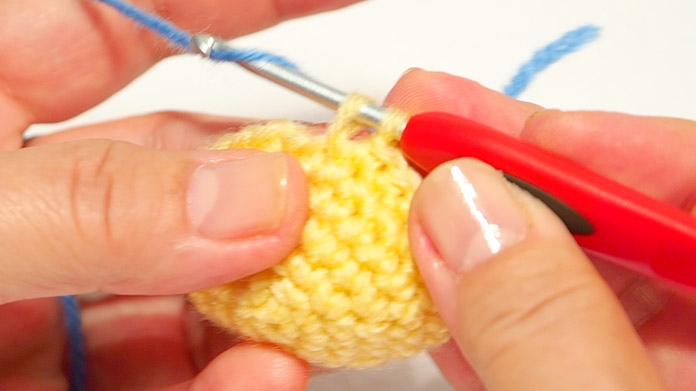
4 How to knit the 2nd and 3rd rows
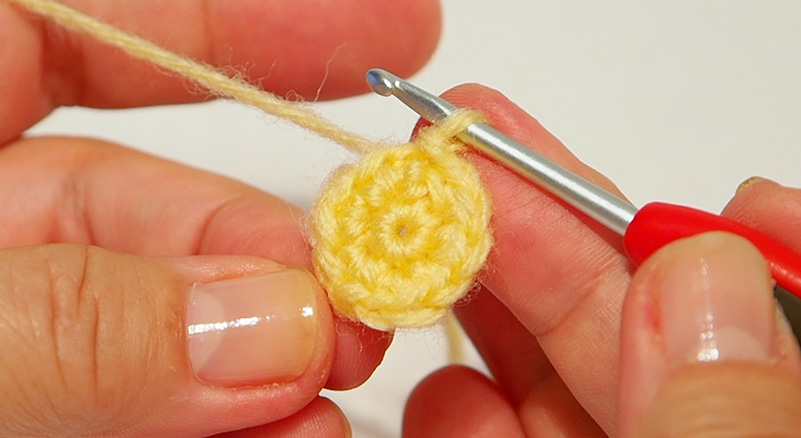

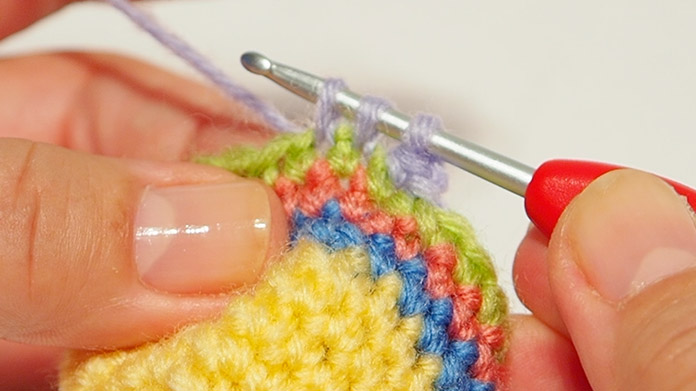
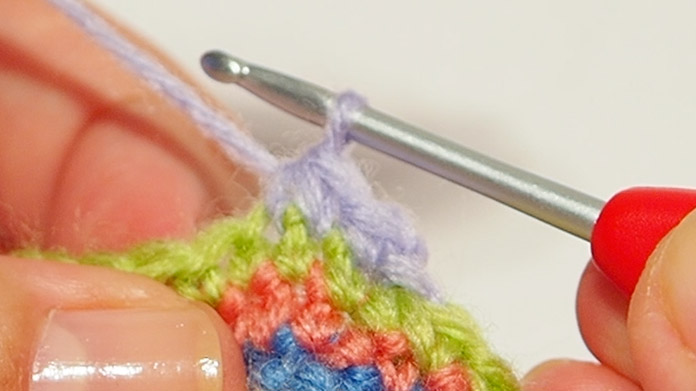
5 Changing colours – how to weave in the wool end after changing colours
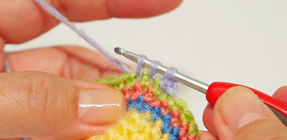
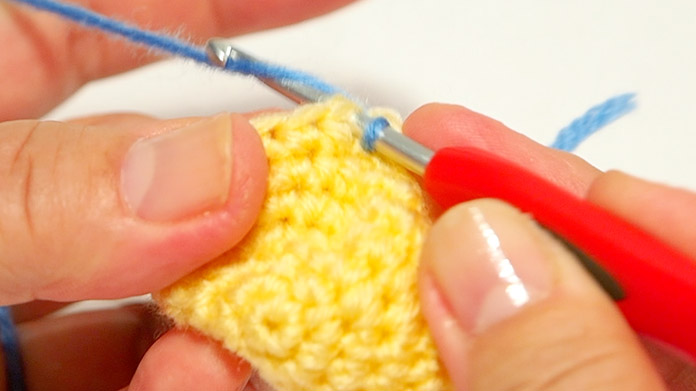
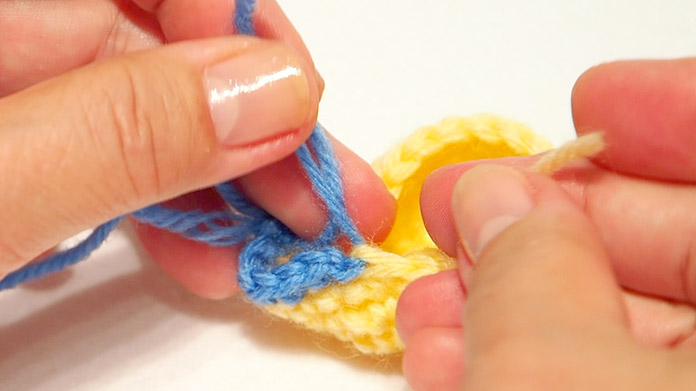
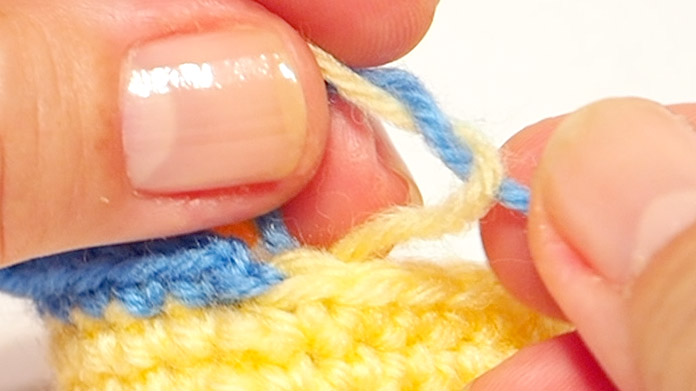
This video shows how to change colours and how to weave in the wool end.
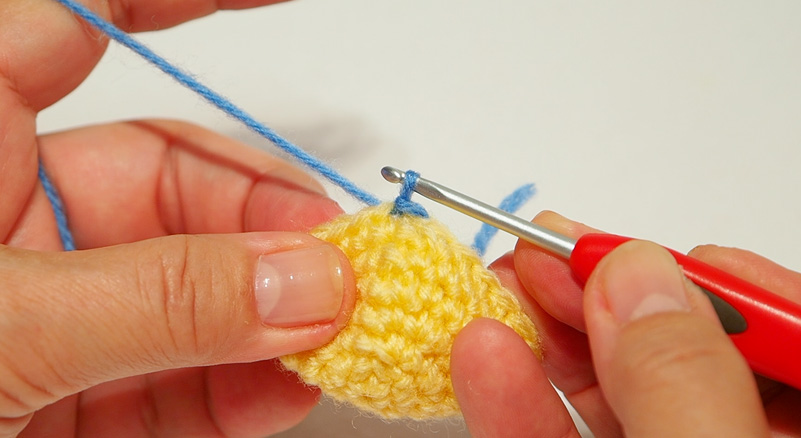
Changing colours
-
Change the wool when the last stitch of the previous row is not complete.
-
Pick up the new wool.
-
Knit in single crochet with the new colour of wool.
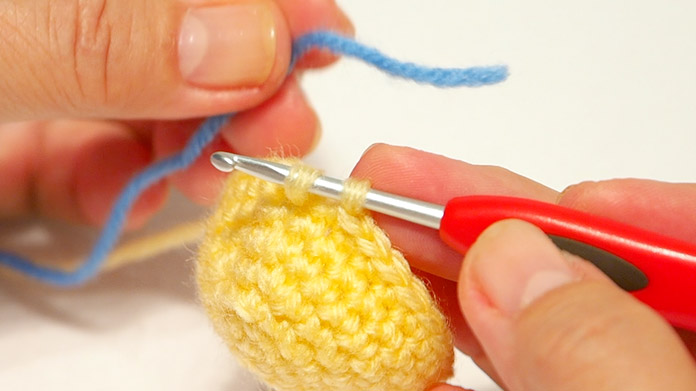
-
Knit a slip stitch.
-
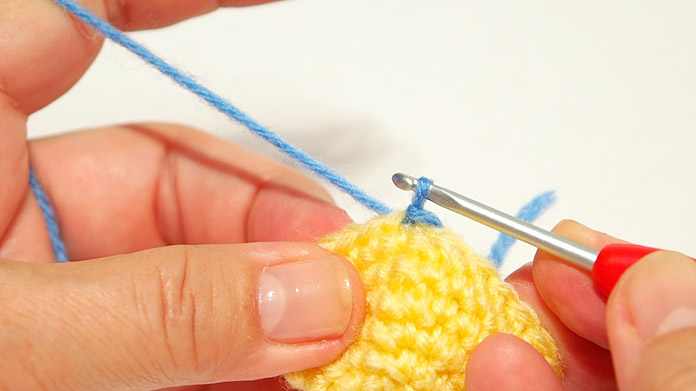
The slip stitch will be knitted in the new colour.
-
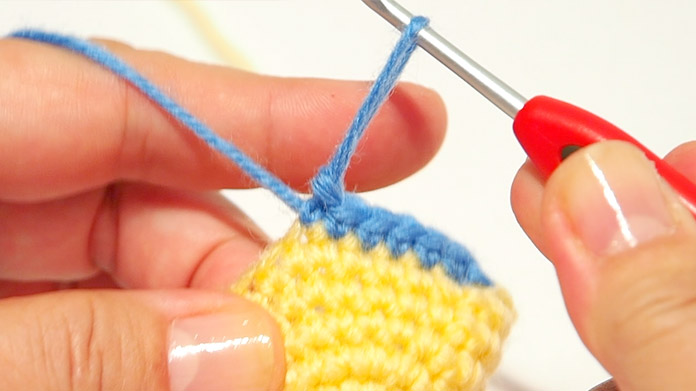
Weave in the wool end once you have knitted a little after the colour change.
Tie the wool ends.
-
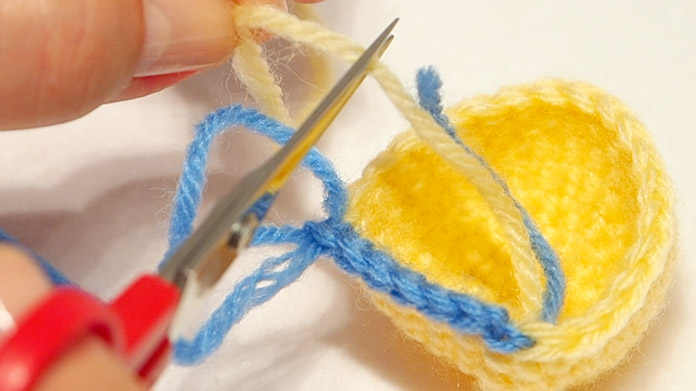
Cut the wool ends to the same length.
-
Tie on the wrong side.
-
Wrap the wool ends twice before pulling.
-
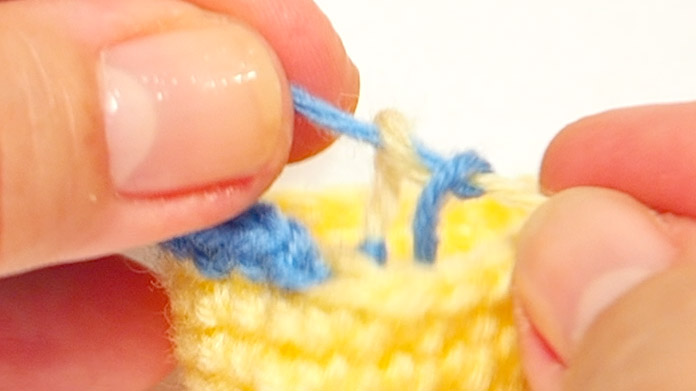
Wrap twice again and tie tightly.
-
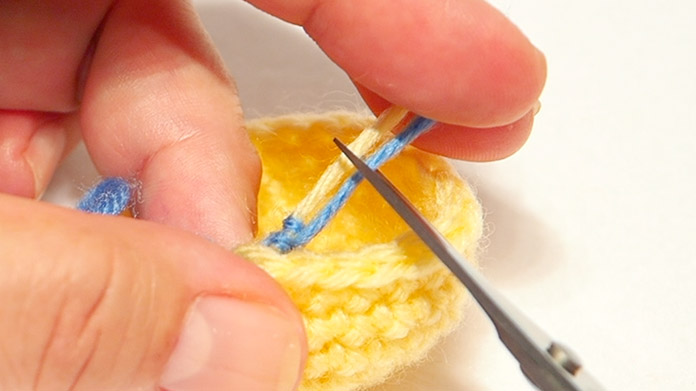
Cut the wool ends short to finish.
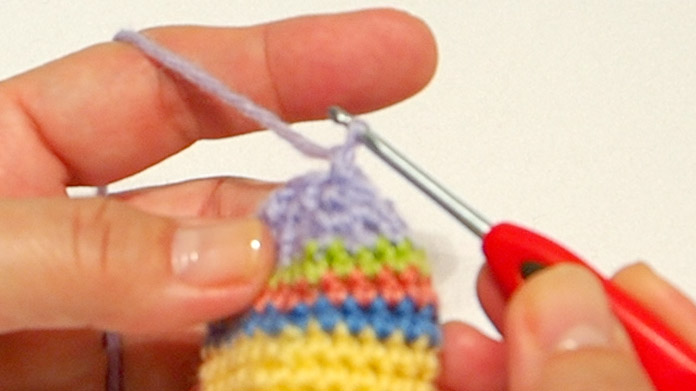
6 How to decrease stitches
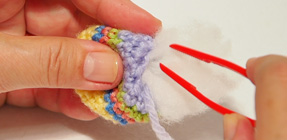
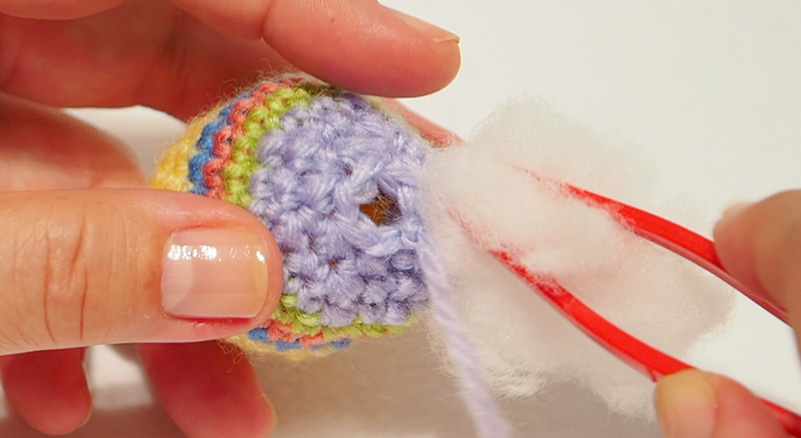
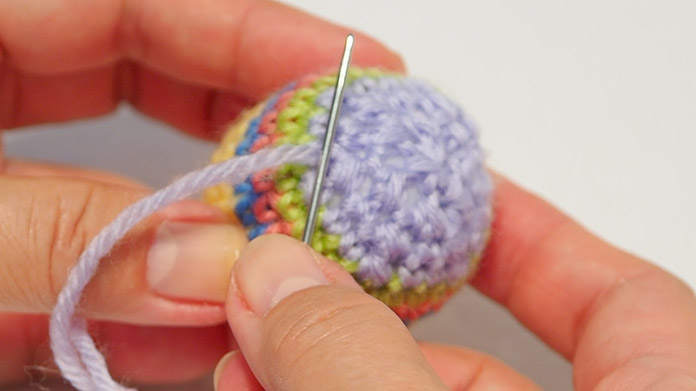
7 Casting off - stuffing - tightening and closing - managing wool
This video shows how to finish knitting, stuff and close.
-
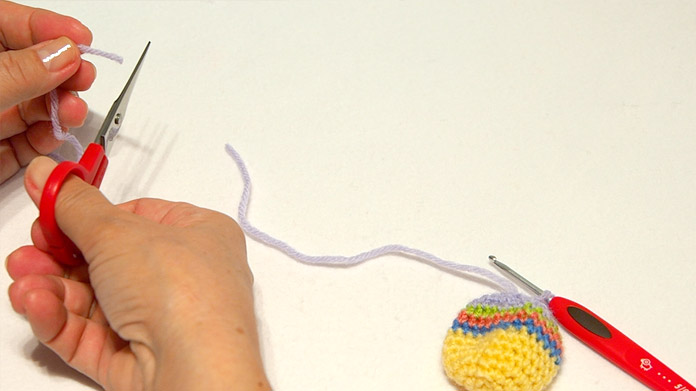
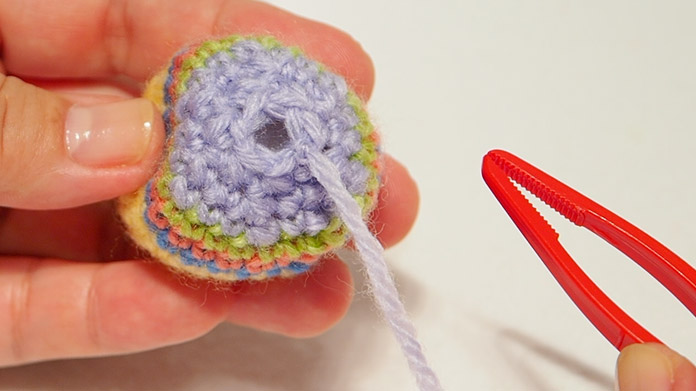
Leave around 20cm of wool once you have finished knitting and cut.
Casting off
-
Knit a chain stitch and pull the wool completely through.
-
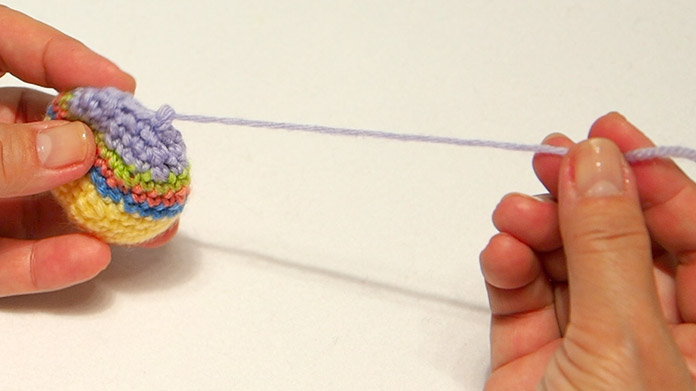
Pull the wool hard to tighten.
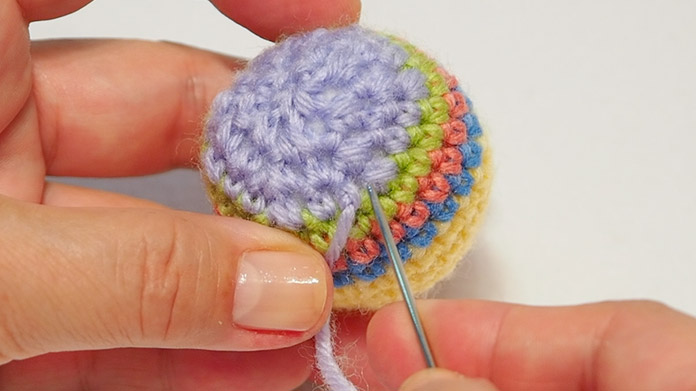
Stuffing
-
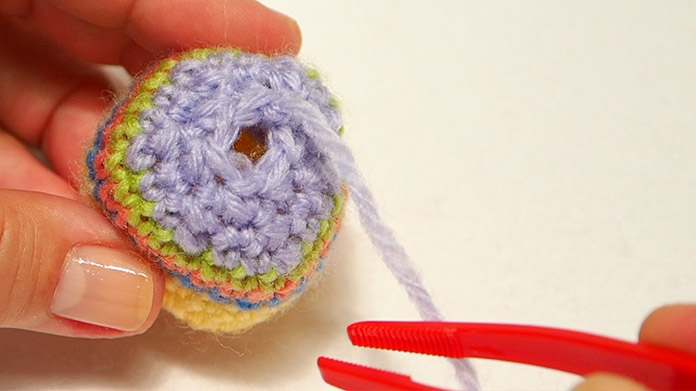
Insert the stuffing through the hole where you cast off.
-
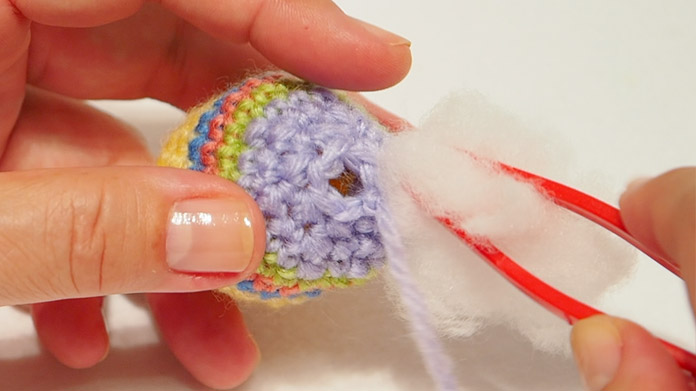
Hold the torn stuffing with tweezers.
-
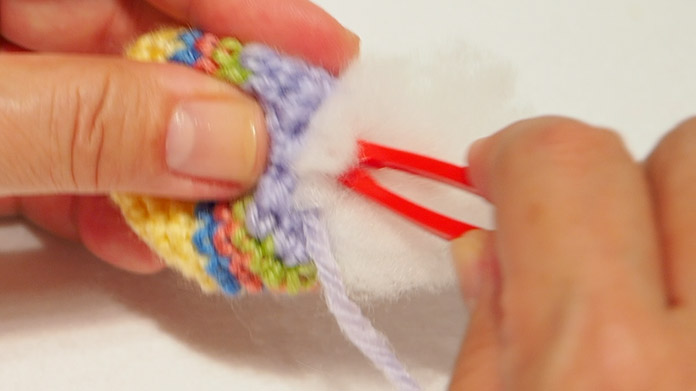
Push into the hole.
You need a lot of stuffing in so pack it tight. -
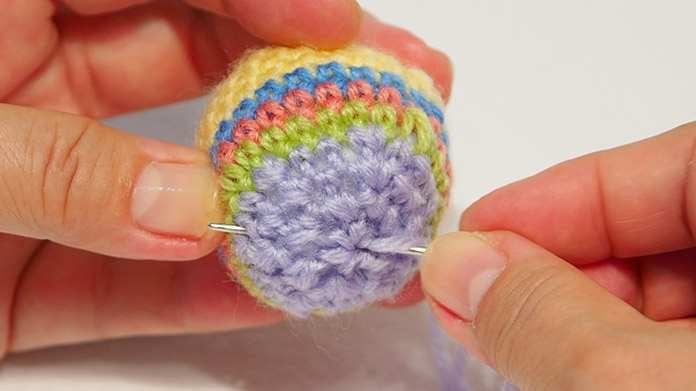
Threading the needle
-
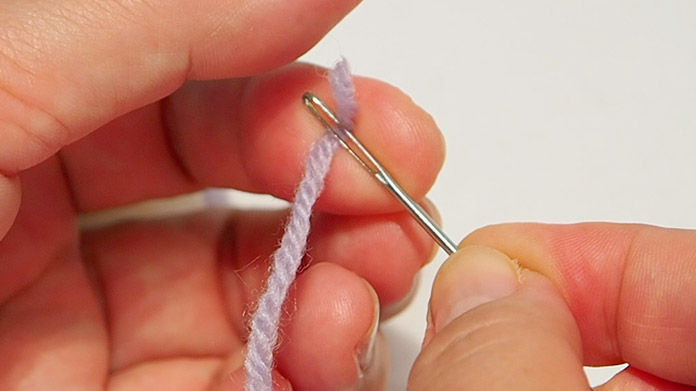
Fold the wool end in two round the needle.
-
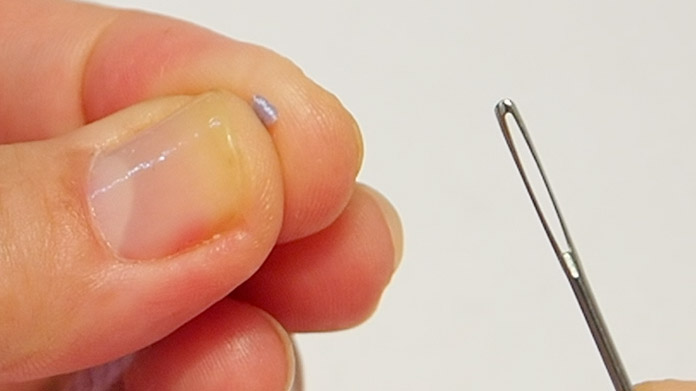
Hold the fold between your fingers and remove the needle.
-
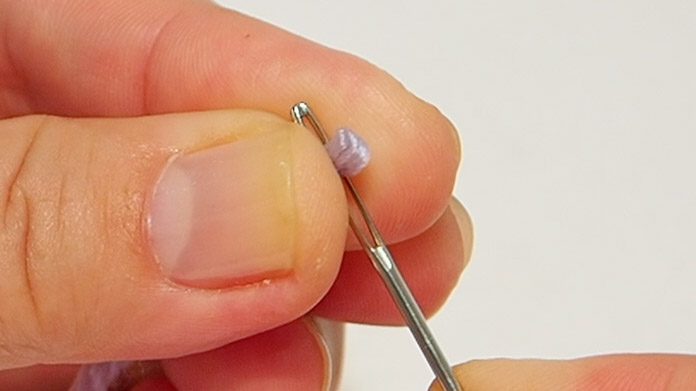
Thread the folded wool into the eye of the needle.
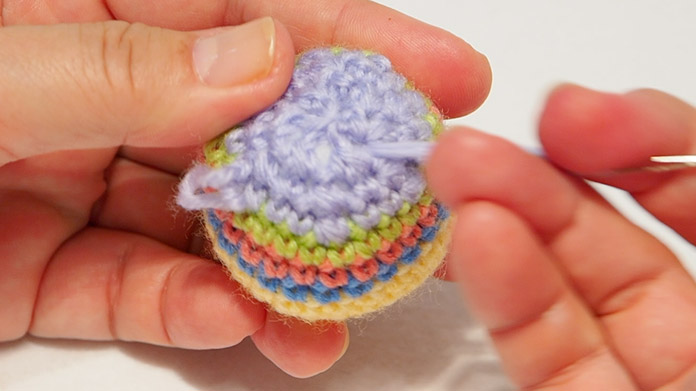
Closing
-
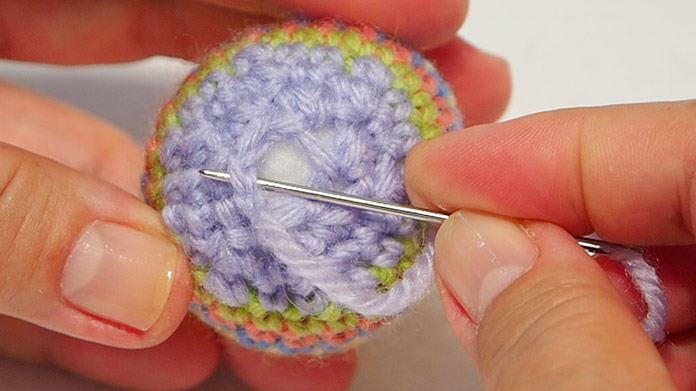
Insert the needle behind the 1st stitch and pull the wool to the front.
-
-
Pick up the next-but-one stitch to complete the circle.
-
Pick up the stitch before the slip stitch.
-
Pick up the stitch before the 1st stitch and pull the wool through.
-
Tighten well.
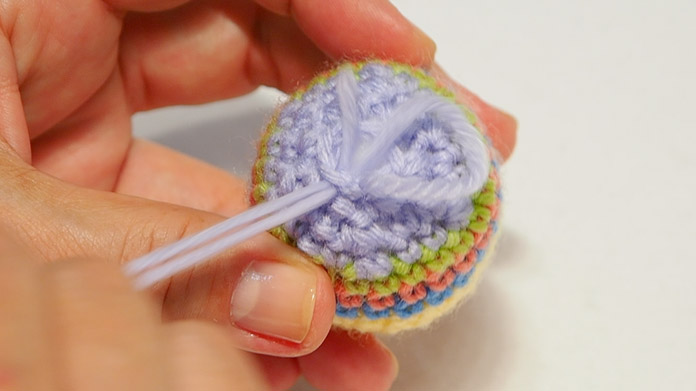
-

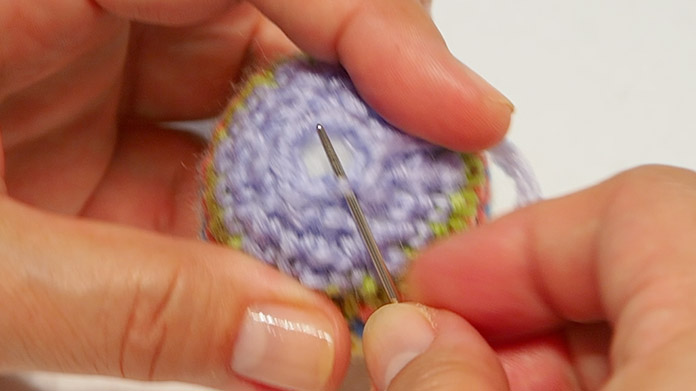
Insert the needle into the closed hole to hide the wool.
-
Sew through the stuffing and bring the needle out at the side.
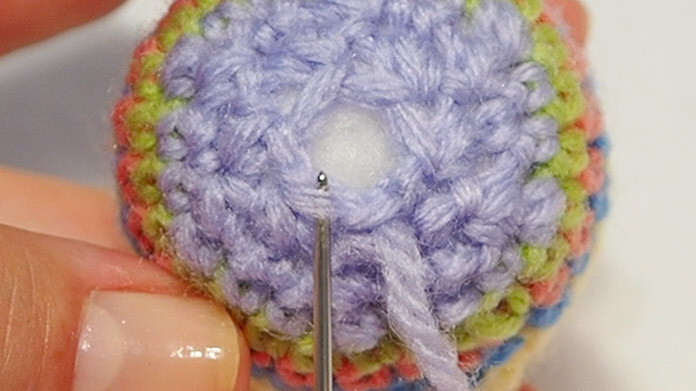
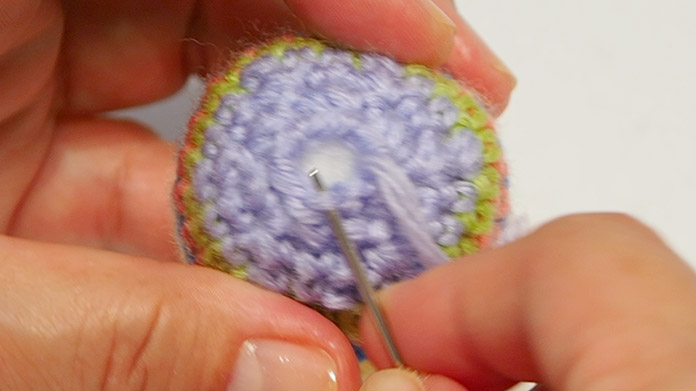
Wool end weaving method
-
Tie a knot.
-
Insert the needle in the same place where the wool came out.
-
Sew through the stuffing and bring the needle out, pulling the knot inside.
-
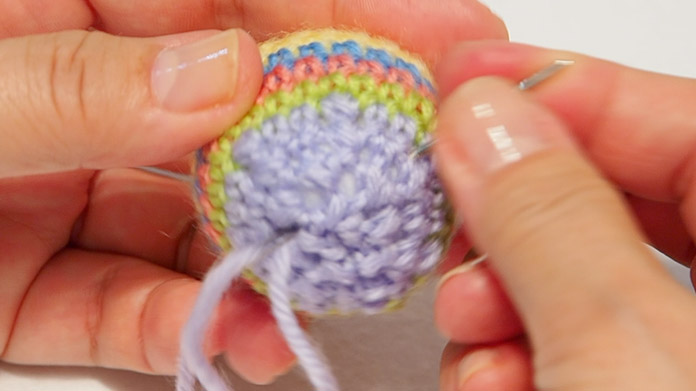
Thread the wool through the stuffing twice more without making knots.
-
Cut the wool close to the knitted fabric.
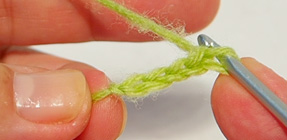
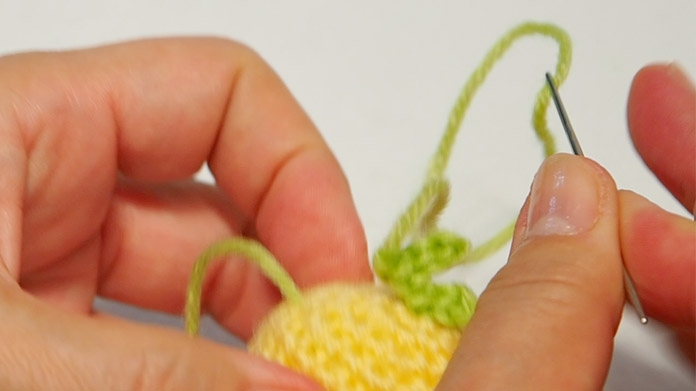
8 How to knit the string parts from a chain

Chain stitch
-
Pick up the wool and wrap it round the hook from behind.
-
Move as if pulling forwards while looping from the bottom.
-
Hold the wool where it intersects.
-
Loop the wool and pull through.
-
Pull the end of the wool tight.
This is the start of the chain. -
Knit 4 chain stitches.
Knitting the string parts
-
-
Insert the hook into the 3rd chain stitch.
-
Knit a slip stitch.
-
Knit slip stitches for the 2nd and 1st stitches, too.
-
In the same way, knit a stitch on the 4th stitch.
-
Knit 3 slip stitches, cast off and cut the wool.
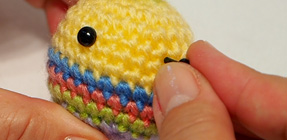
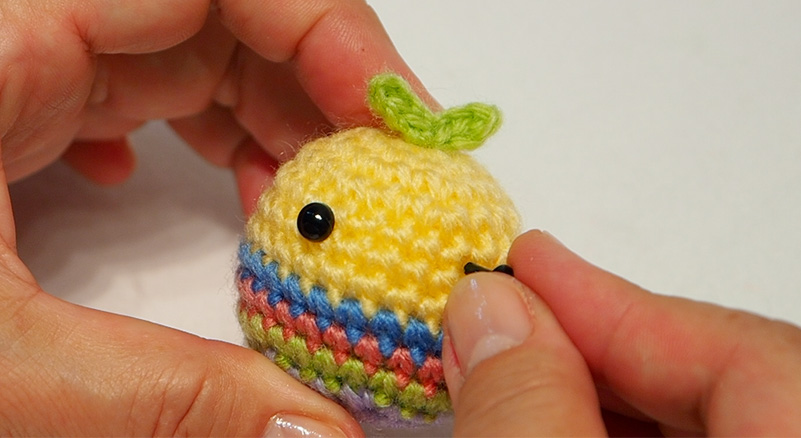
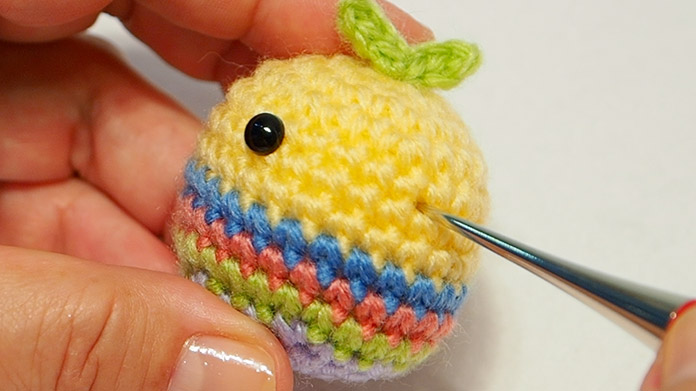
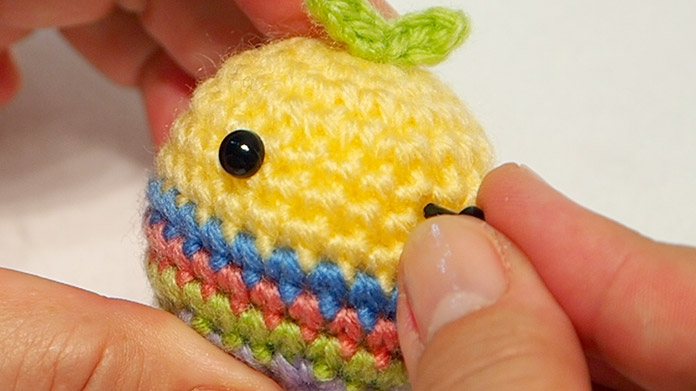
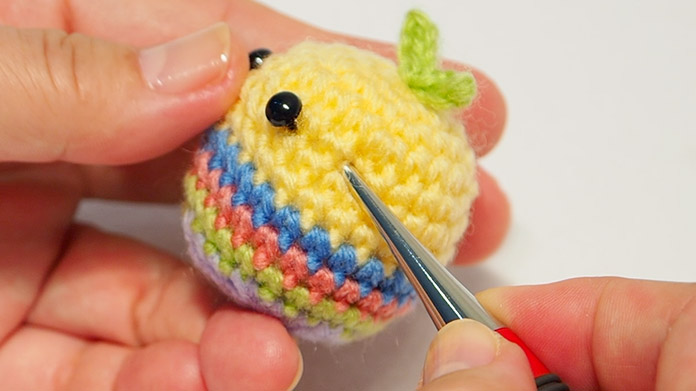
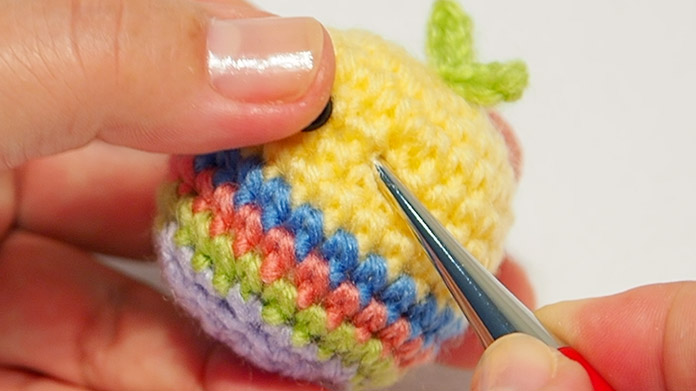
9 How to sew the parts on
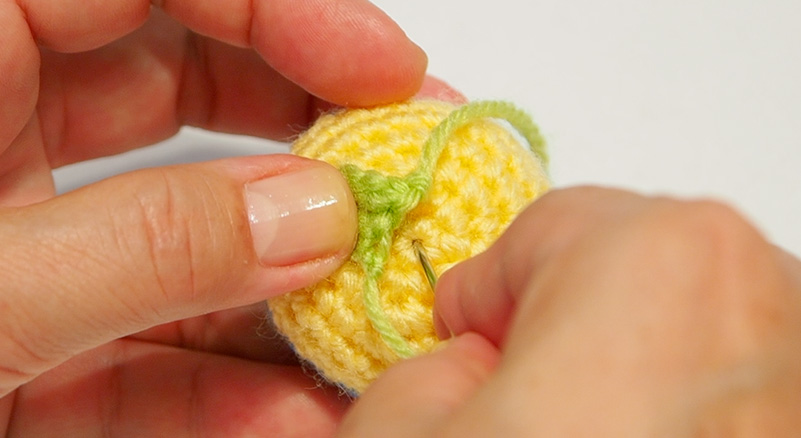
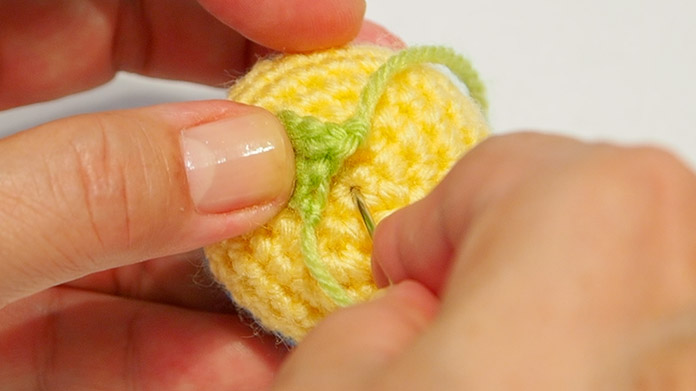
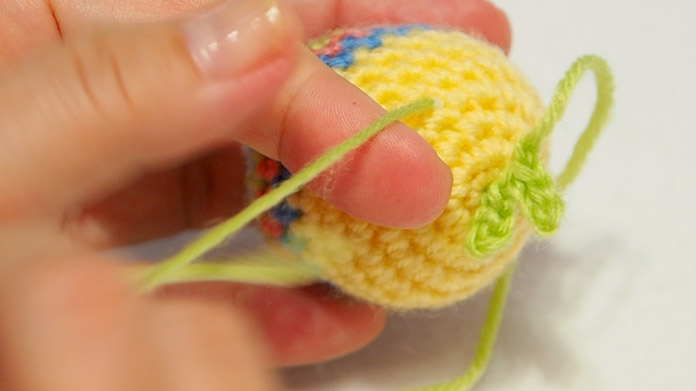
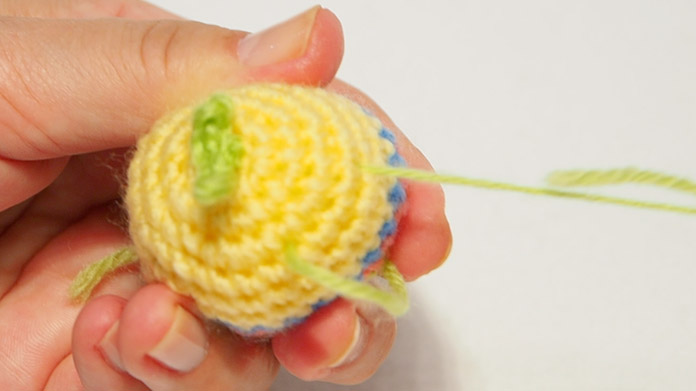
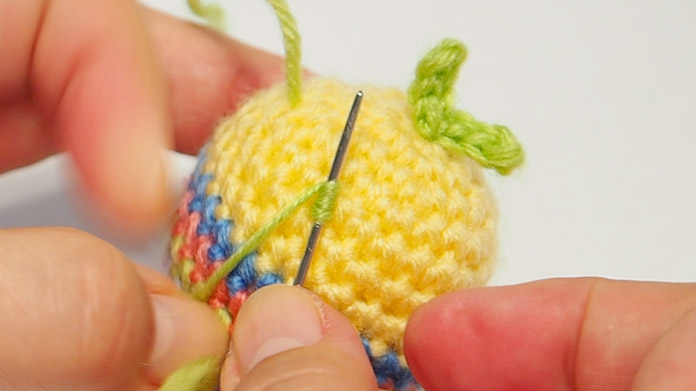
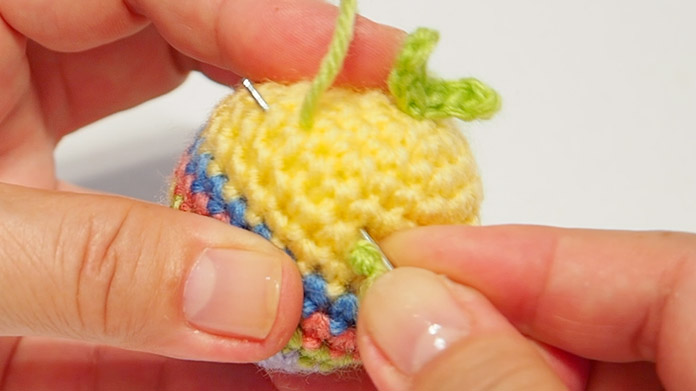
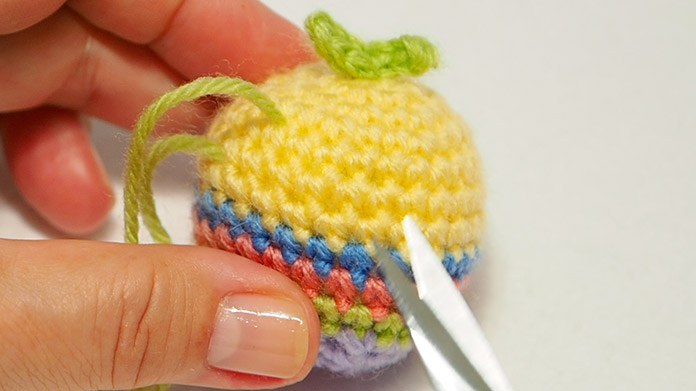
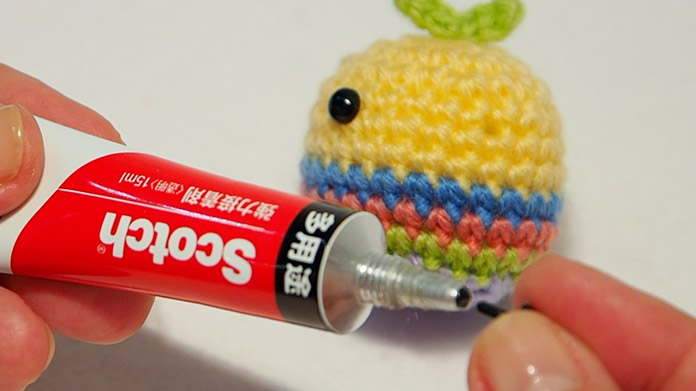
10 How to stick the parts on
11 About the pattern
The pattern is a blueprint with shapes and instructions for how to knit using symbols. It is typically Japanese to have created diagrams for knitting patterns and these are now used all across the world, particularly in Asia, as amigurumi becomes more and more popular.
Finding out the meaning of the symbols and deciphering the pattern is one of the joys of amigurumi.
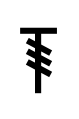
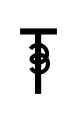
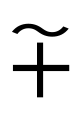
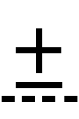
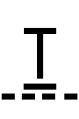
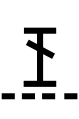
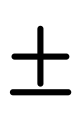
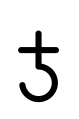
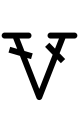
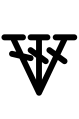
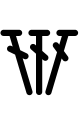
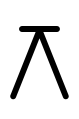
Major pattern symbols
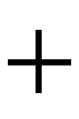
Chain stitch
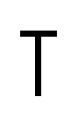
Single crochet
Half double crochet
Double crochet
Treble crochet
Double treble crochet
Rolled stitch

Slip stitch
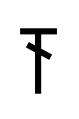
Reverse single crochet
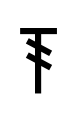
Back loop single crochet
Back loop half double crochet
Back loop double crochet
Single crochet through the back loop
Front post single crochet
Front post half double crochet
Front post double crochet
Back post single crochet
Back post half double crochet
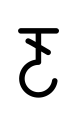
Back post double crochet
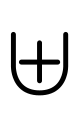
Single crochet loop stitch

Knit 2 single crochet stitches into next stitch
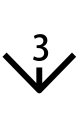
Knit 3 single crochet stitches into next stitch

Knit 2 half double crochet stitches into next stitch
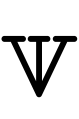
Knit 3 half double crochet stitches into next stitch
Knit 2 double crochet stitches into next stitch
Knit 3 double crochet stitches into next stitch
Knit 3 double crochet stitches into a bunch

Single crochet 2 stitches together

Single crochet 3 stitches together
Half double crochet 2 stitches together
Half double crochet 3 stitches together
Double crochet 2 stitches together
Double crochet 3 stitches together
Half double crochet 3 stitch bobble
Double crochet 3 stitch bobble
Join the chain
※ Only symbols that are used in these contents are shown here.
The dotted line marks where to continue knitting the same stitch.

A dotted line on a pattern means that the knitting method and number of stitches remain the same as in the preceding and following rows.
This symbol is used to make it intuitively clear that it is the same as the previous step, rather than having to decipher symbols for every row.
As an example, the following pattern is read as follows.
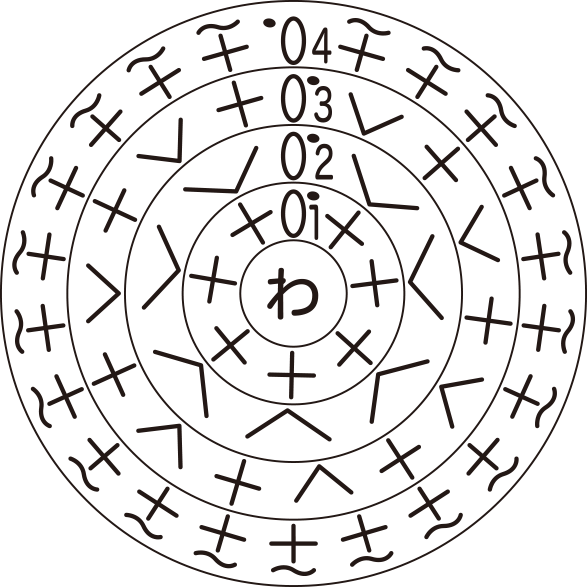
| Rows | Stitches |
|---|---|
| 4 | 21 ※ |
| 3 | 21(+7) |
| 2 | 41(+7) |
| 1 | 7 |
※ Reverse single crochet
- 1st row
- Knit 1 starter chain stitch to cast on the circle.
Knit 7 single crochet stitches.
Knit a slip stitch. - 2nd row
- Knit 1 starter chain stitch.
Knit 2 single crochet stitches into next stitch (increase stitches). Knit 7 stitches this way.
Knit a slip stitch. - 3rd row
- Knit 1 starter chain stitch.
Knit 1 single crochet stitch.
Knit 2 single crochet stitches into next stitch (increase stitches).
Knit 1 single crochet stitch.
Knit 2 single crochet stitches into next stitch (increase stitches).
Knit 1 single crochet stitch.
Knit 2 single crochet stitches into next stitch (increase stitches).
Knit 1 single crochet stitch.
Knit 2 single crochet stitches into next stitch (increase stitches).
Knit 1 single crochet stitch.
Knit 2 single crochet stitches into next stitch (increase stitches).
Knit 1 single crochet stitch.
Knit 2 single crochet stitches into next stitch (increase stitches).
Knit 1 single crochet stitch.
Knit 2 single crochet stitches into next stitch (increase stitches).
Knit a slip stitch. - 4th row
- Knit 1 starter chain stitch.
Knit 21 reverse single crochet stitches.
Knit a slip stitch.
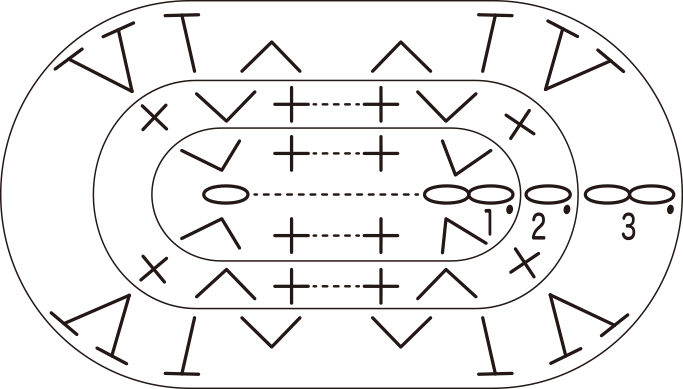
| Rows | Stitches |
|---|---|
| 3 | 44 |
| 2 | 44(+4) |
| 1 | 40 |
18th chain stitch
- Knit 18 chain stitches.
- 1st row
- Knit 1 starter chain stitch.
Knit 2 single crochet stitches into next stitch (increase stitches).
Knit 16 single crochet stitches.
Knit 2 single crochet stitches into next stitch (increase stitches).
Turn the fabric over.
Knit 2 single crochet stitches into next stitch (increase stitches).
Knit 16 single crochet stitches.
Knit 2 single crochet stitches into next stitch (increase stitches).
Knit a slip stitch. - 2nd row
- Knit 1 starter chain stitch.
Knit 1 single crochet stitch.
Knit 2 single crochet stitches into next stitch (increase stitches).
Knit 16 single crochet stitches.
Knit 2 single crochet stitches into next stitch (increase stitches).
Knit 2 single crochet stitches.
Knit 2 single crochet stitches into next stitch (increase stitches).
Knit 16 single crochet stitches.
Knit 2 single crochet stitches into next stitch (increase stitches).
Knit 1 single crochet stitch.
Knit a slip stitch. - 3rd row
- Knit 2 starter chain stitches.
Knit 2 half double crochet stitches into next stitch.
Knit 1 half double crochet stitch.
Single crochet 2 stitches together (decrease stitches),
Knit 14 single crochet stitches.
Single crochet 2 stitches together (decrease stitches),
Knit 1 half double crochet stitch.
Add 2 half double crochet stitches into next stitch.
Knit 1 half double crochet stitch.
Single crochet 2 stitches together (decrease stitches),
Knit 14 single crochet stitches.
Single crochet 2 stitches together (decrease stitches),
Knit 1 half double crochet stitch.
Knit 2 half double crochet stitches into next stitch.
Knit a slip stitch.
Knit 1 half double crochet stitch.